
To get Caught up on this now multi-year build, check out the two previous posts here:
Part 1 (ouch, I estimated this would be done for Wondercon ’18, oops)
Part 2
I last updated this project… I think in February of 2019. I do my best costume work in the two month crunch before the event the costume is for, and since this was for Celebration Anahiem 2020, I thought I had a bit of time to work on it. 
Turns out I have/had more.
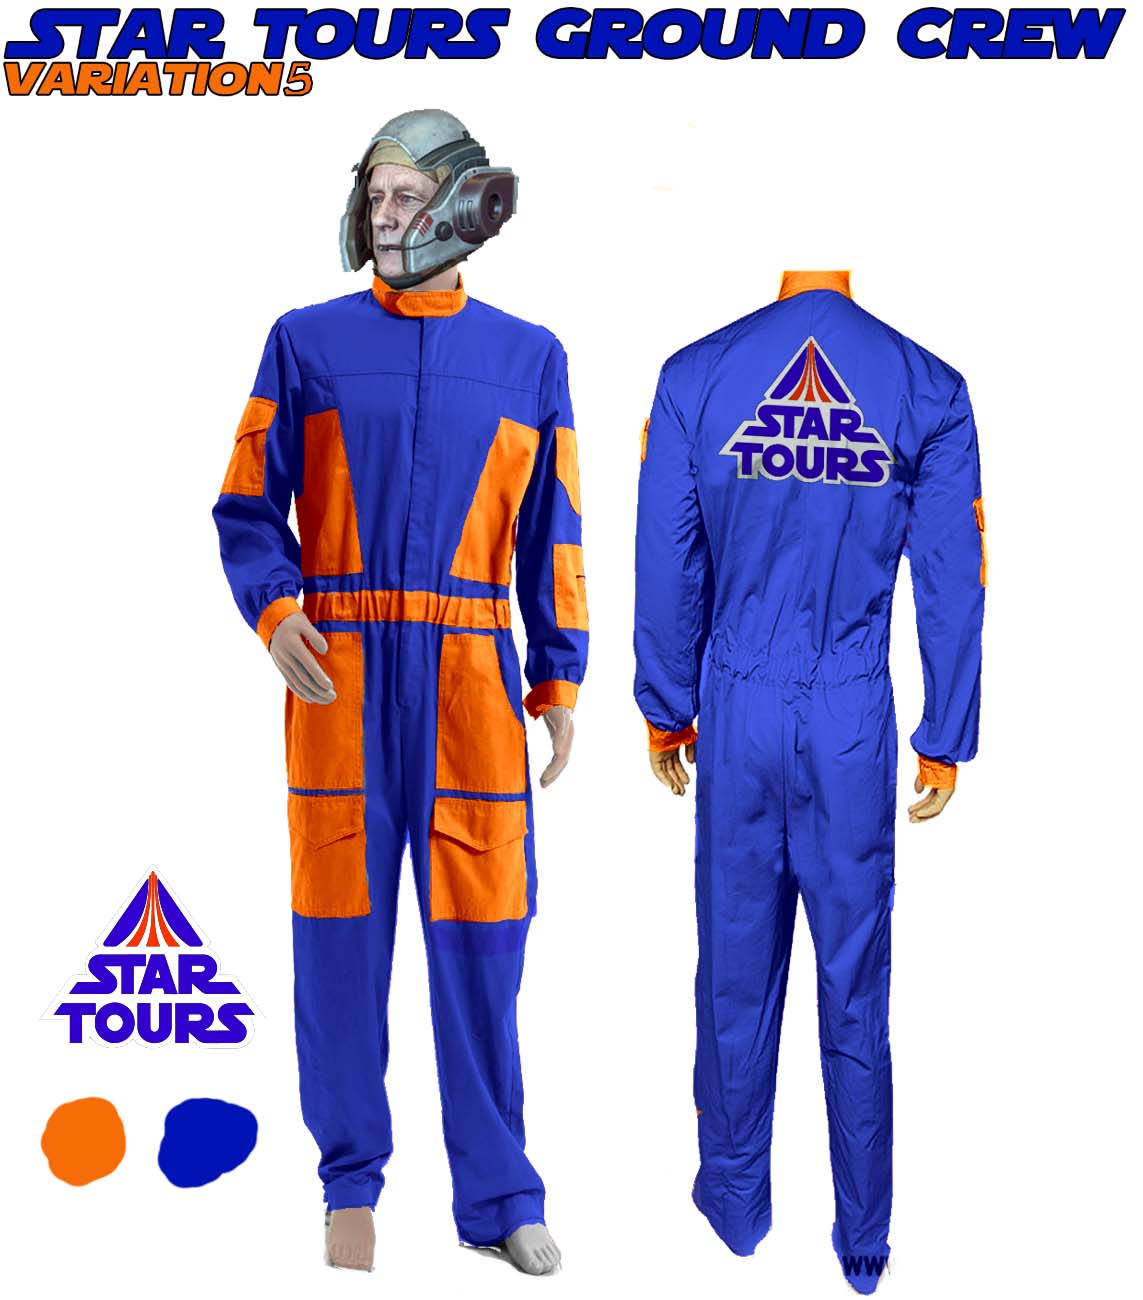
So what has changed/been done in the year since I started this? Well, we started over completely. The original flight suit I made was crafted from a slightly thin and kinda stretchy fabric. It was remnants of the fabric I used for my Flight Crew uniform and was definitely more of a “Fashion” fabric than the “Utility” material that would be more appropriate. As a flight suit, this material didn’t feel right, too soft, if you will. It also didn’t help that I had three problems:
- It was a little too short (if you recall, I had to make the mid-section belt wider too try to sneak in an extra 2 inches).
- I had run out of the orange material that I was using and Joann’s Fabric stopped carrying it.
- The wearer really wasn’t too keen on the predominantly orange version of the flight suit.
So I threw it out (metaphorically, it’s still in my closet) and started anew, but this time I cheated a bit.
Back to the Drawing Board
About the time we decided to start over, the current costume license holder for Star Wars, Anovos, had a obnoxiously good sale on their AT-AT Driver Jumpsuit. I think I got it for around $30 (normally $165). What’s great about this suit is that it basically is the X-wing flight suit, but grey instead of orange. It’s a fantastic ‘screen accurate’ way to get general measurements of the pockets and seams for the Star Tours one we’re making. This one I actually for myself (for an At-St Driver outfit), so it’s one size smaller than what the Star Tours one will be.
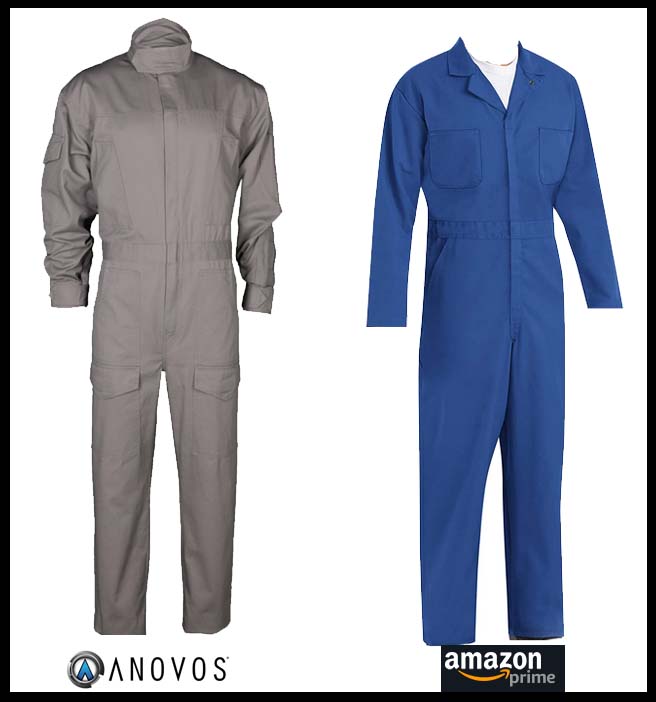
I picked up the blue jumpsuit for pretty cheap on Amazon, but, more importantly, it came in a real nice shade of blue. It also helped that it was a very basic set up without a ton of pockets or extra seams that I would need to modify. So with a new base for the costume, let’s revisit a familiar image:
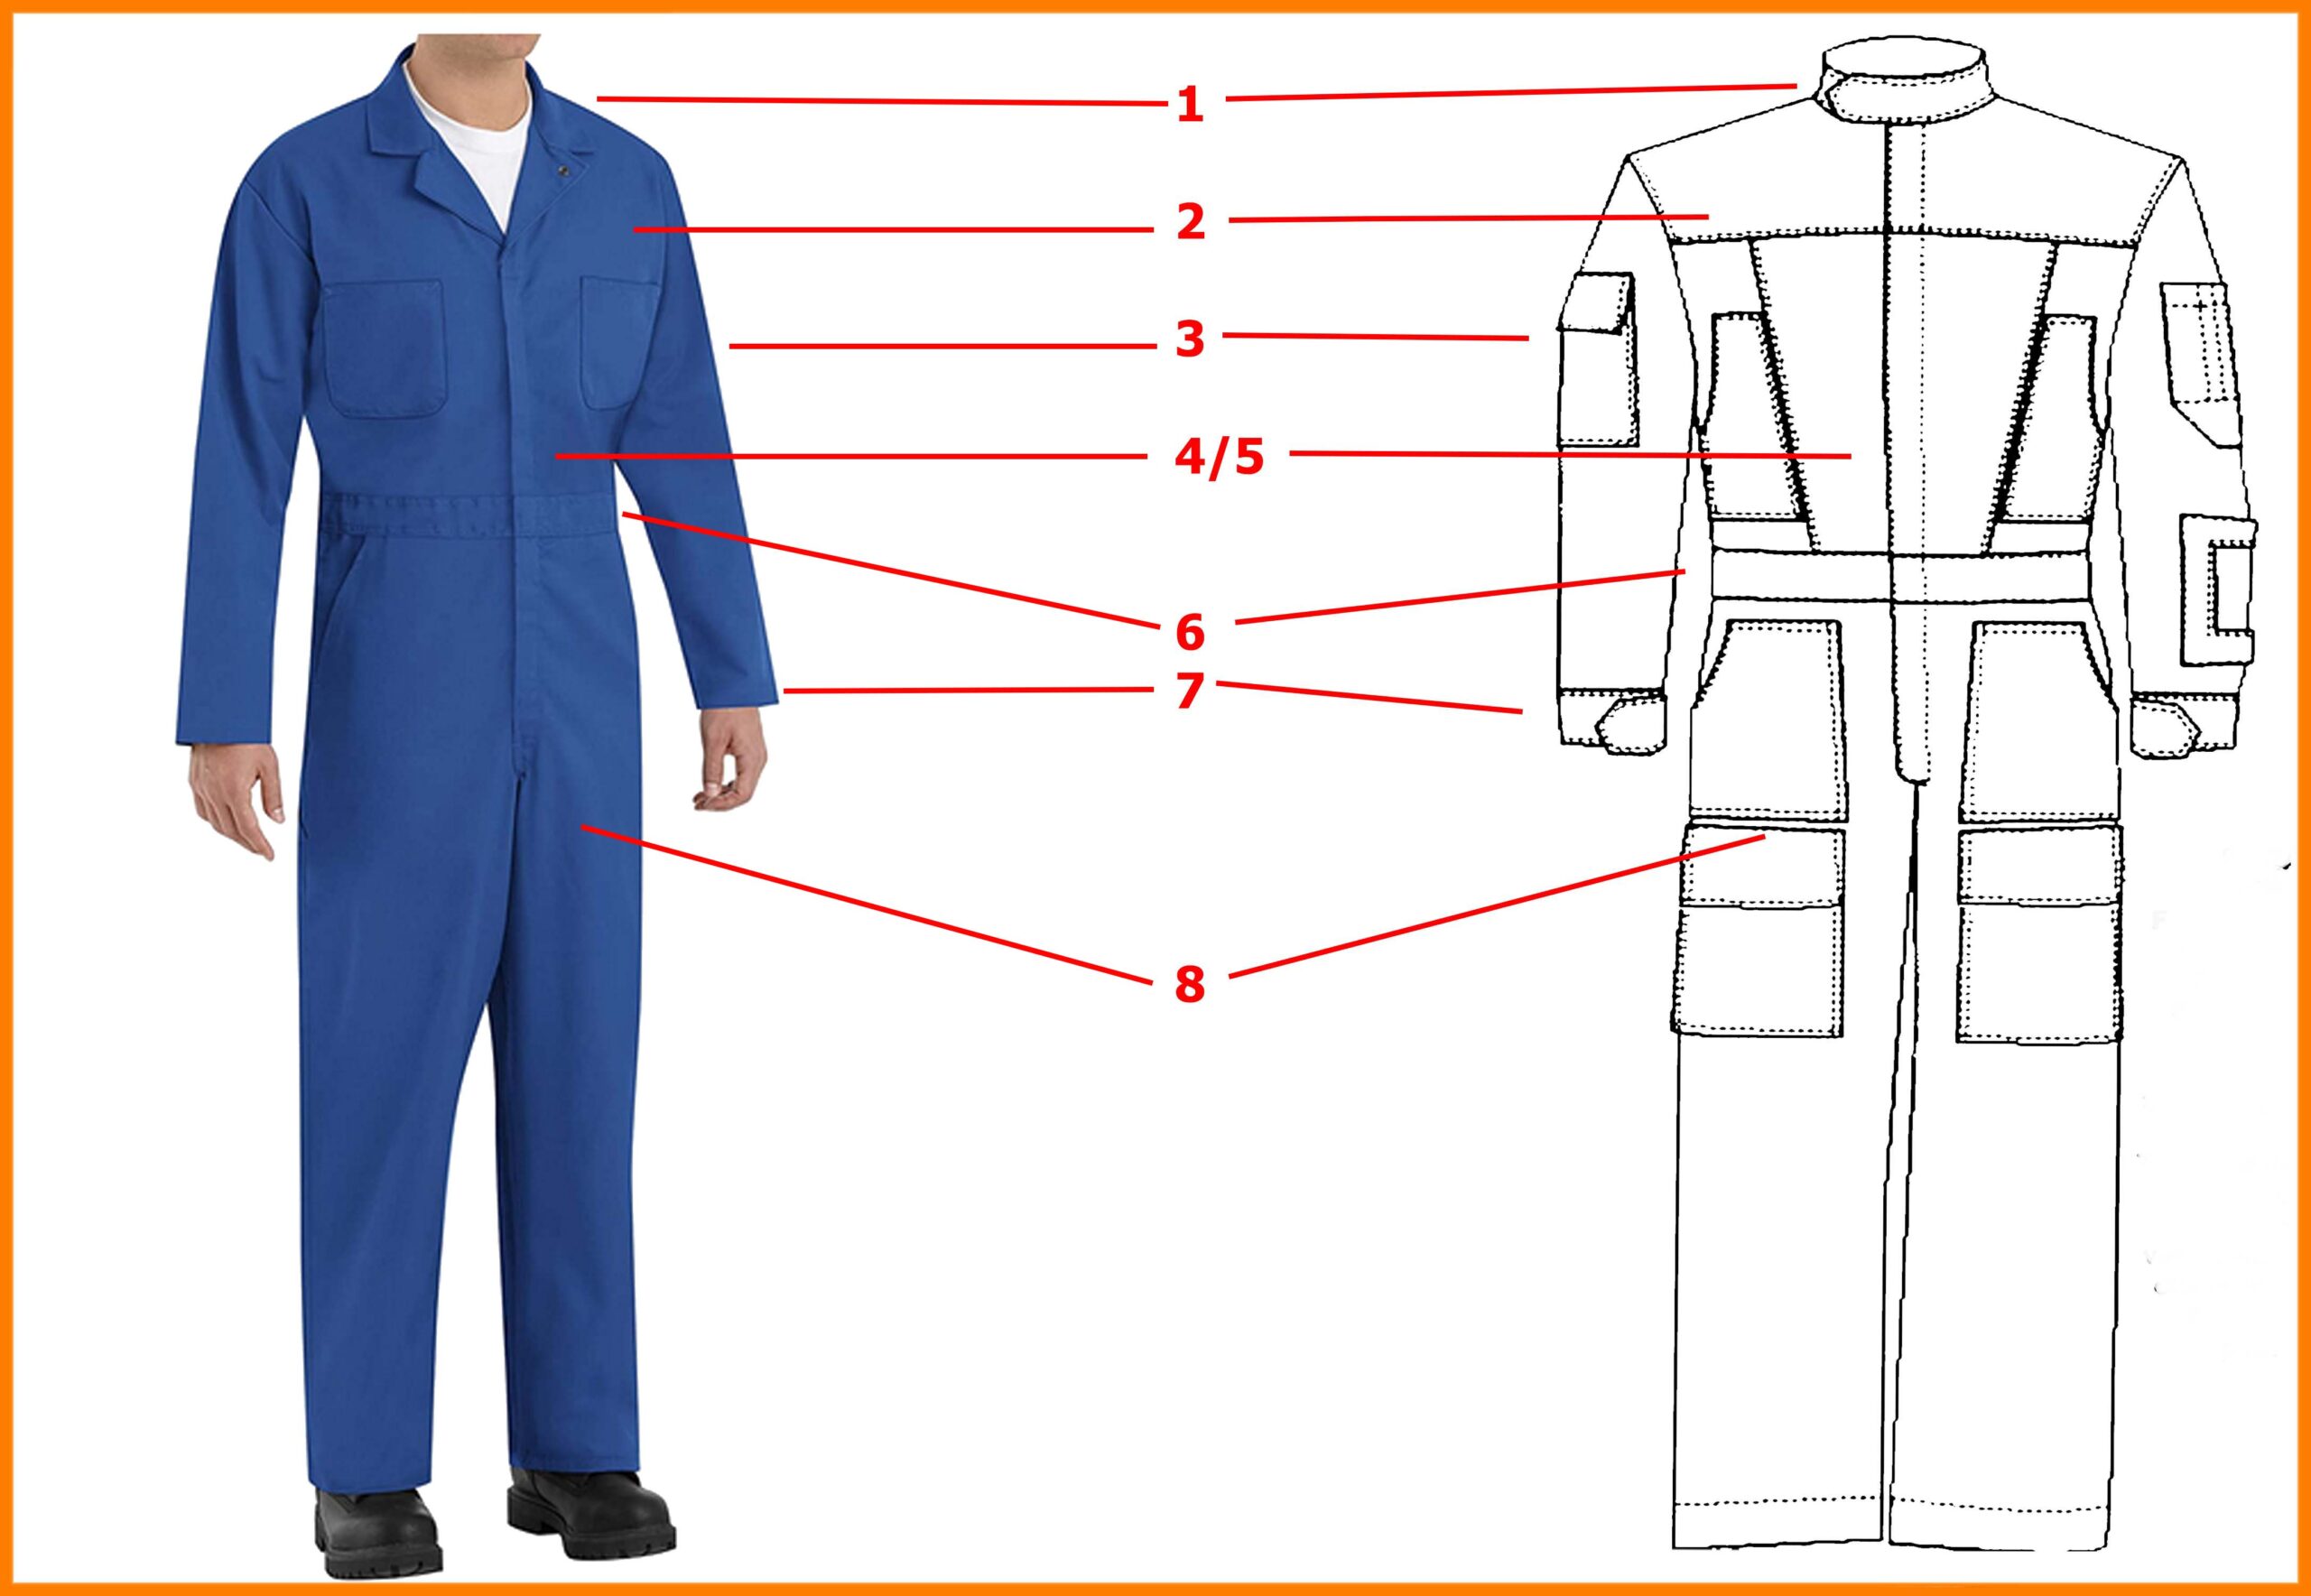
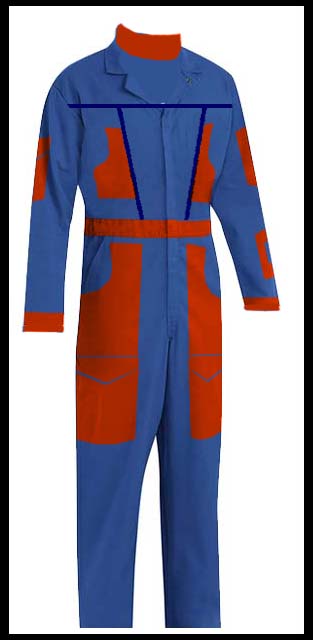
- Collar closure style:
Gotta remove the collar and replace it with a orange Mandarin Collar style one
- The upper shoulder yoke piece shape/length:
The upper chest/shoulder yoke will be simulated (explained later in the post) - Shape of sleeve pocket(s):
Correct pockets to be fabricated and sewn on with orange fabric - Chest yoke:
Chest pockets removed. The Lower chest yoke will be simulated (explained later in the post) - Chest pockets:
Correct orange pockets to be fabricated and sewn on - Waist ‘belt’:
Existing blue ‘belt’ to be removed and replaced with an orange belt
- Lower sleeve closure:
New orange cuffs will be sewn over existing cuffs with addition of Velcro fasteners
- Lower pocket shape/placement:
Orange pockets to be fabricated and sewn on with appropriately colored fabric…that’s orange, there’s a theme here, catch up.
Starting Again, Again
Here is the basic idea we are starting with. Similar to the old version, just “color-inverted”. At the moment, we are leaning towards an A-Wing helmet as the base for a tech helmet, we are still going over options for vest/tool holder.
 Faking Seams with Fake Seams, it Seems
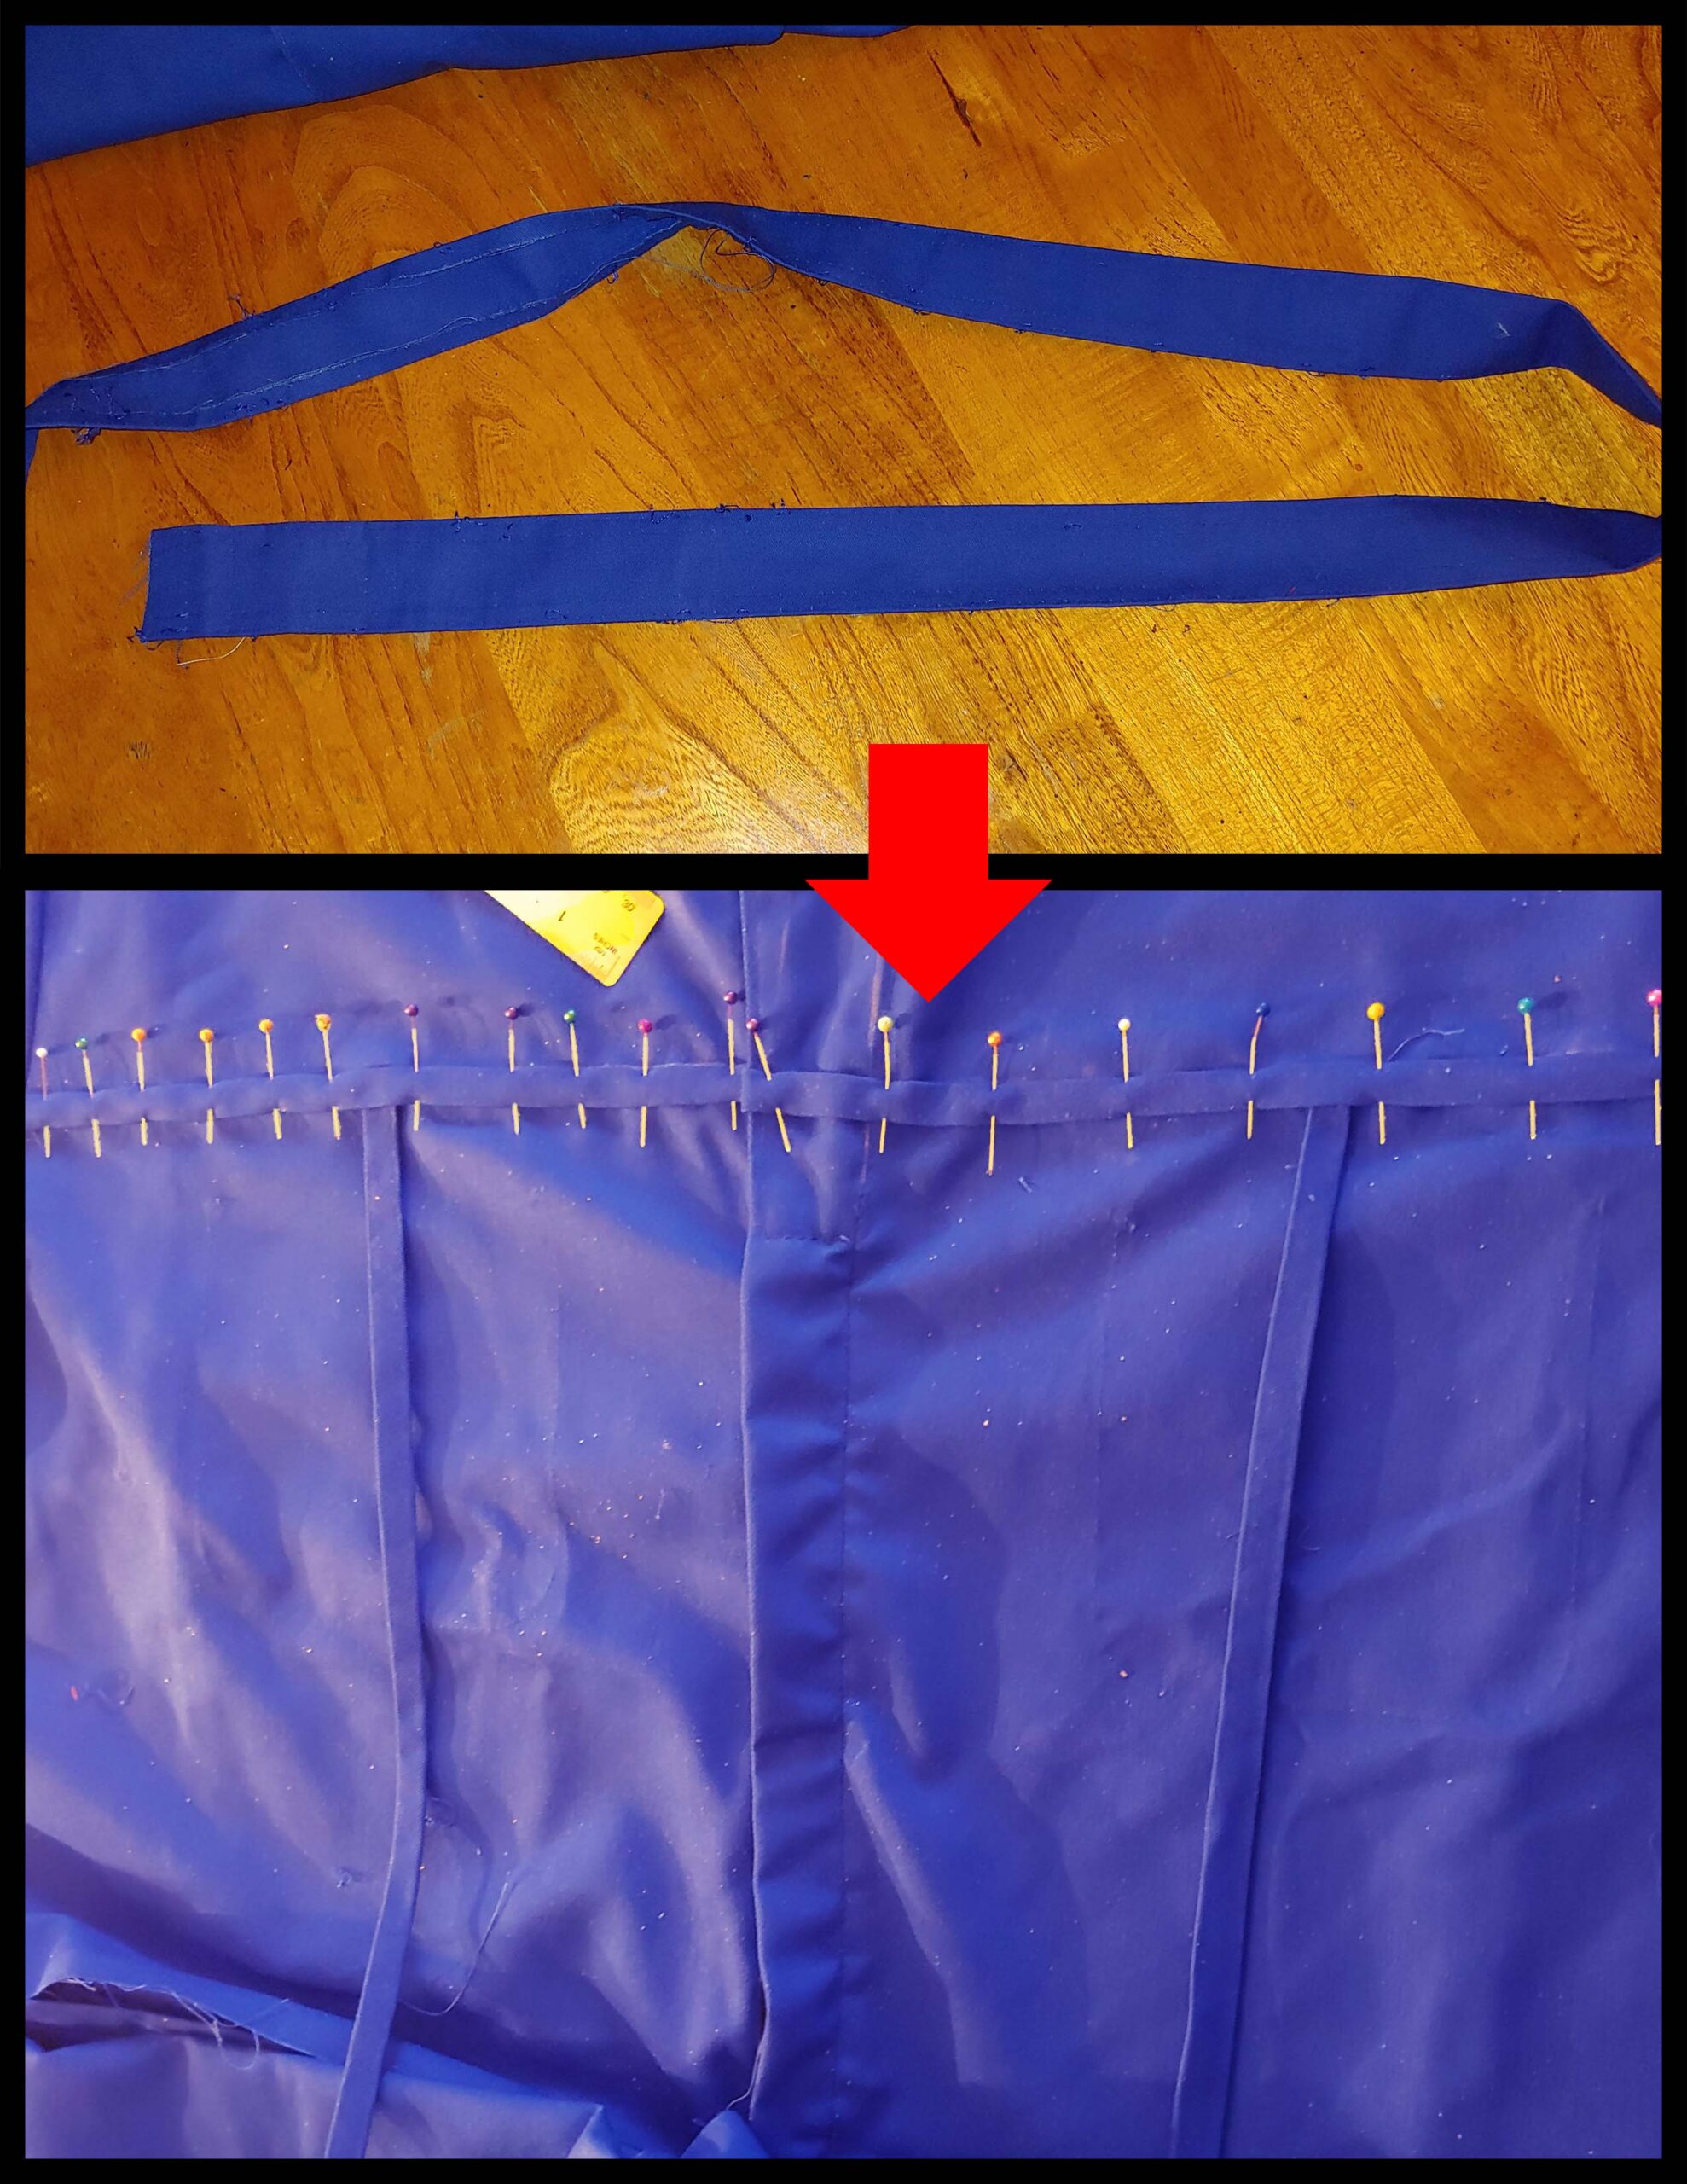
Since the jumpsuit I’m using is, well, already made, there are a few customization I have to add. First of these is creating fake seams on the chest (the Dark Blue lines) then create the pockets (orange) which I will do a little later.
On the ‘real’ suit, the chest seams are created by overlapping fabric. I’m not gonna replicate that so I made fake seams. I did this by removing the blue ‘belt’ (that will be replaced by an orange one) and using that extra fabric to create x3, 1/2 inch wide strips of fabric.
If you take a look at the image to the right, you will see where I attached the ‘seams’. Pretty easy to do, just a simple top-stitch. Up close its pretty obvious what I did, but far enough away it looks…close enough to ‘screen accurate.
Usually, I’d post a picture here of how that turned out, but at the moment of typing this, it looks bad close up. Up close the stitching is not straight and I’m going to re-do it at some point. So let’s just move on.
Hoth Pockets
As mentioned earlier, having the Anovos jumpsuit was really helpful. Unlike with Version 1 of this suit, I didn’t have to guess the dimensions of the pockets. I could measure the Anovos ones and extrapolate a scaled up pattern.
It was a pretty straight forward process:
- Draw a rough trace of the Anovos pocket on paper
- Refine the shape with accurate measurements
- Cut out a test piece, adjust for size chage
- Add a 1/4″ inch extra on each side of the template
- Cut the fabric out using said template
- Fold the extra 1/4″ of fabric under and press with an iron
- Sew pattern on to the flight suit
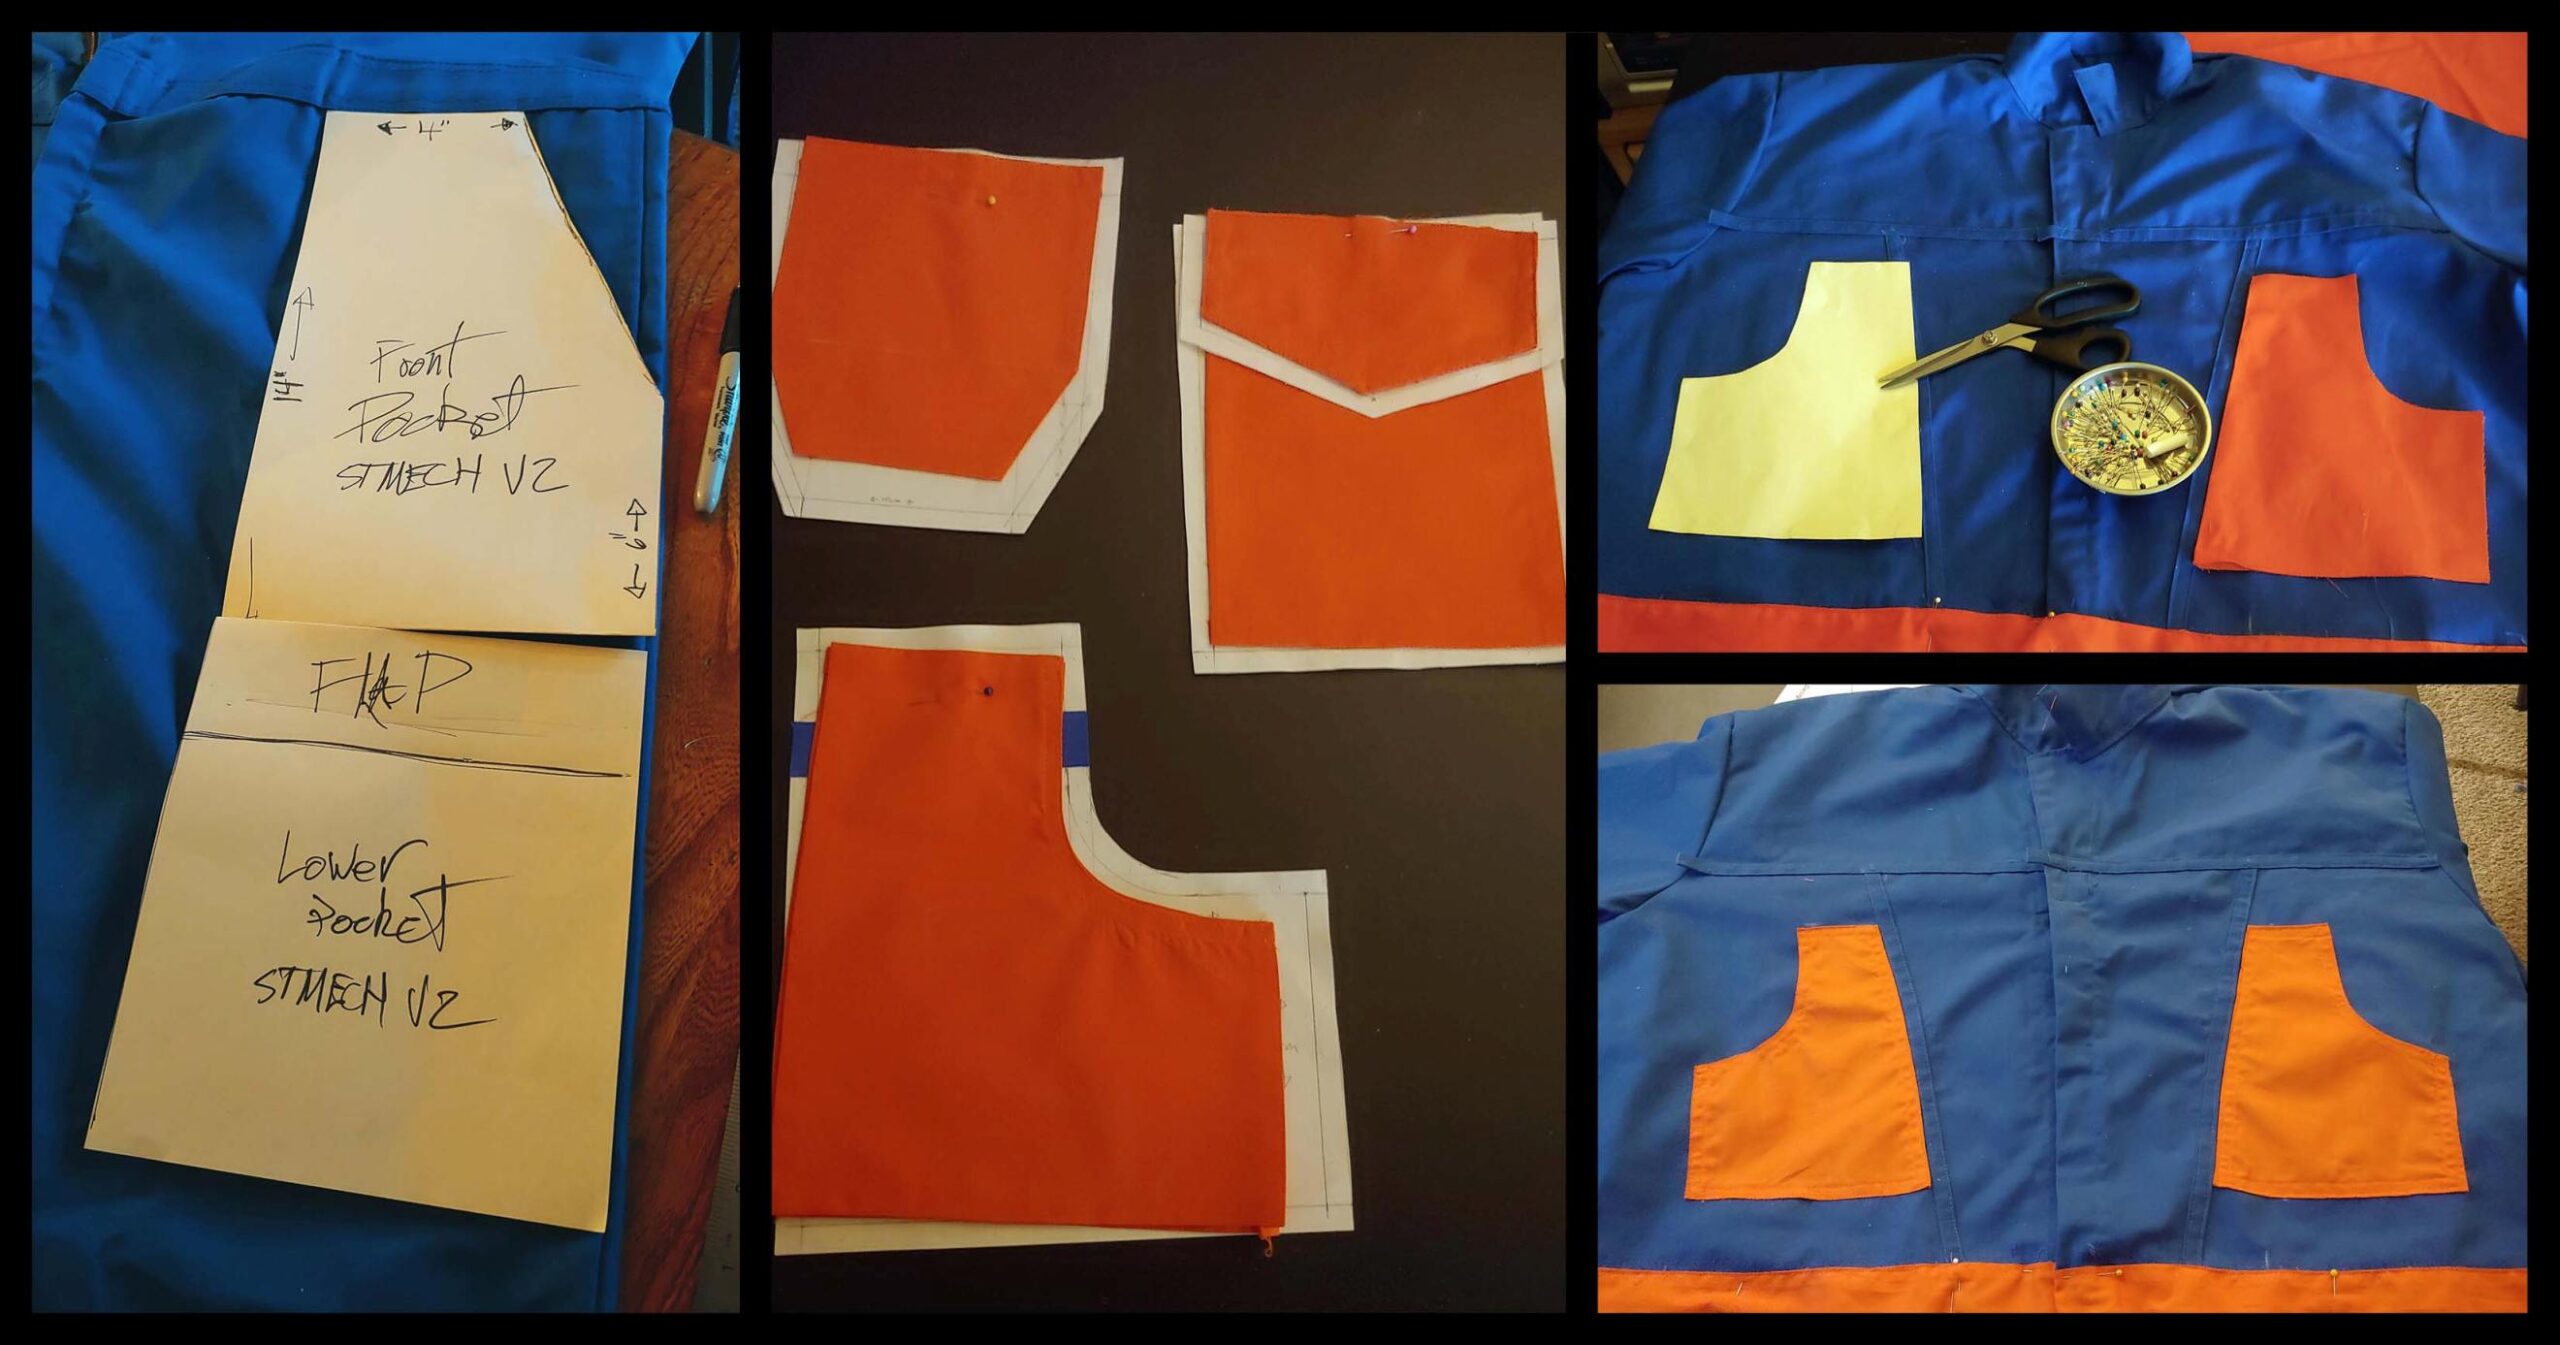
The Sleeve pockets were a bit of trick though. Due to the “Already Constructed” nature of the jumpsuit, I needed to rip out a lot of the per-existing seams so that I would be able to sew on the pockets.
On a weird side note, the ‘Compad’ pocket on the lower sleeve is really really small on the the Anovos flight suit. The open part of the pocket is like, 2″x2″. Solely based on the images for the ‘compad’ greeblies available out there, I assumed this was a much larger pocket.
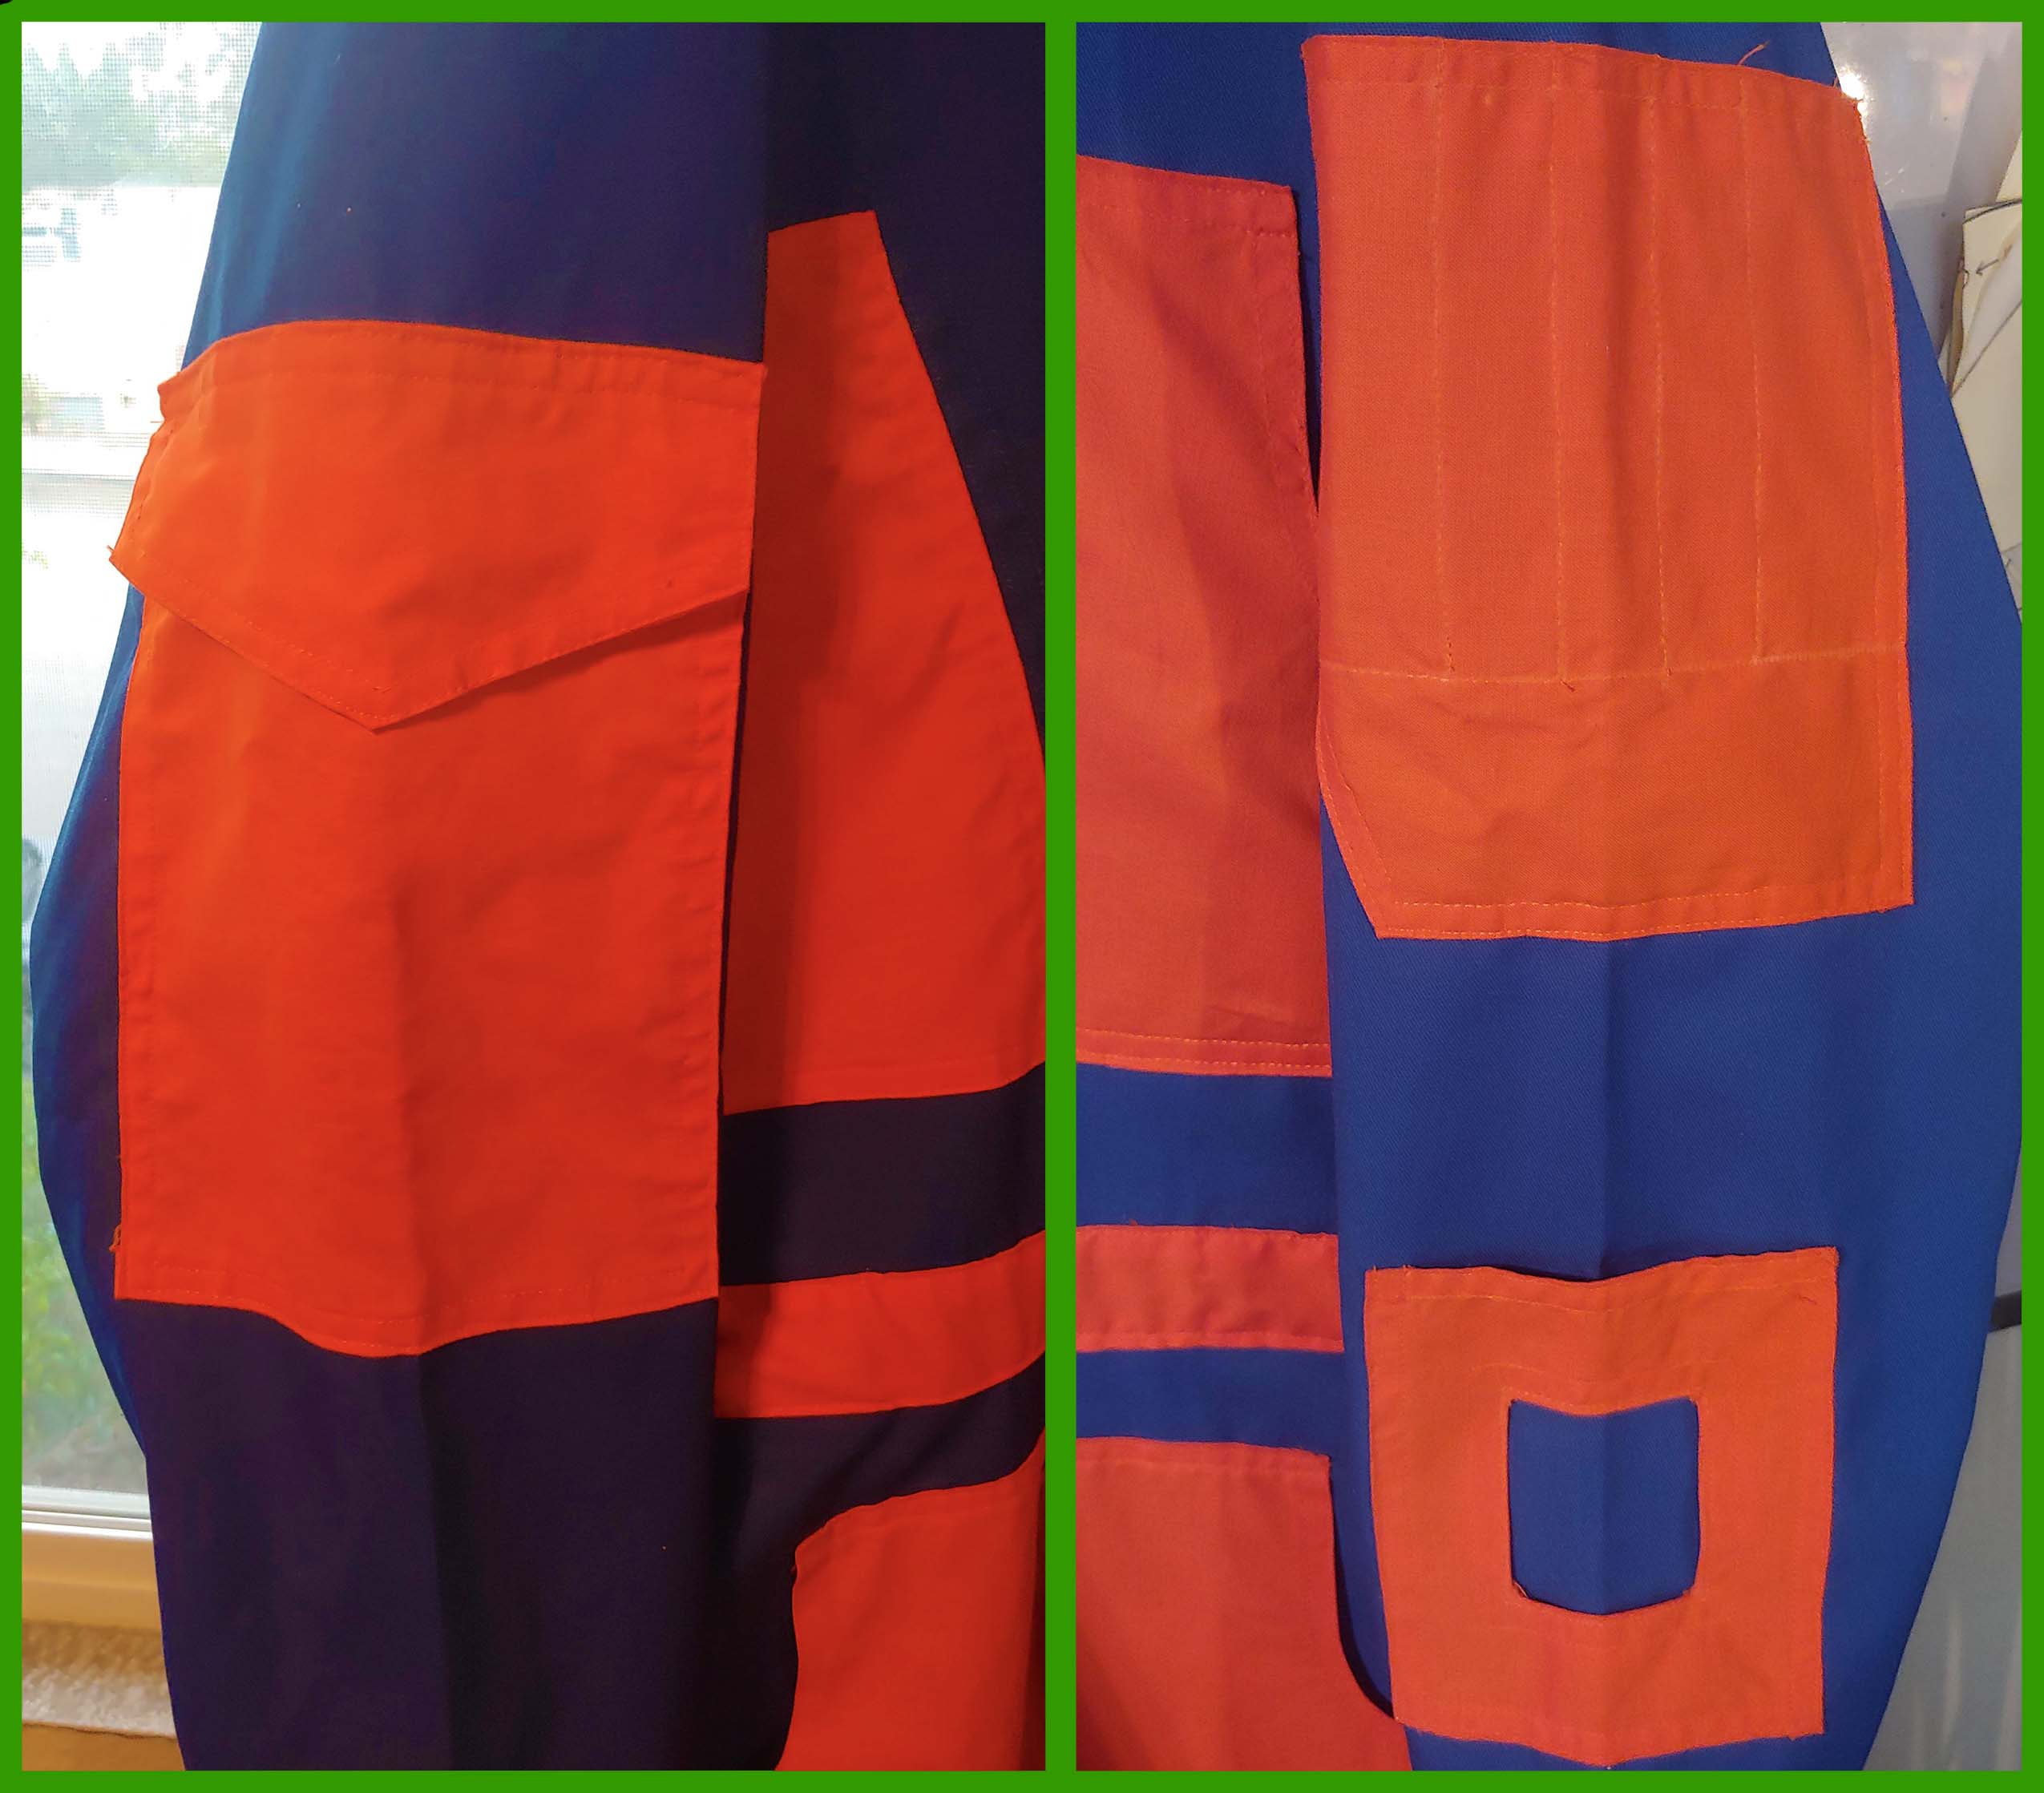
With the pockets sewed on and the Collar and Belt replaced with moar orange versions of themselves, I’m pretty much done with the flight suit. There is a few more small tweeks (re-do the fake seams, apply patches, custom compad etc), but it is 99% done.
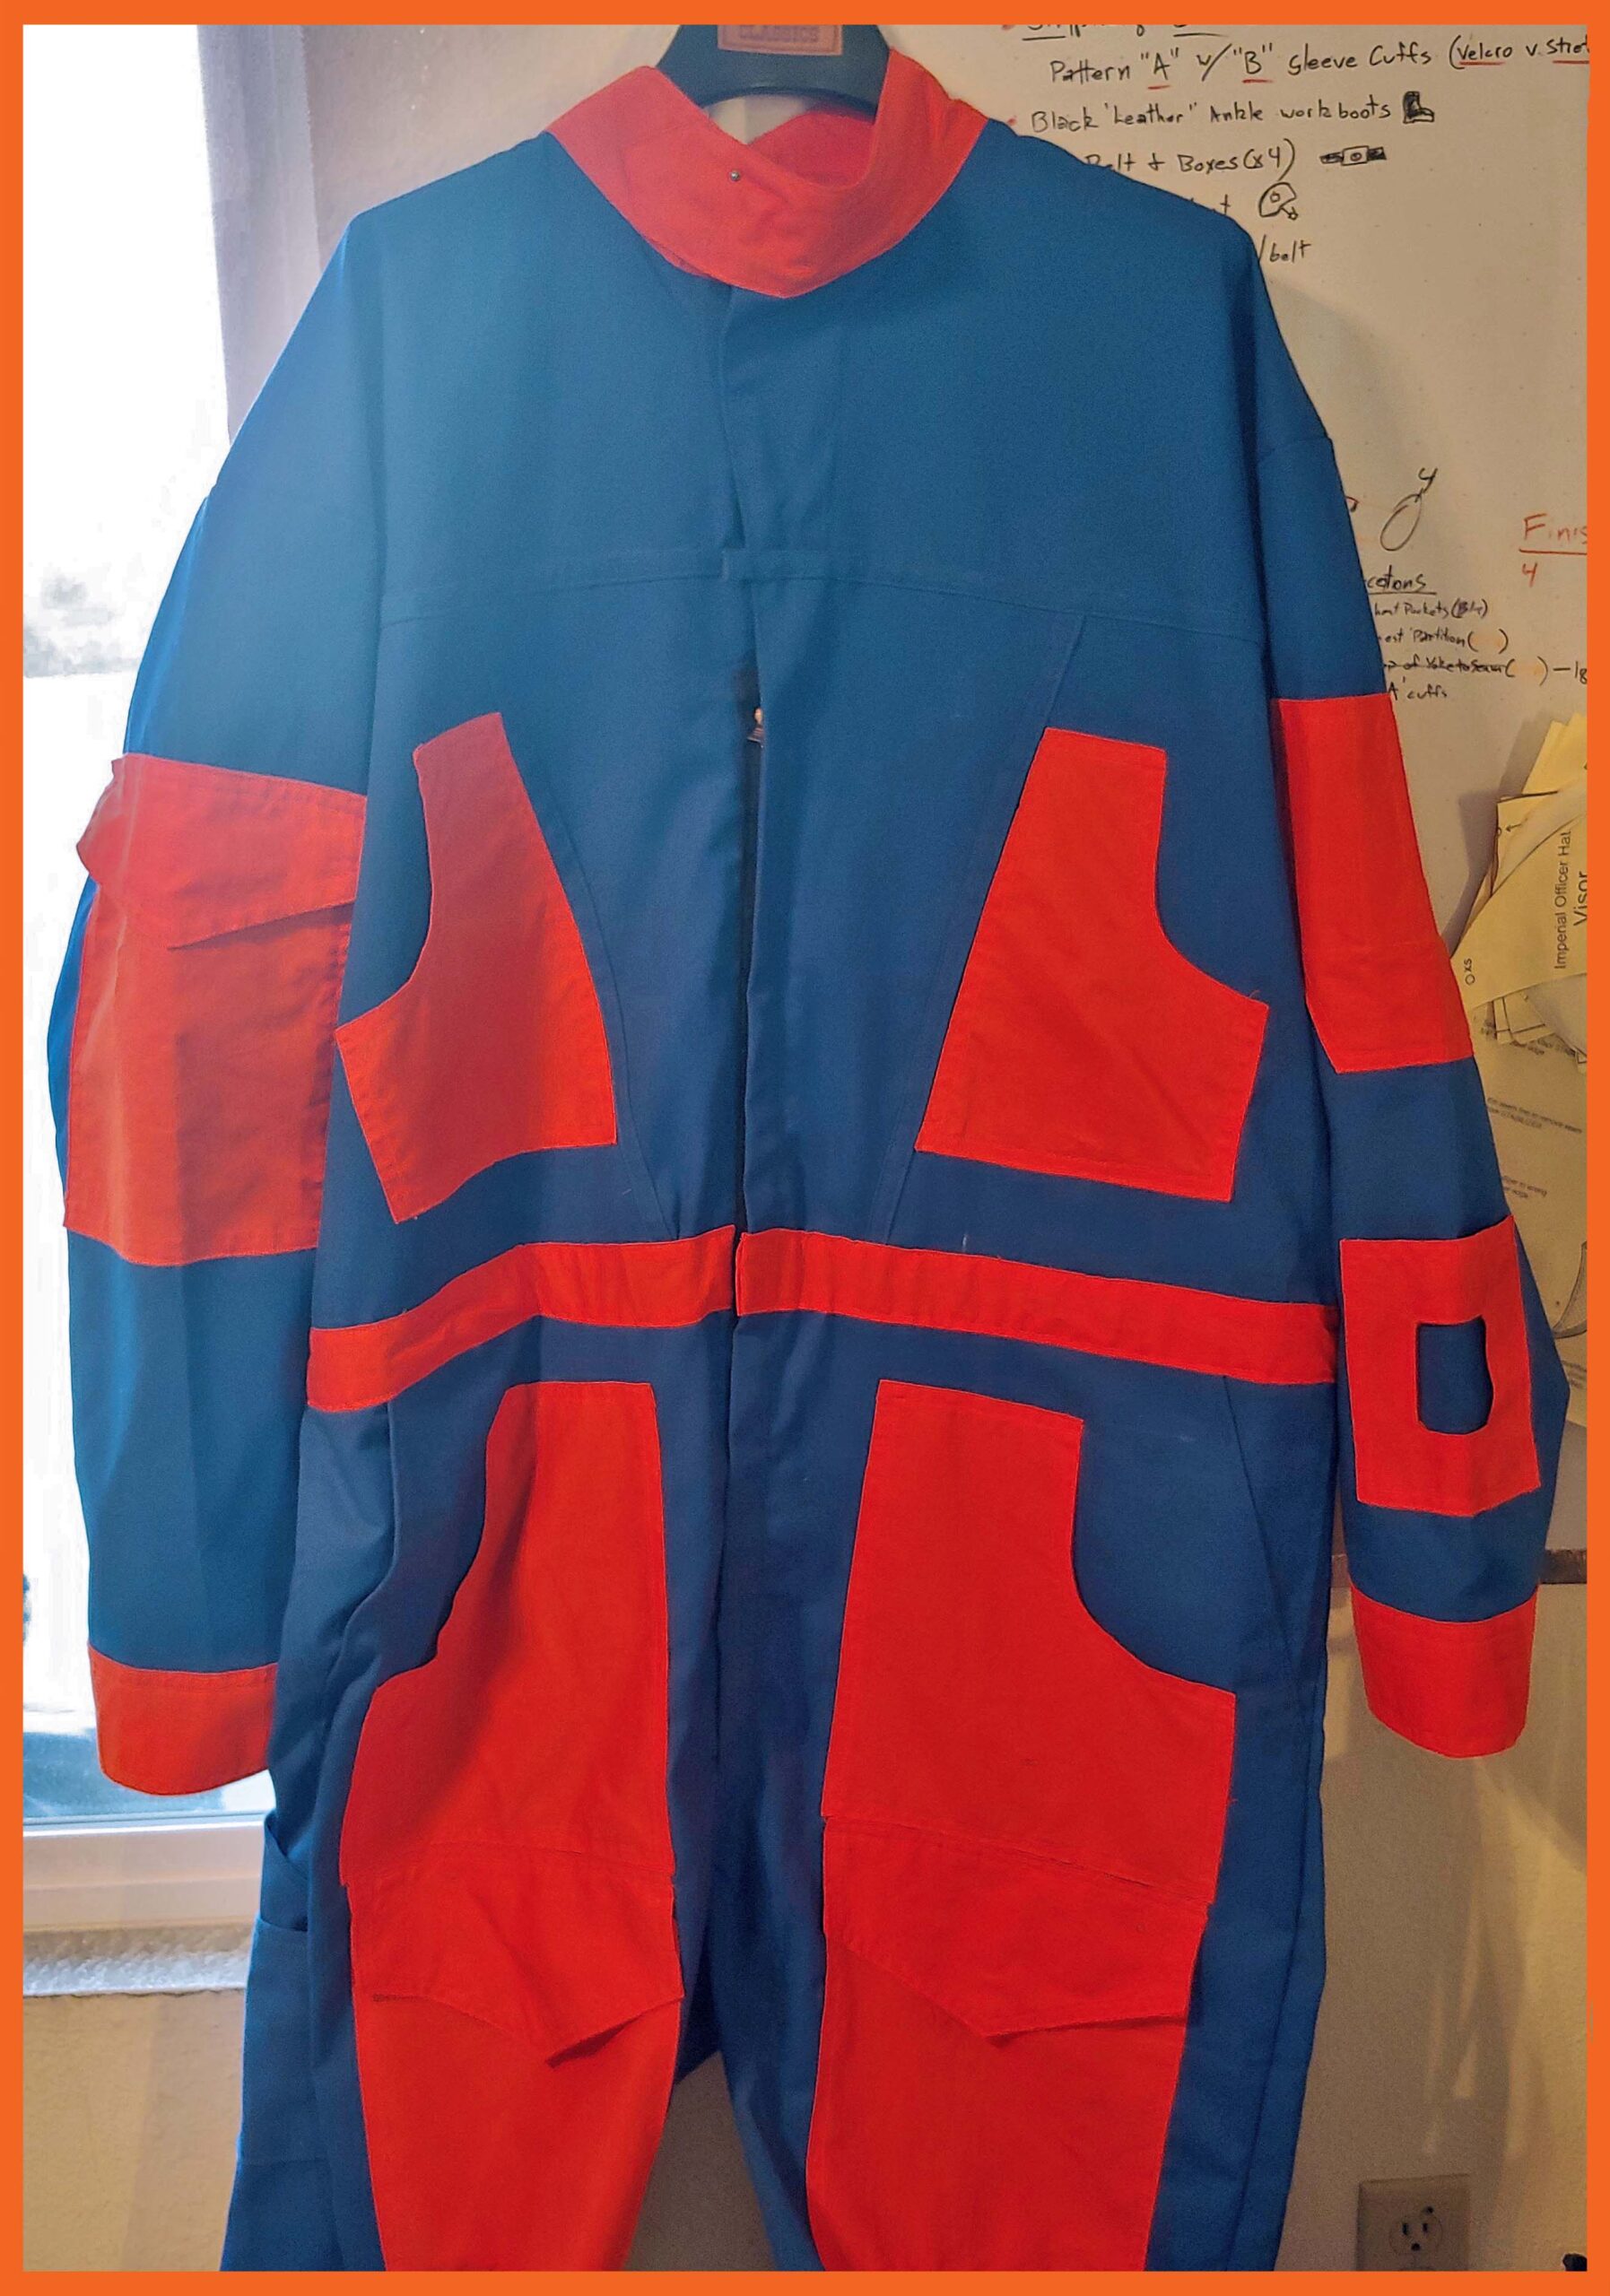 I still feel like it needs something orange on the upper chest, it’s kind of a big, weird, and unbalanced sea of blue up there. It won’t be a huge deal as that area will be mostly covered by a vest/harness type thing.
Getting inVested
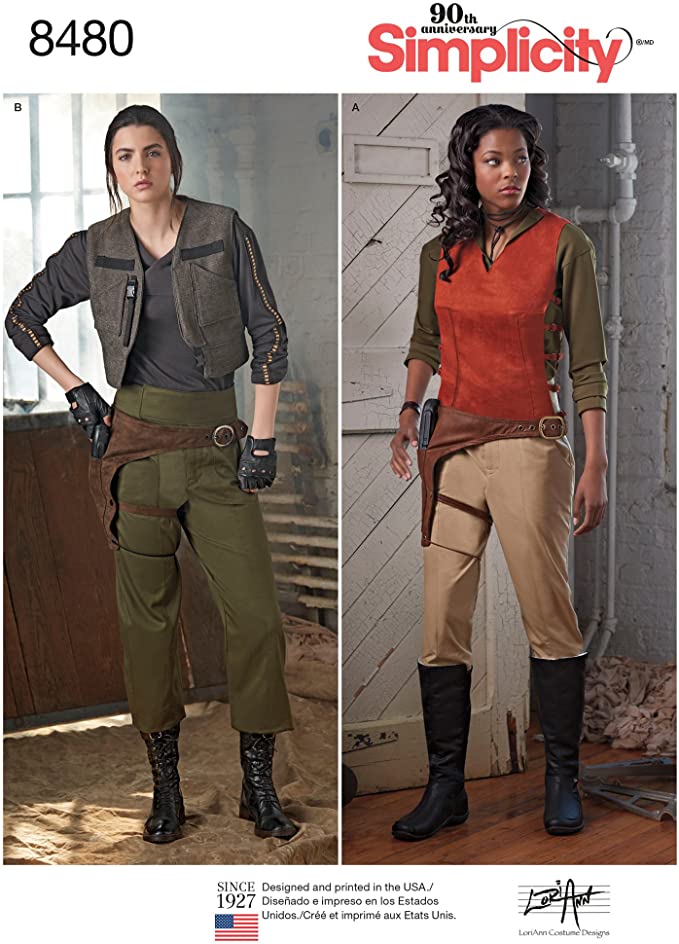
So now we are left off nearly where we were on the last post about this project. Except this time I didn’t run out of fabric for the sleeves. Next step? Some sort of tool vest. We’ve gone through several different ideas for this part of the costume (see the first post). But, I think we finally settled on something similar to Cassian Andor’s Vest/Disney Smuggler’s Run vests. However I don’t have a pattern for those so I started messing around with Simplicity’s 8480 pattern which is very similar to Jyn Erso’s vest:
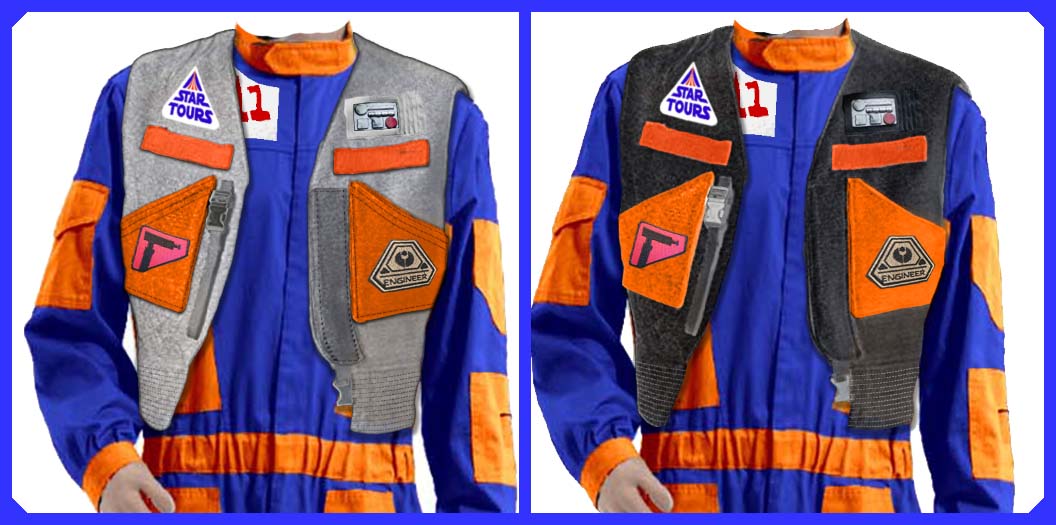
 I want it to be a different color than the primary colors of he flight suit, so just for a visual reference, a white/grey and black variant:
Though… the Smugglers Run cast members at Galaxy’s Edge have a pretty cool vest, and it would tie the costume to the Parks just a little bit more.
Things to contemplate for the future.
*Update 5/30/2022* – Post Celebration ’22
Due to me getting throughout distracted with my Mudtrooper armor, I did not get around to taking notes on this project as I sped up to knock it out before Celebration.
Main Notes:
– Determined a vest would make the outfit ‘too busy’ and cover up a ton of detail on the flight suit
– Ian found a ‘fall harness’ that was orange and blue hat we hung some pouches off of
– Bodhi Rook style safety goggles were added
– patches added to the sleeves as well as vinyl name tag/unit # in aurebesh added to the chest and sleeve
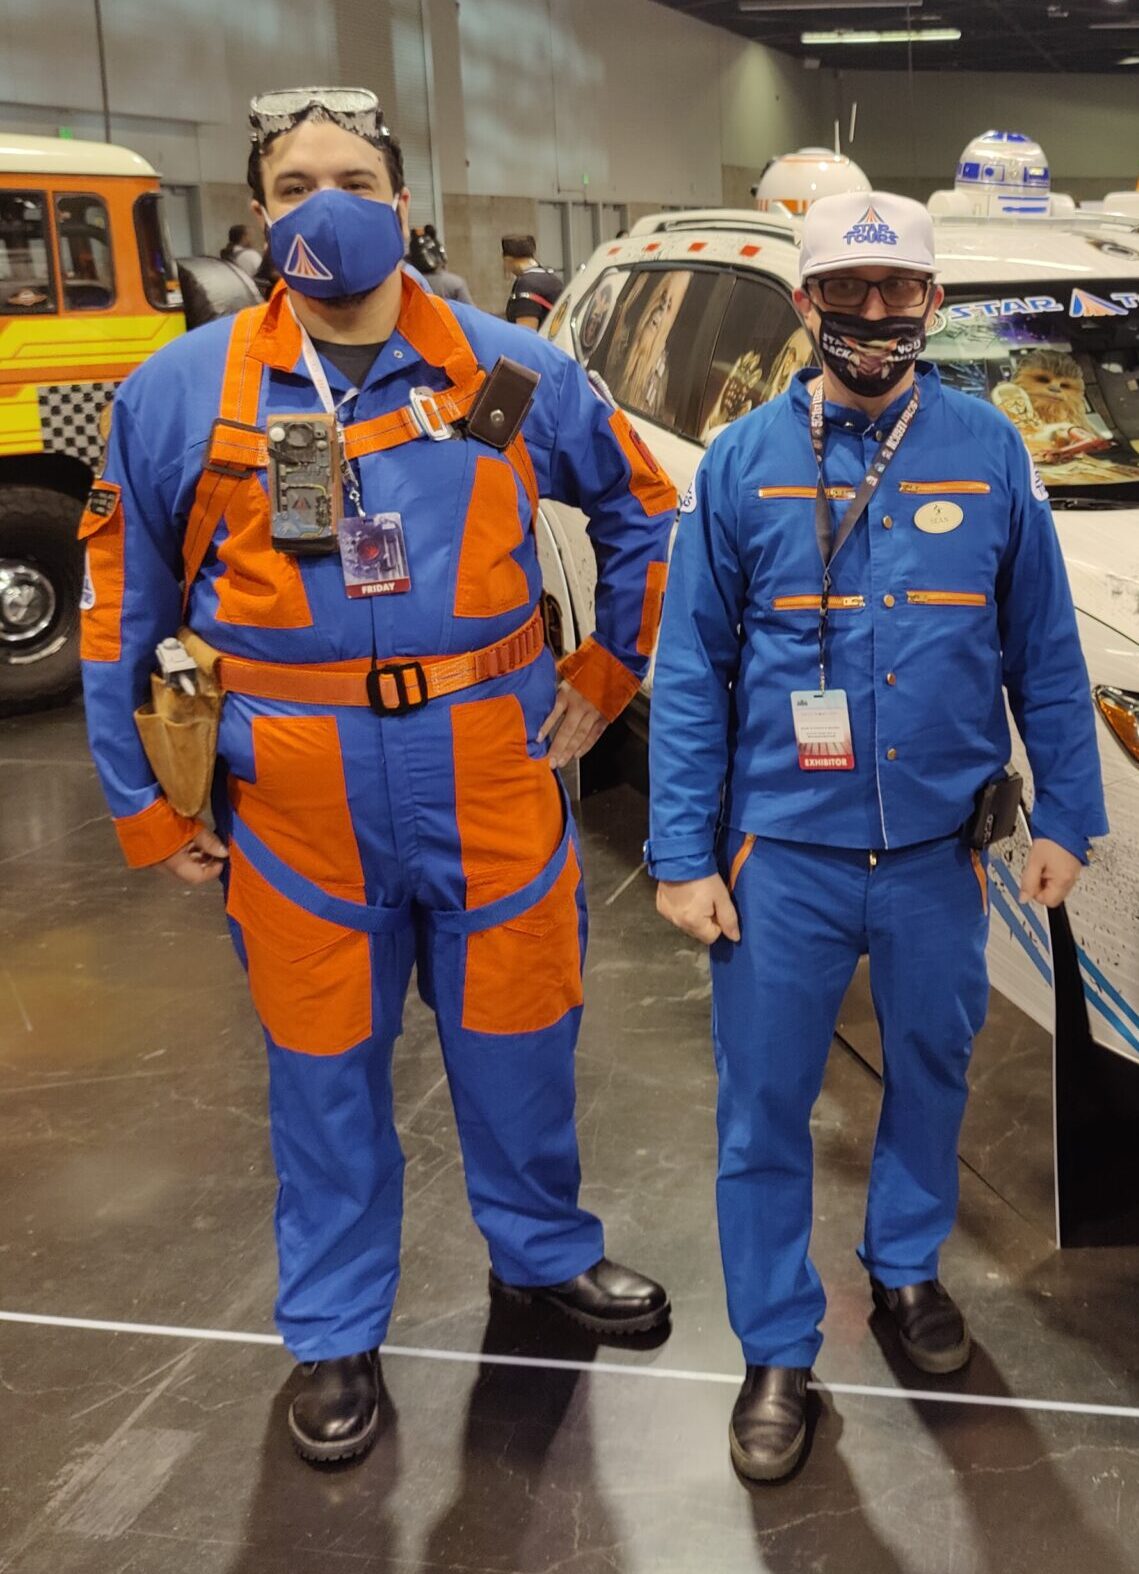
Ian with Sean and his Starpseeder car (Sean is rocking a pretty sweet Repo Cast Member uniform)
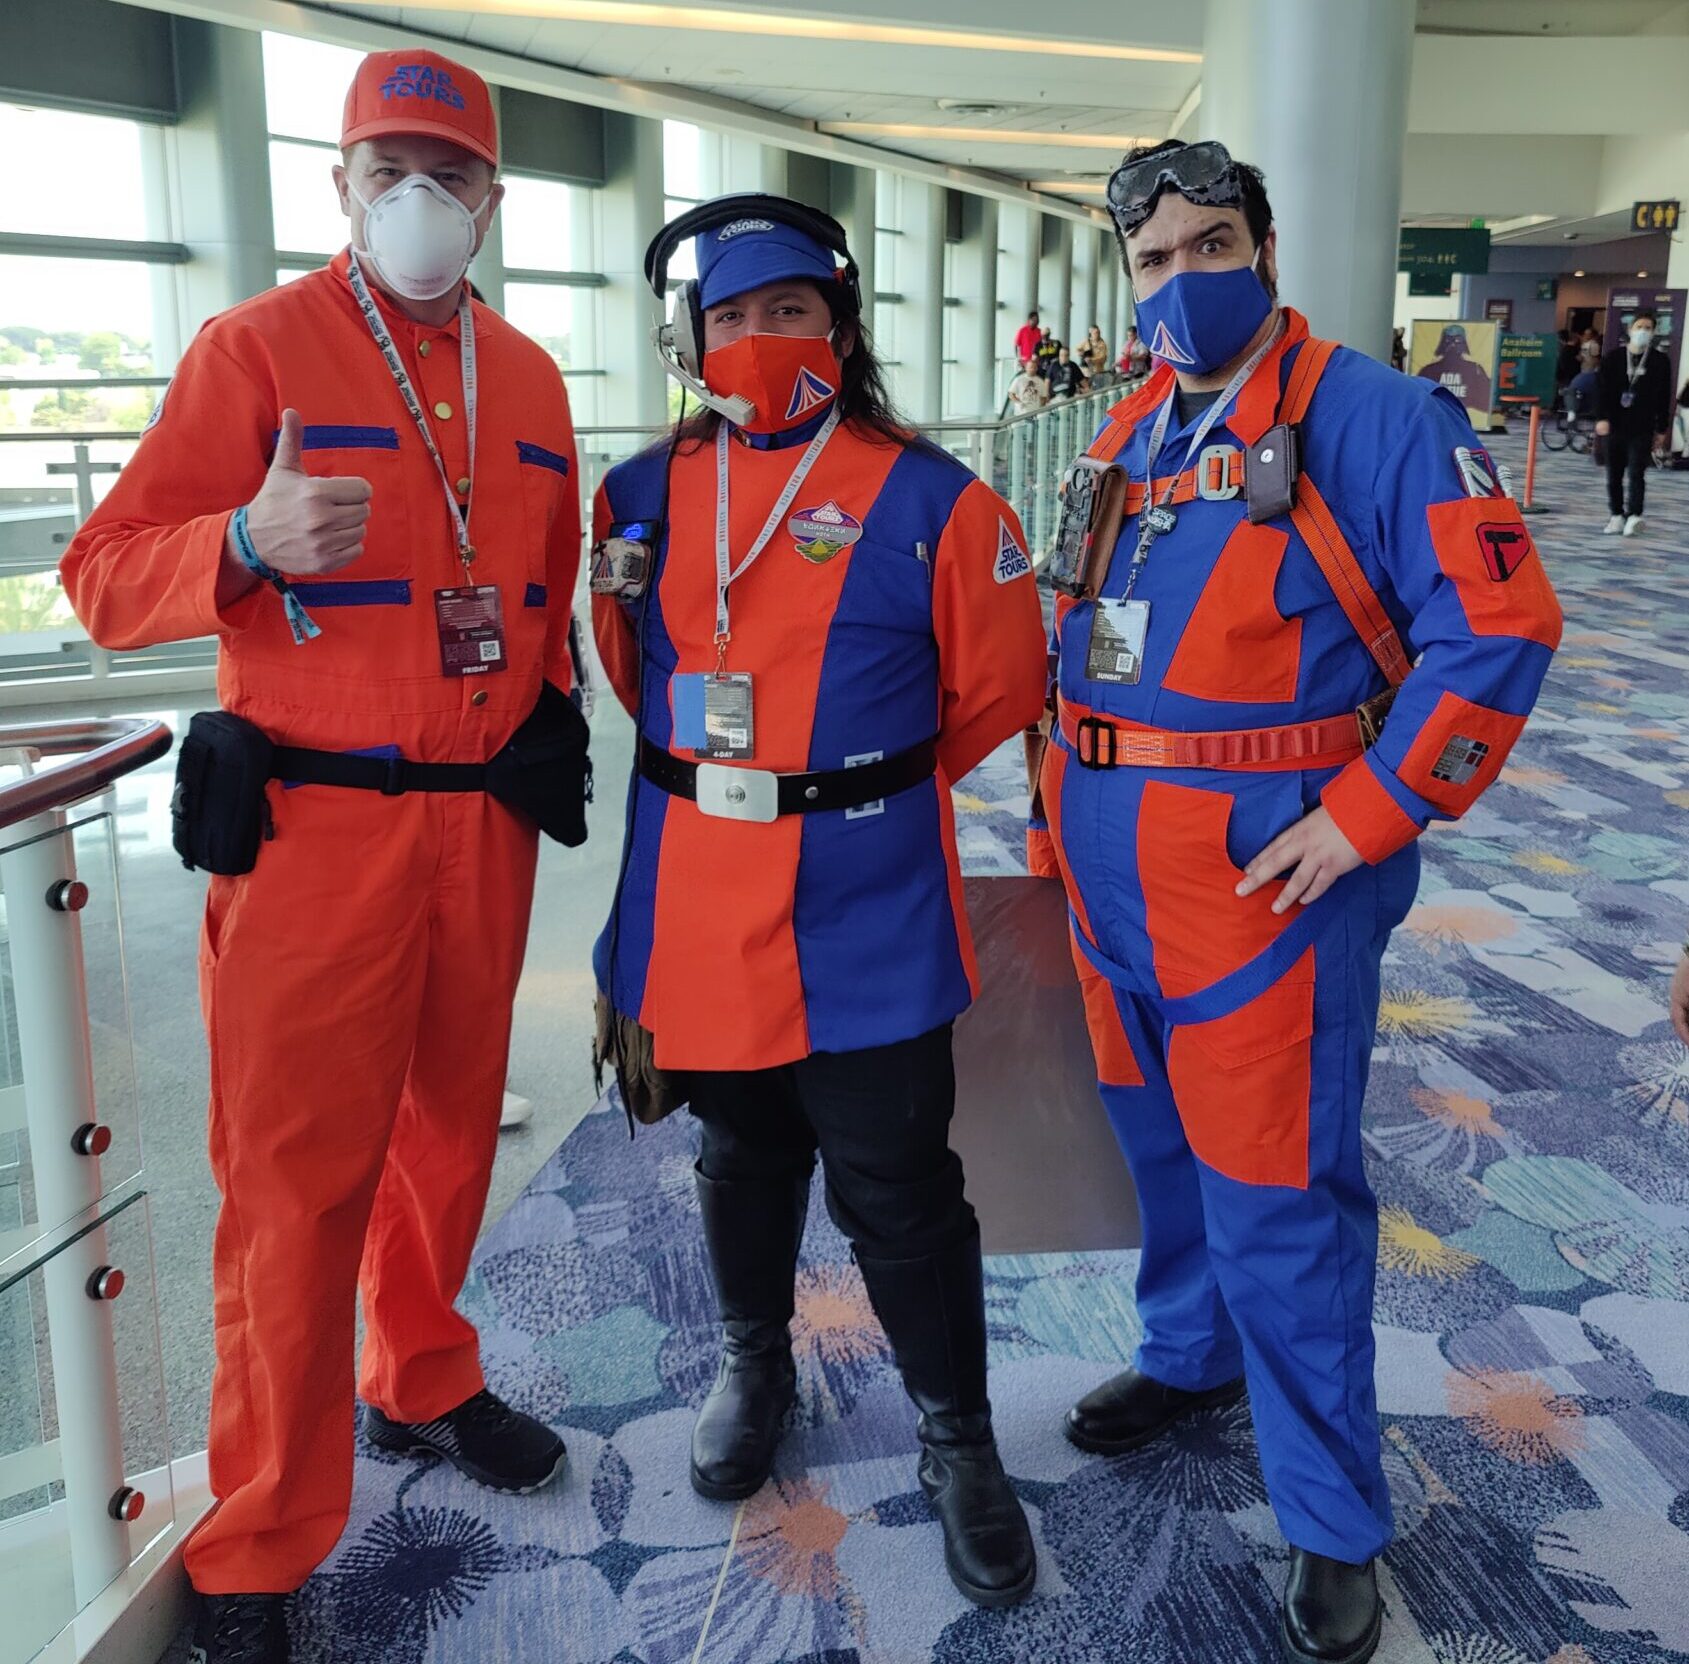
This guy, who’s name I forgot (notice how all of our badges are backwards facing? annoying), But I do believe he runs @Flight_1401 over on Instagram, made the inverted color cast uniform, which ironically is the same jumpsuit base I used for Ian. We met him in line for the Star Tours 35th anniversary panel.
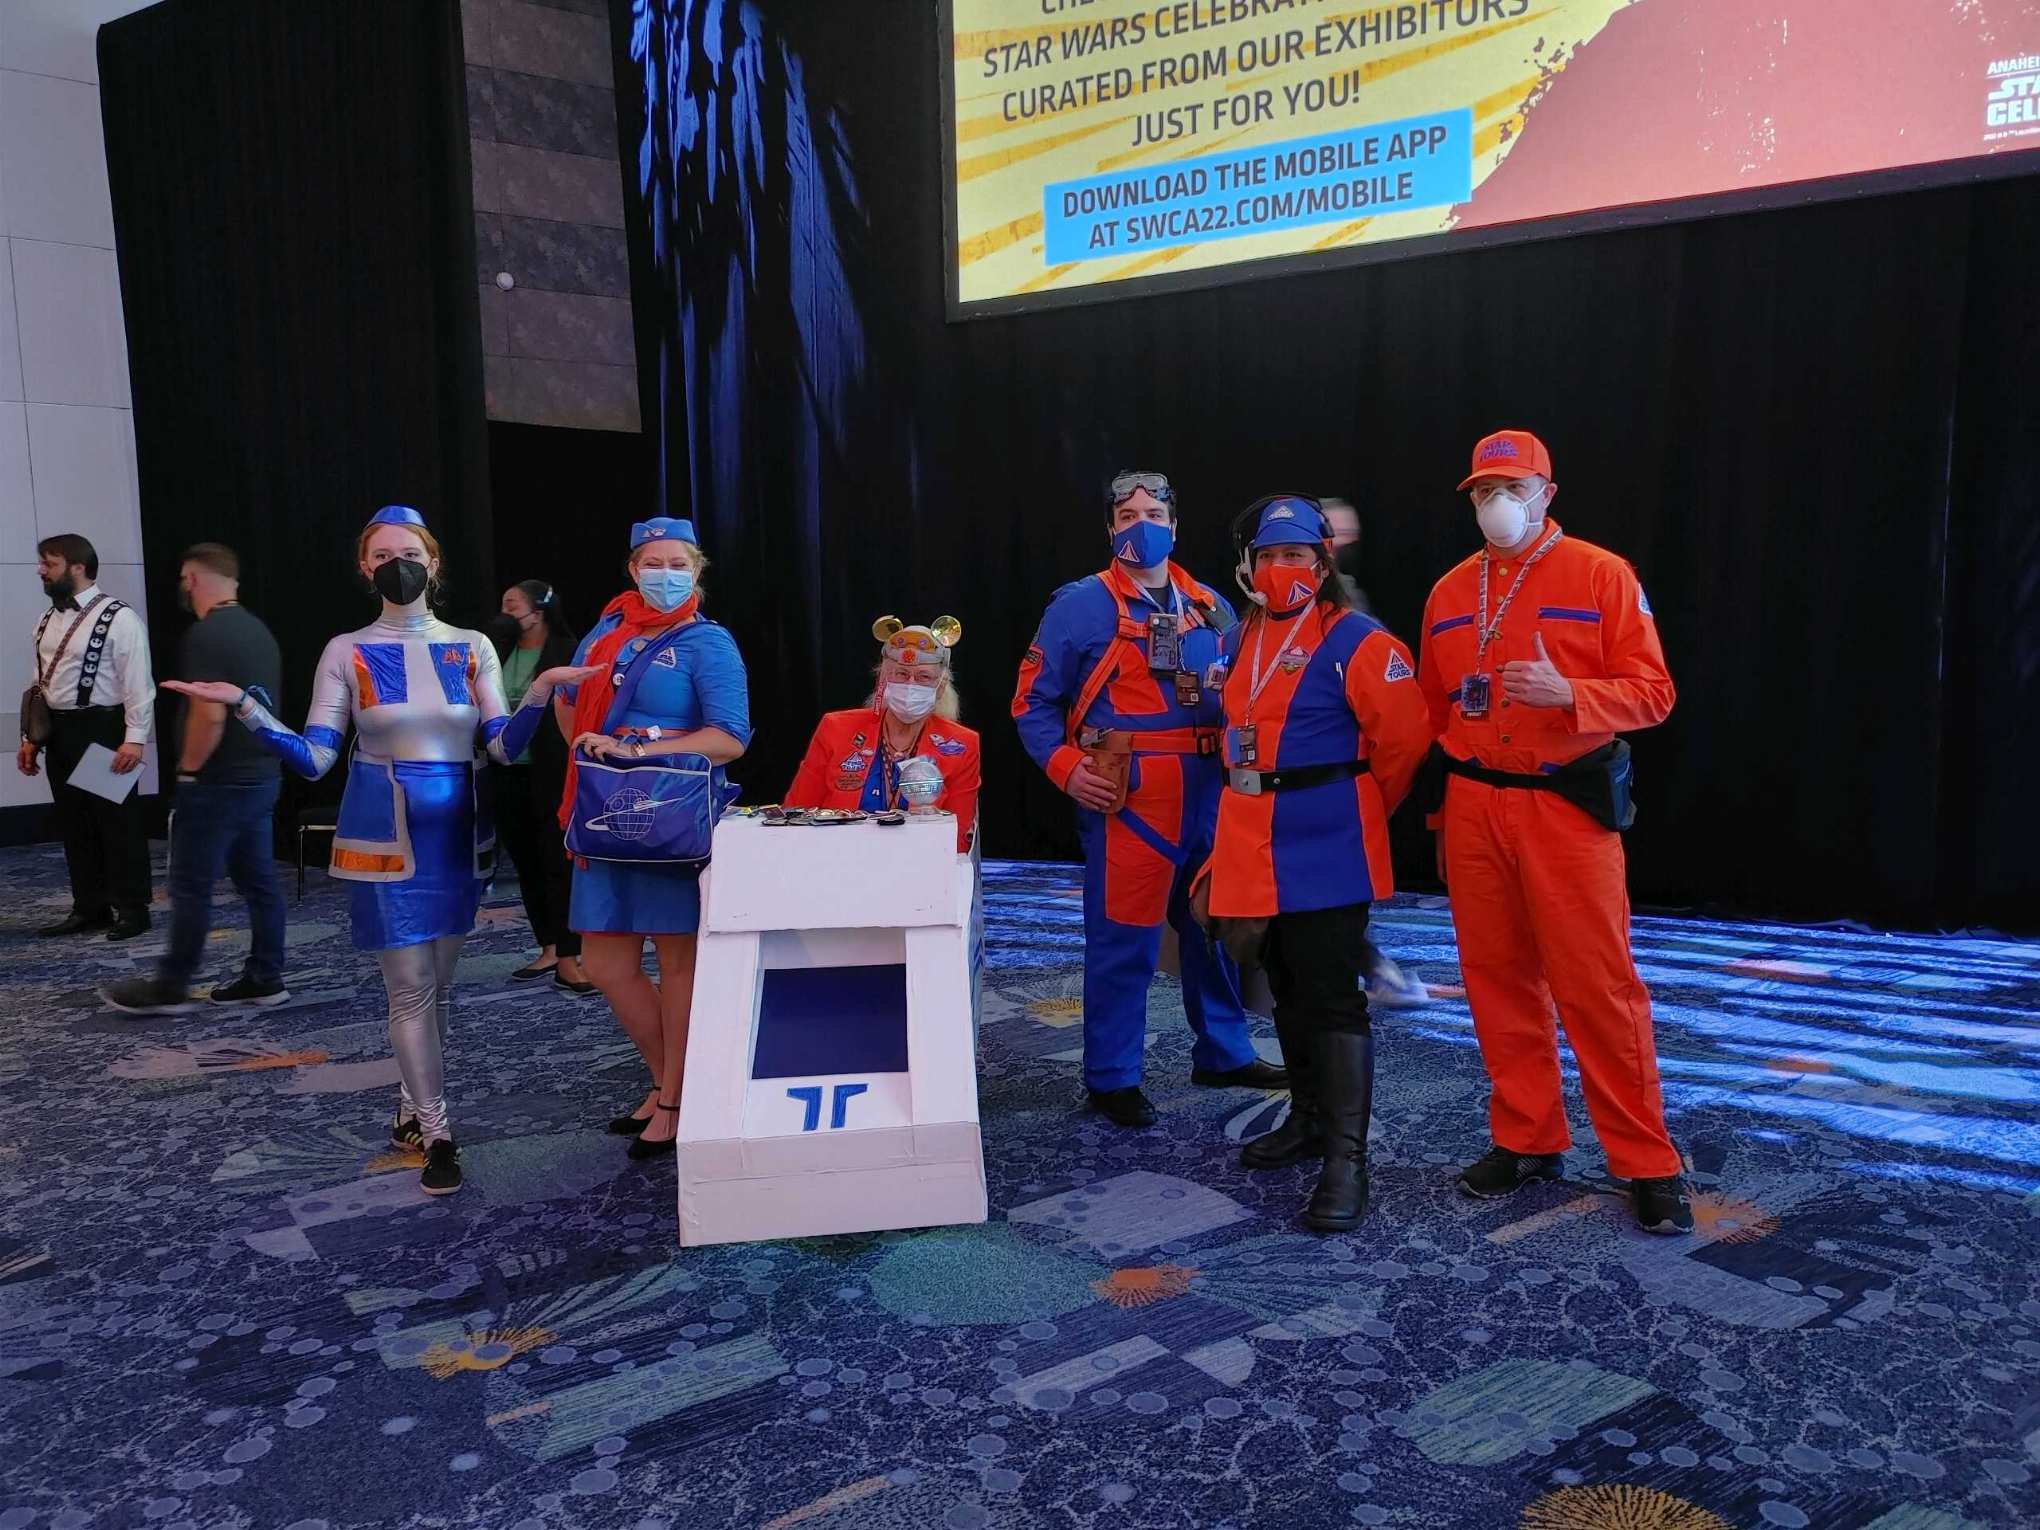
And finally, a group shot of (nearly) all the Star Tours cosplayers at the end of the panel