
Welcome to Part 2 of Another Star Tours Costume Build. If this is you first time here, check out Part One here to get caught up!
Whence we last off, I had just come up with a prototype outline for what this costume will look like. I found a suitable pattern for a flight suit and had (most) of the fabric already on hand. In this update, I will go over some of the changes/differences in the sewing pattern and what is worn on screen for the Rebel Pilot flight suit. Some of the changes I implemented, others I didn’t due to a miscalculation on how much orange fabric I had.
Whats the Difference?
*An essay on the struggles of wanting to be screen accurate for a non-canon, in fictional-universe fictional uniform*
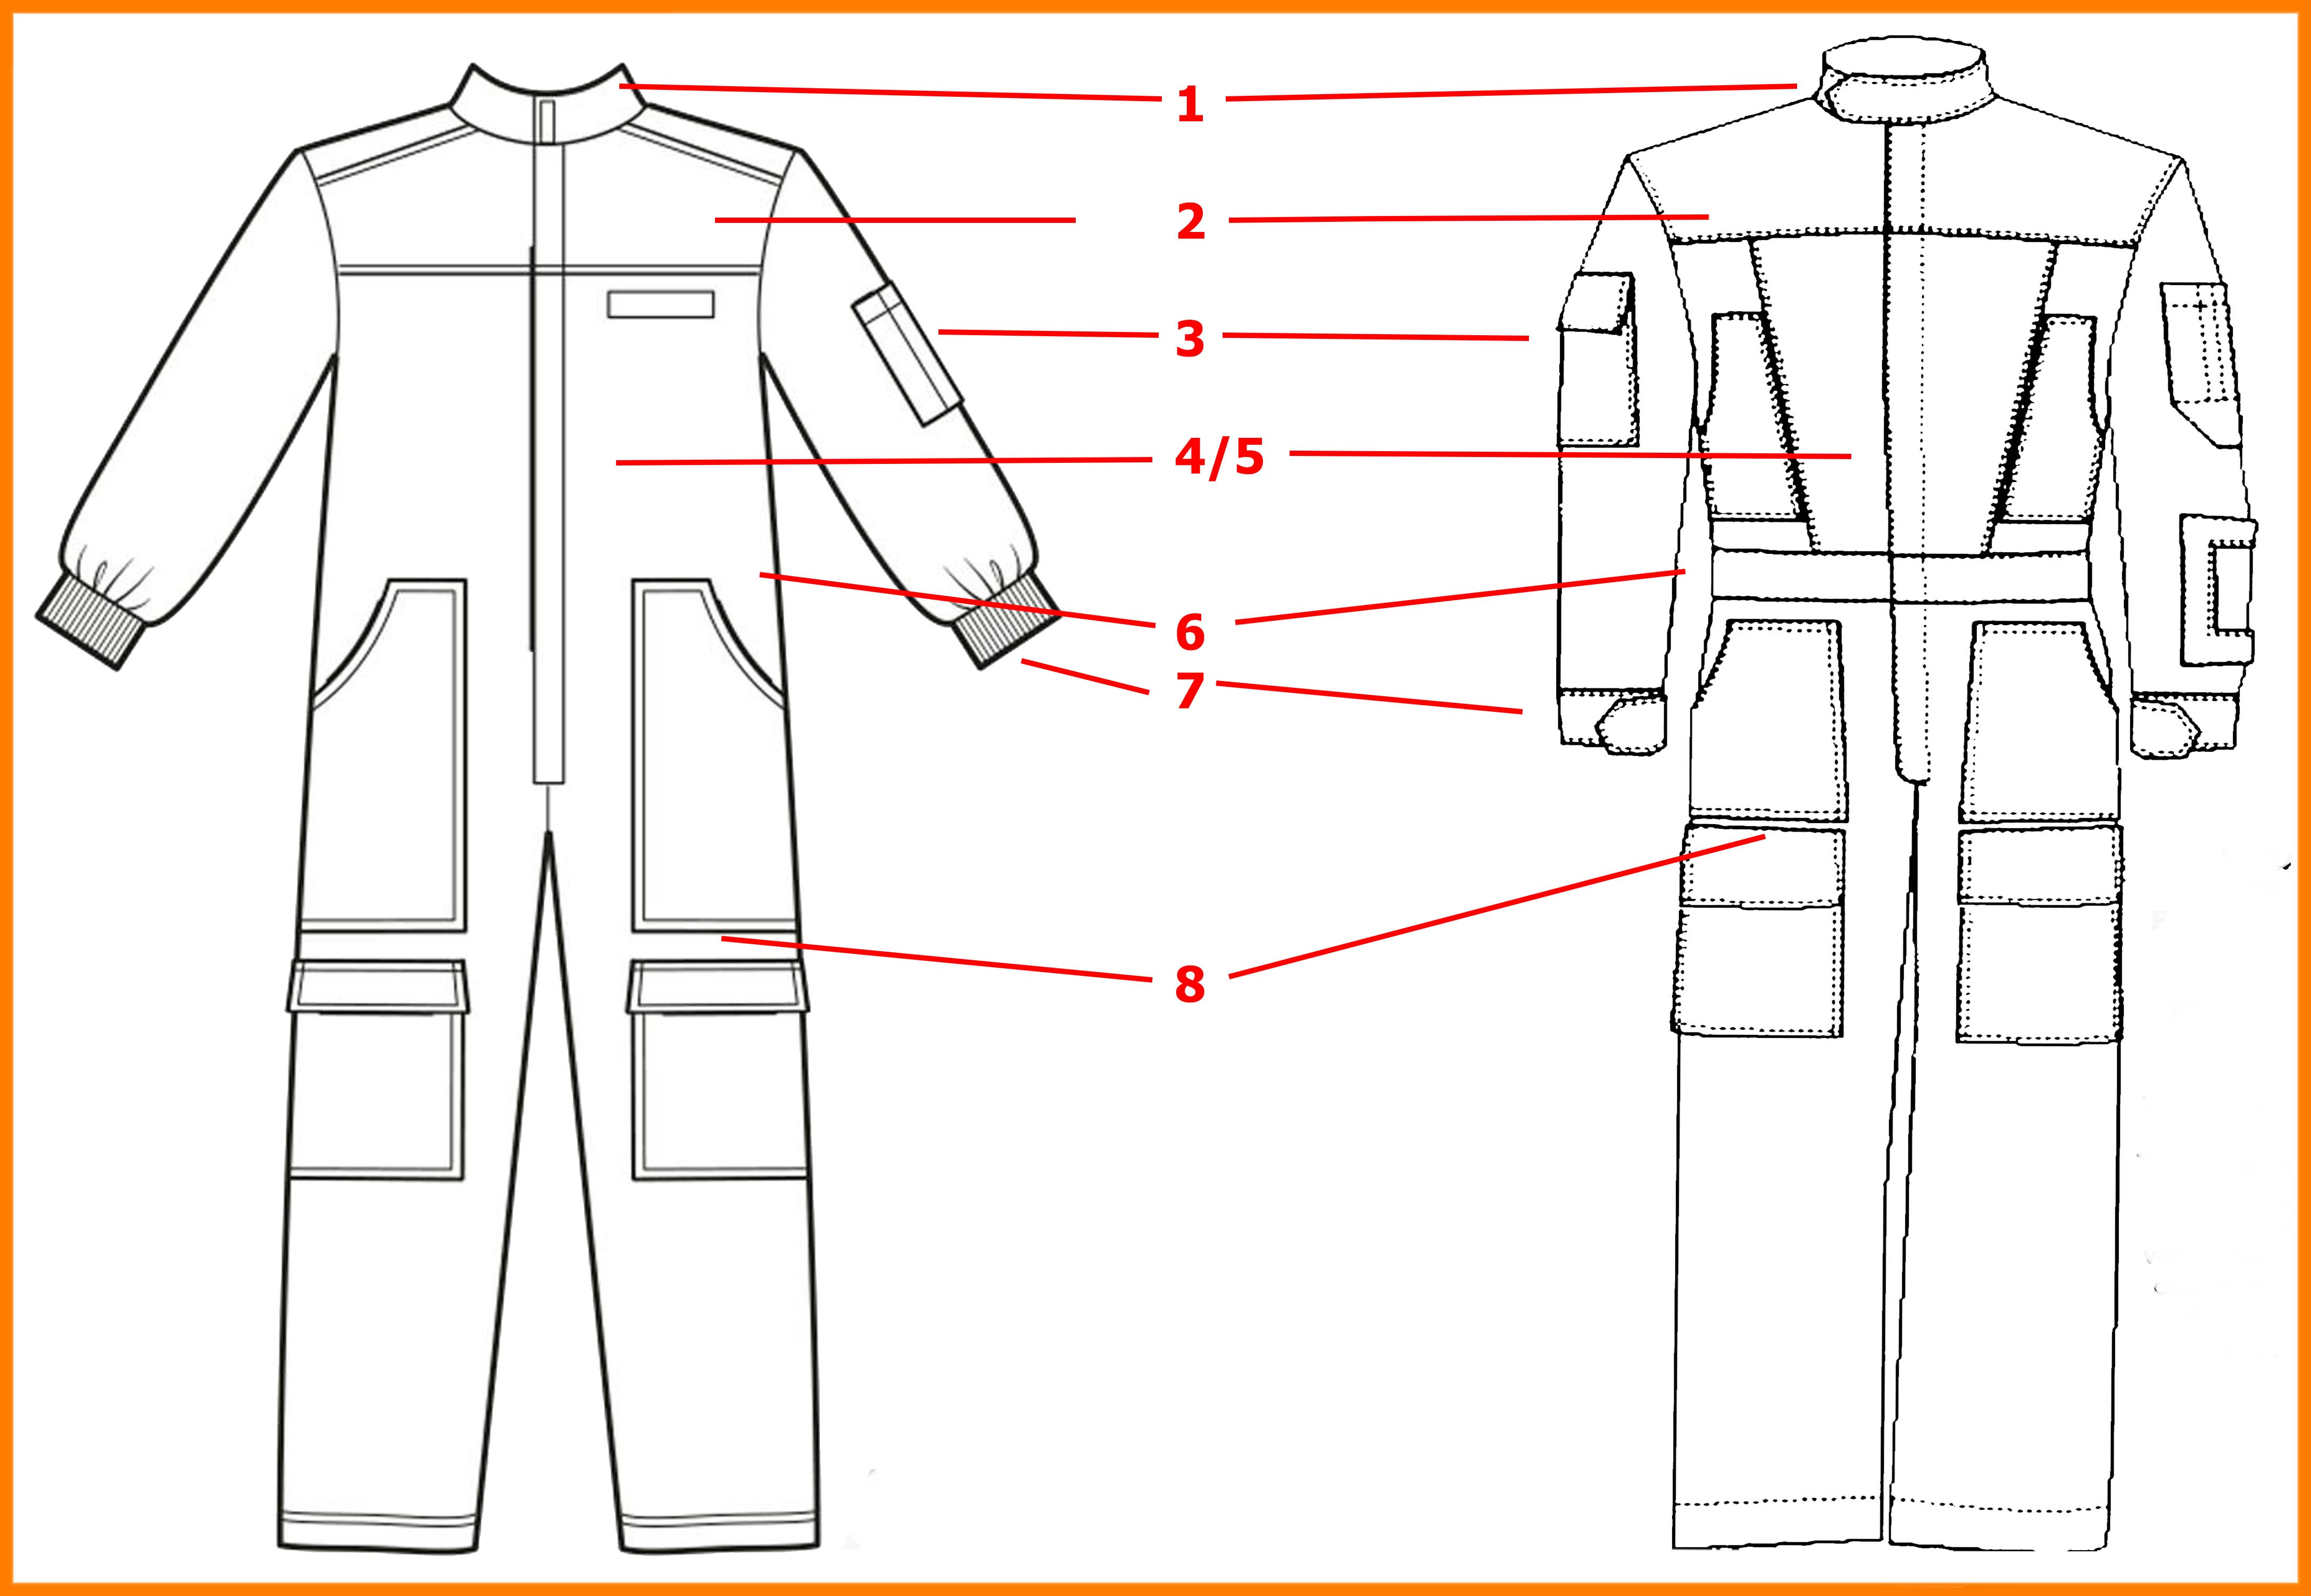
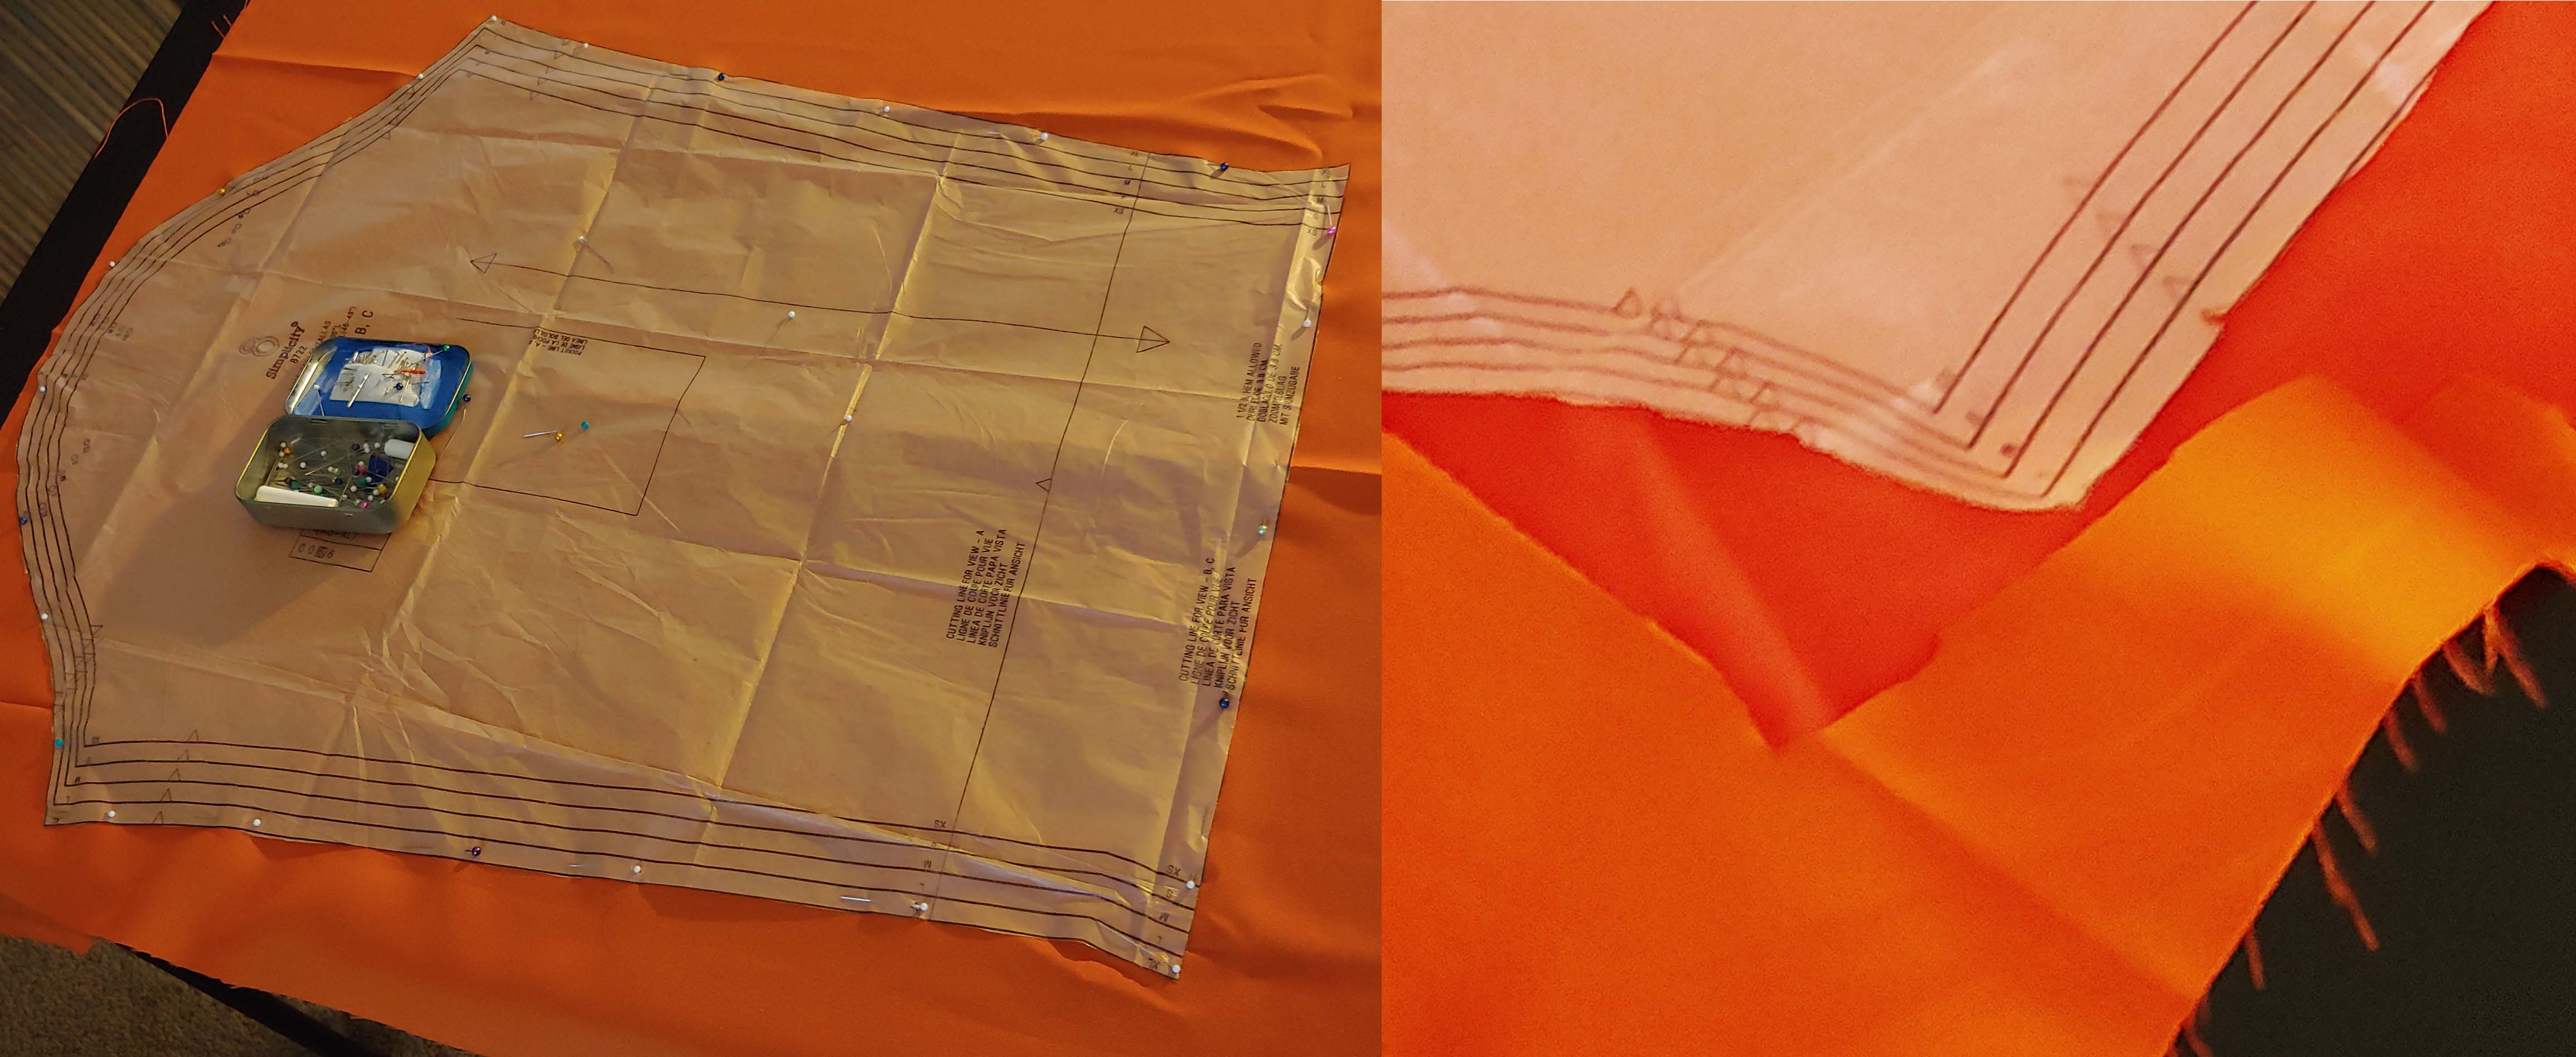
The comparison is the Simplicity pattern next to an outline I blatantly stole from the Rebel Legion’s costume forum. So, the differences (what I change is listed in red):
- Collar closure style:
After first test fit, the collar was too tight, this gave me the excuse to add the triangle shaped extension of the ‘screen accurate’ style - The upper shoulder yoke piece shape/length:
This is staying the way it is on the Simplicity pattern, not enough fabric to cut an extended yoke that would cover all the way to the shoulder seam. - Shape of sleeve pocket(s):
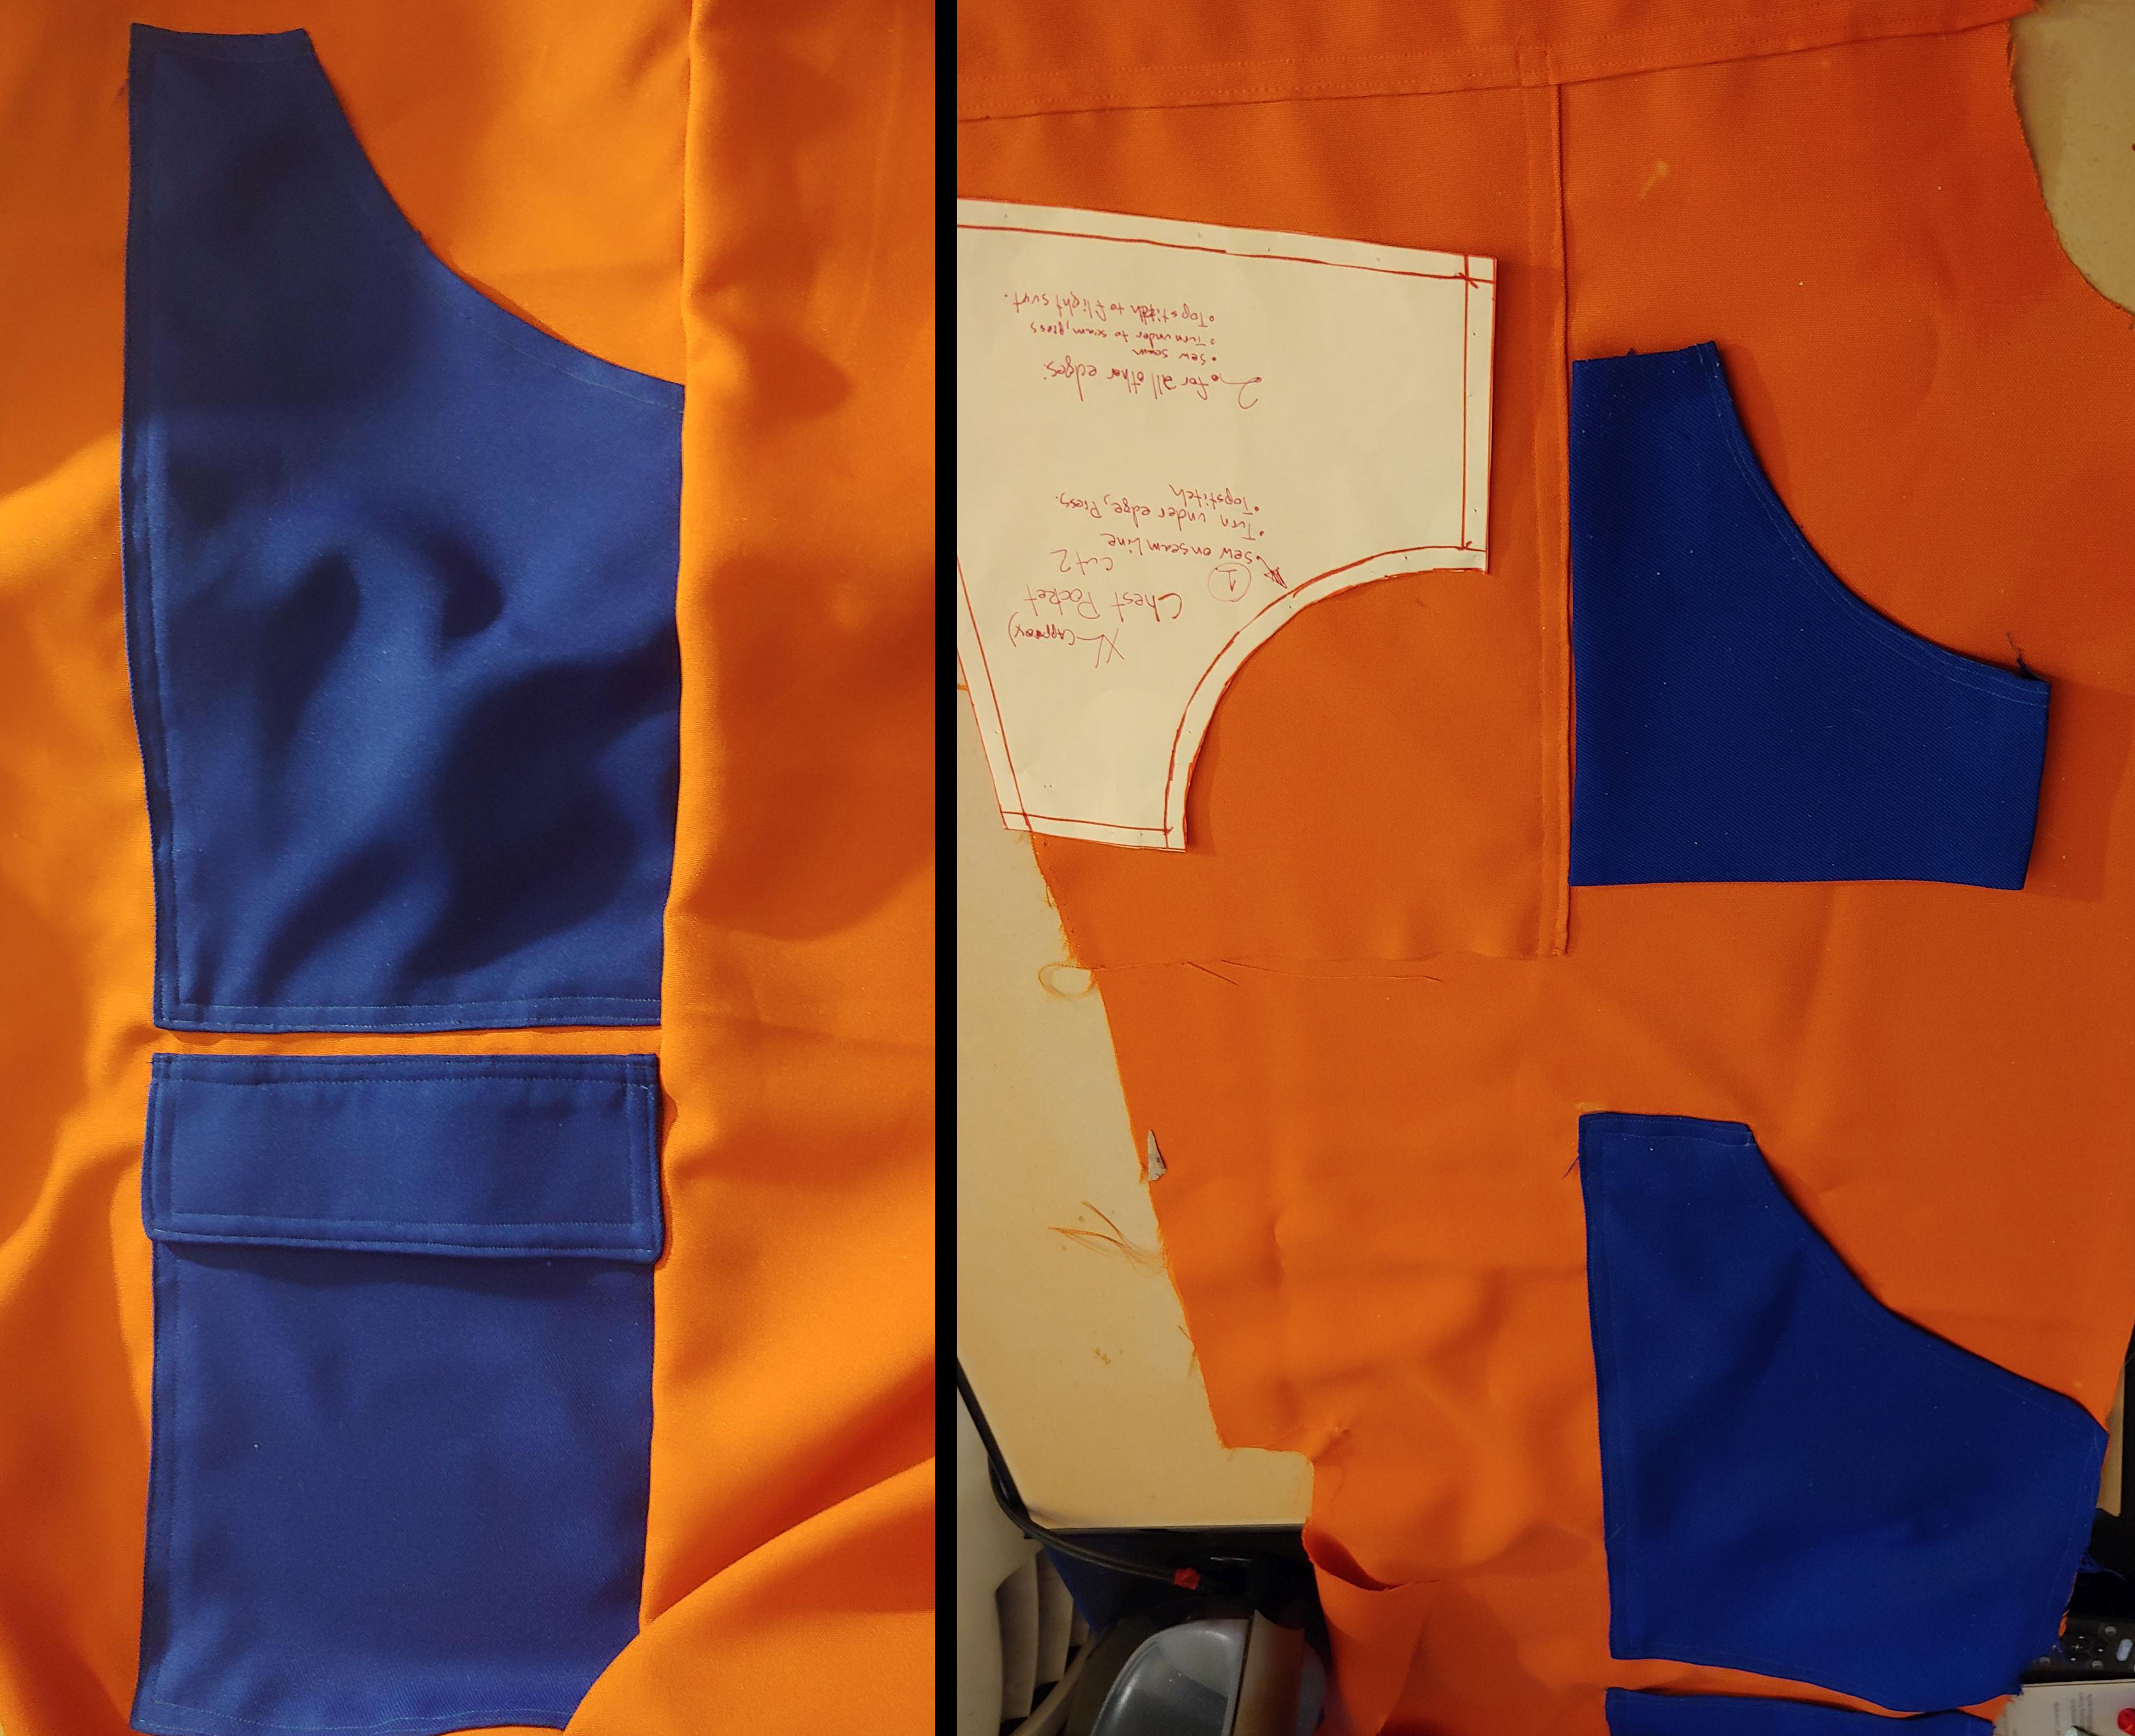
The left pocket is an awkward wacky shape and I will need to add a rectangular one to the right sleeve. - Chest yoke:
I did have enough fabric to add these two sections on either side of the front closure. - Chest pockets:
Once there is a test fit, I will be better able to figure out size and placement of these *see not on lower pockets - Waist ‘belt’:
Same as above, hopefully I have enough of this orange fabric to make a ‘belt’, maybe I can make it from multiple pieces and hide the seams in the folds that the elastic band inside will make. - Lower sleeve closure:
The pattern calls for a stretchy fabric closure, that’s not what the screen used ones did, so I will need to create these strap closures. - Lower pocket shape/placement:
Not going to be changing this. I didn’t find the rebel jumpsuit template until after I had attached the pockets. I have no desire to to take the time to rip out the double top stitching that every seam has. Nope. Deal with it. …though, if I sew on a faux pocket flap half way down the larger pocket, this flight suit would be like Luke’s with 4 square pockets on the leg.
Beginning the Construction:
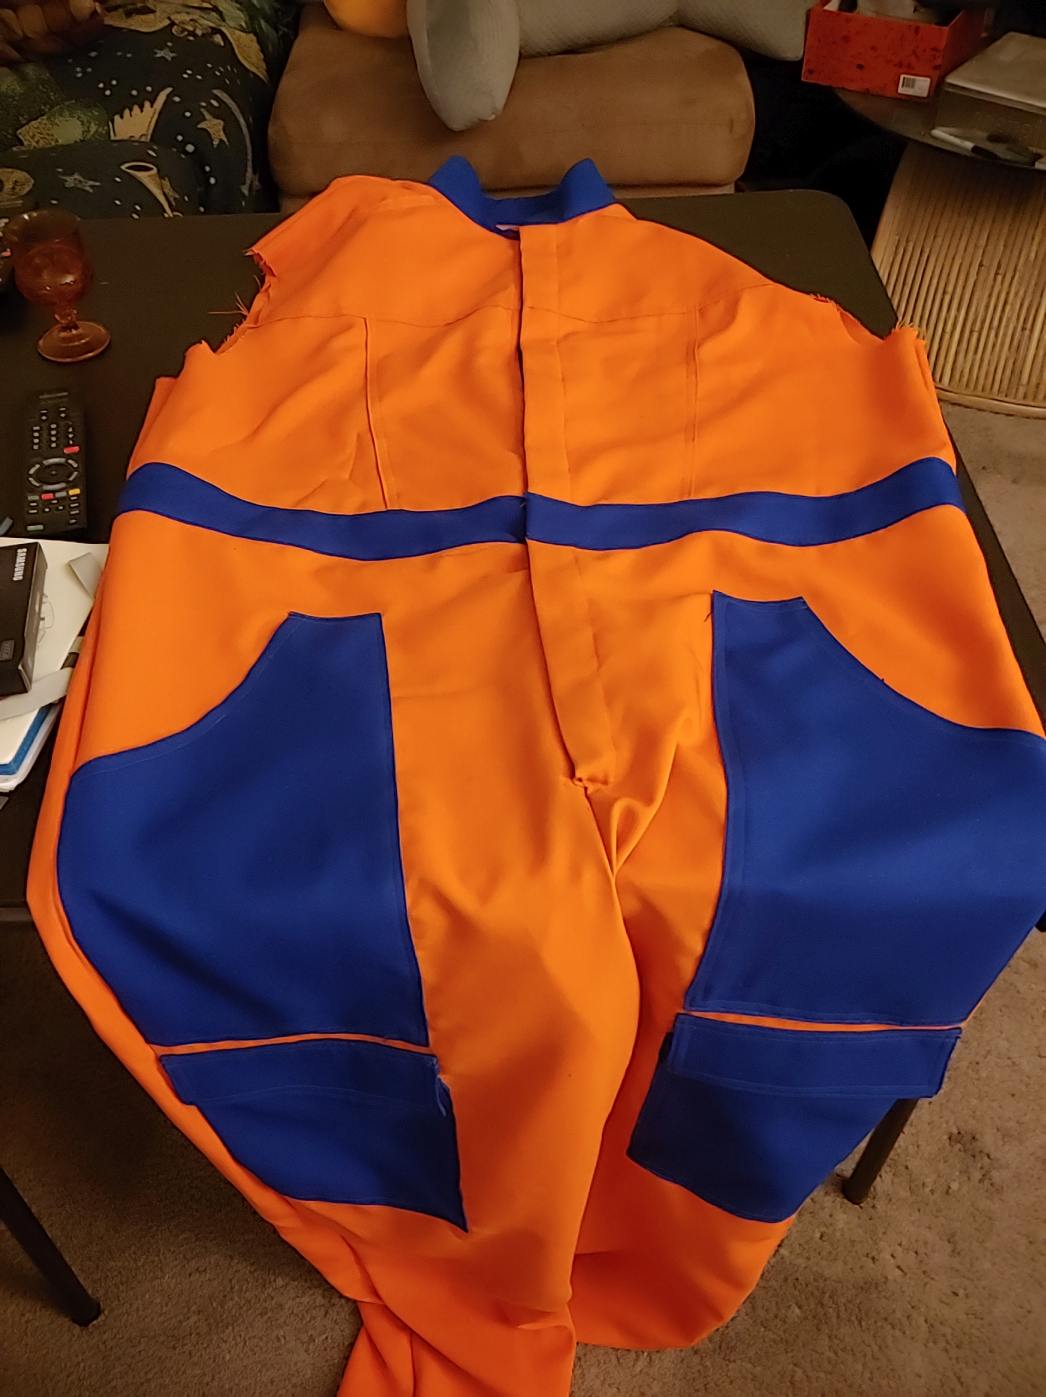
Enough planning. Let’s just jump into it, shall we? First off, I will mention again, that the majority of plan for this costume revolved around a bolt of orange fabric that has been sitting in my apartment for a year. Cutting out the pattern pieces is easy. Pinning the templates to the fabric is easy.
 Trying to figure out where to place the pieces on a limited amount of fabric should have been easy. But I did not space the templates out efficiently and had a few problems.
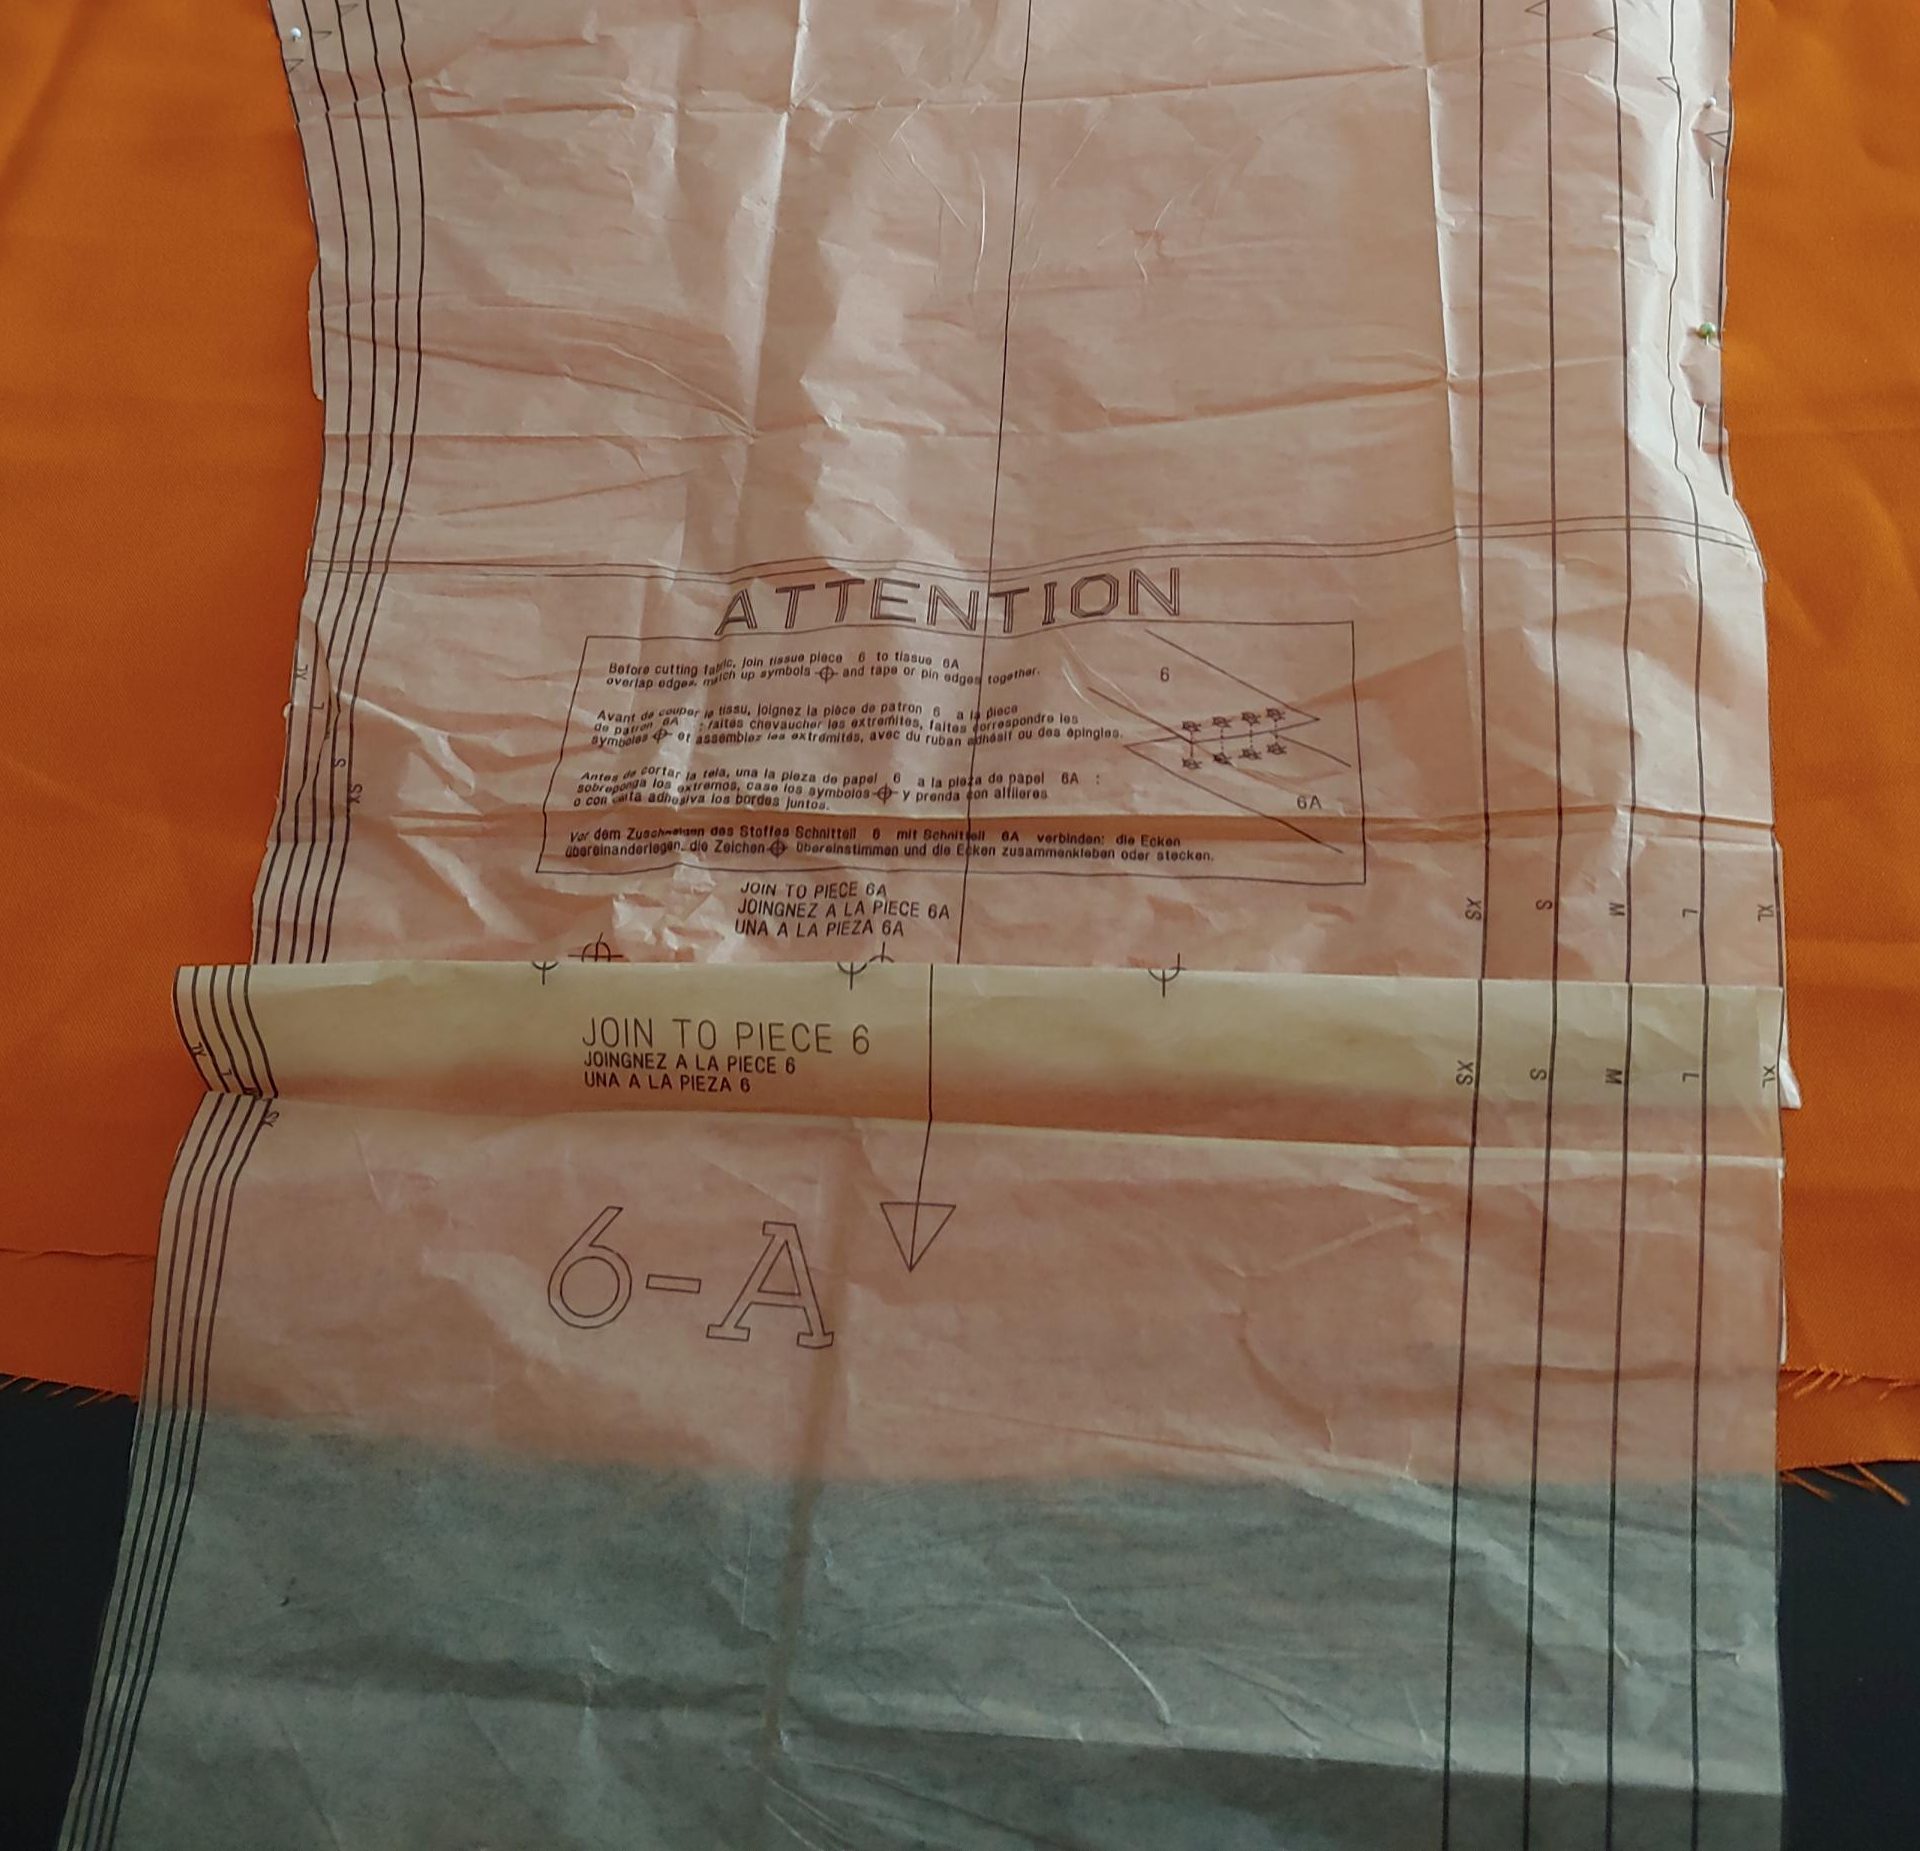 As you can see from the picture on the left, I ran out of fabric for the back side pieces. So, this particular jumpsuit is going to have a weird seam towards the bottom where I had to sew on more fabric. Hopefully this will be hidden by the boots or by how the jumpsuit lays/folds in the end.
I also ran into an issue with one of the sleeves. Just like the above mistake, I miscalculated and no matter how I oriented the template, I was going to missing a portion. I would not be able to add fabric like with the leg pieces, so my only other option was to use some left over fabric from the other costume builds. The other scrap orange fabric I had is a little stiffer and ‘redder’ than what I’m using for this build, but I don’t really have another option at the moment.
Additions, Ignoring, and Panic.
With the failures out of the way, time to move on to an intentional difference (and to a less extent a accurate addition). If you look at #2 on the graphic at the beginning of this post, both patterns have a seam going across the chest, the difference is the sewing pattern has an additional seam below the shoulder seam (referred to as the ‘yoke’ in the instructions). The correct version has the piece of fabric that creates this ‘yoke’ extends all the way to the shoulder seam. I didn’t have the spare fabric to extend this piece due to another addition i needed to make using up what I left. That addition? A seam that is perpendicular to the shoulder yoke that runs at a slight inward angle (see #4 above). I will use this seam to align the chest pockets (#5),
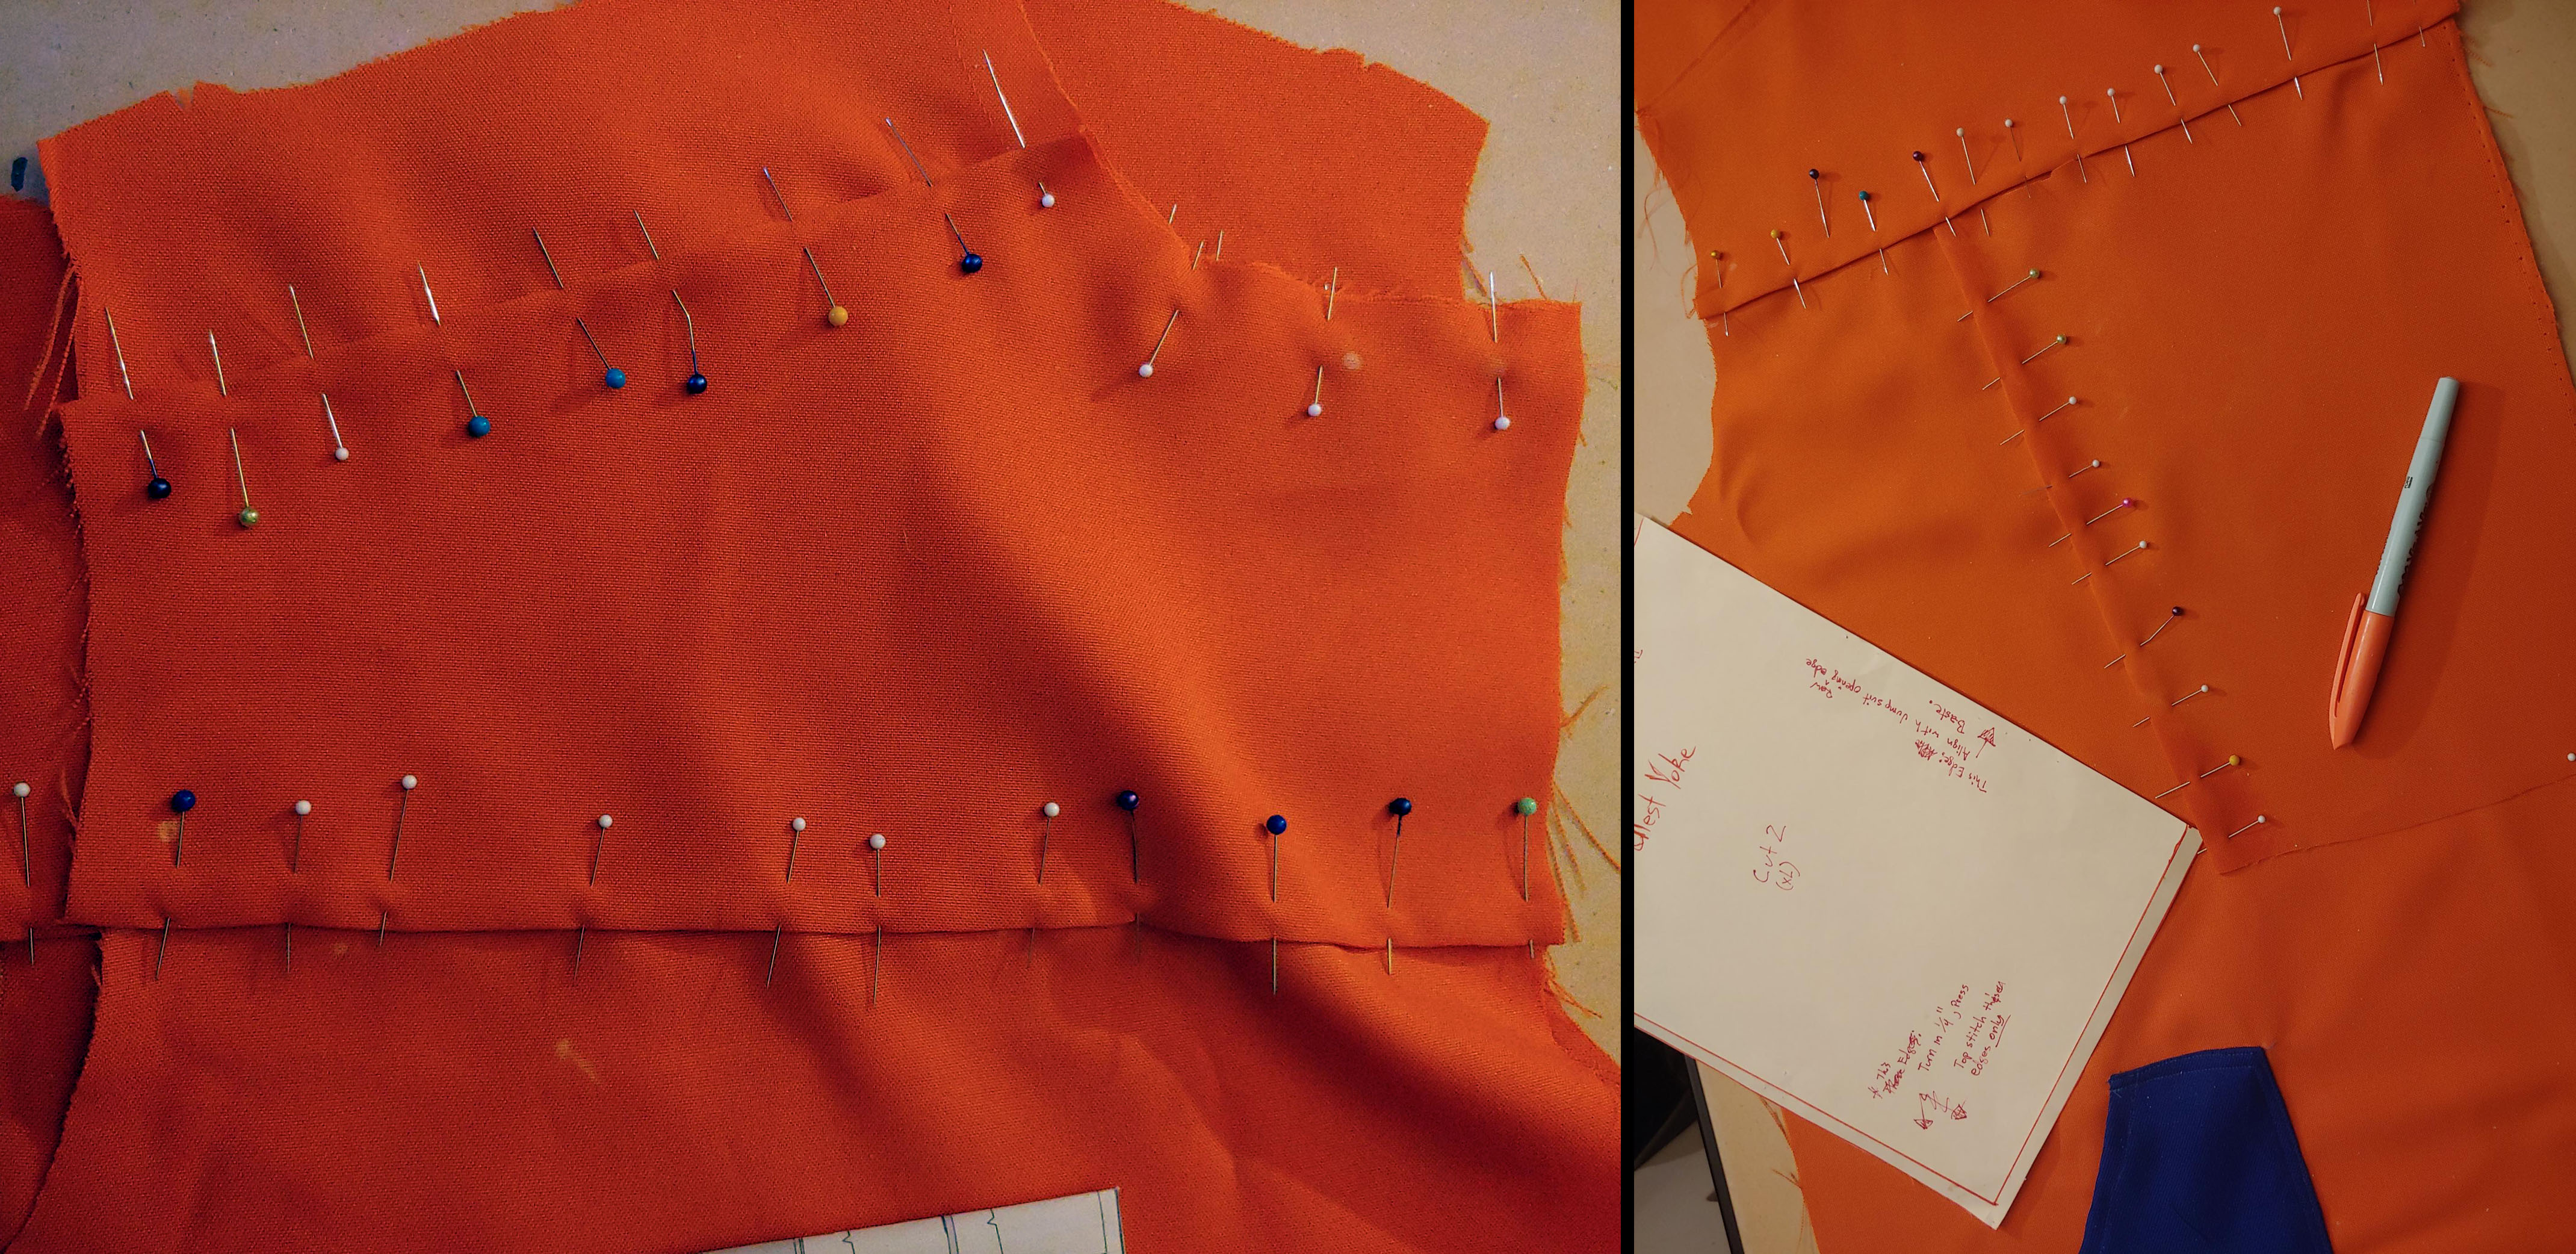
I’m pretty sure that Simplicity omitted/changed these bits because a complete X-wing Pilot costume has that white vest that would cover these parts up anyway. You may notice that the lower edge of the chest yoke is not pinned in the above picture, that is because there is a ‘belt’ that the end of the seam will be hidden by.
Next up, adding the numerous pockets. Not much to say here other than that the Chest Pocket template I made was very wrongly proportioned and shaped (these didn’t get sewed on). The large pockets are a little too large, but I think I have a little plan that will trick the mind (see note #8 at the top)
With the (majority) of pockets attached. I sewed the two front halves together and then the front to the back pieces. The closure in the middle is secured with ‘velcro’.
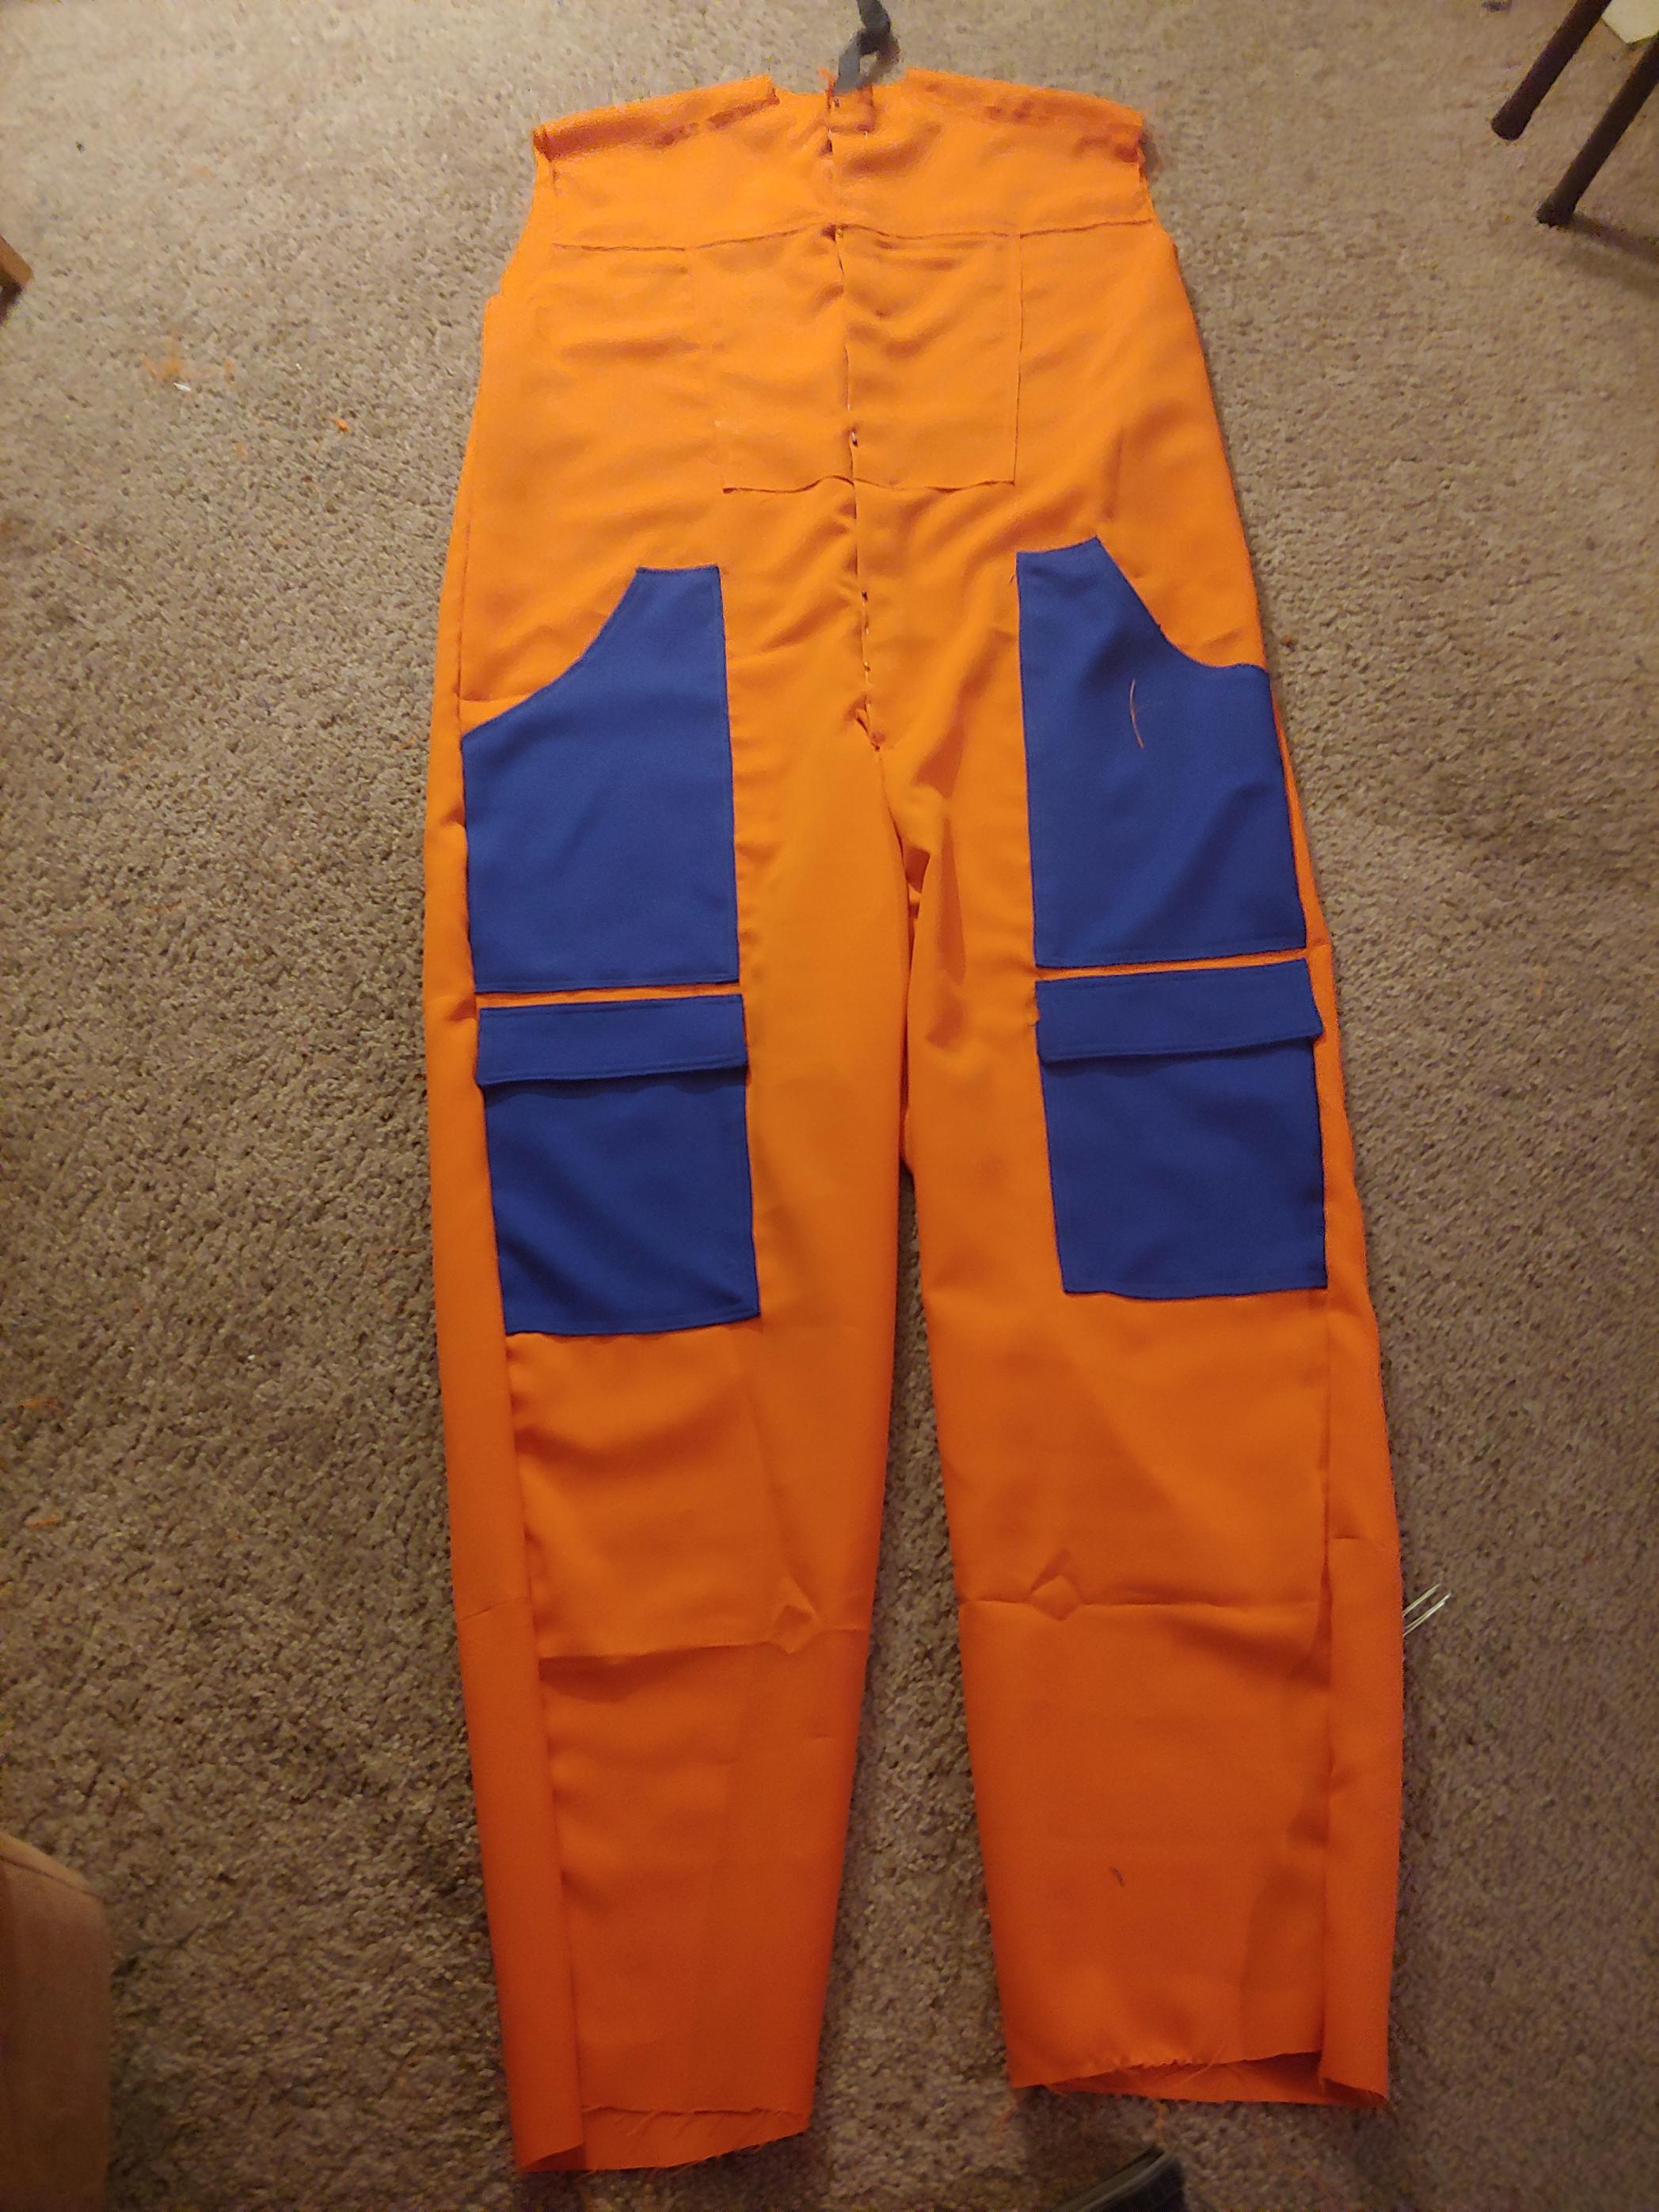
I had Ian try it on (no pics…I forgot to take a whole bunch of pictures of things) and determined that it was about 1.5″ inches to short in the mid section. Originally I was going sew the ‘belt’ section on just over the fabric, but because I need to lengthen the mid section, the belt will double as 1.5/2″ extension. So it all works out(ish).
The belt had to be positioned at the bottom edge of the chest pockets, and due to this, the belt may be higher than it would be on a standard flight suit. This is again, due to the limited supply of the orange fabric I had on hand. However, on the final project, this area will most likely be covered by a utility vest.
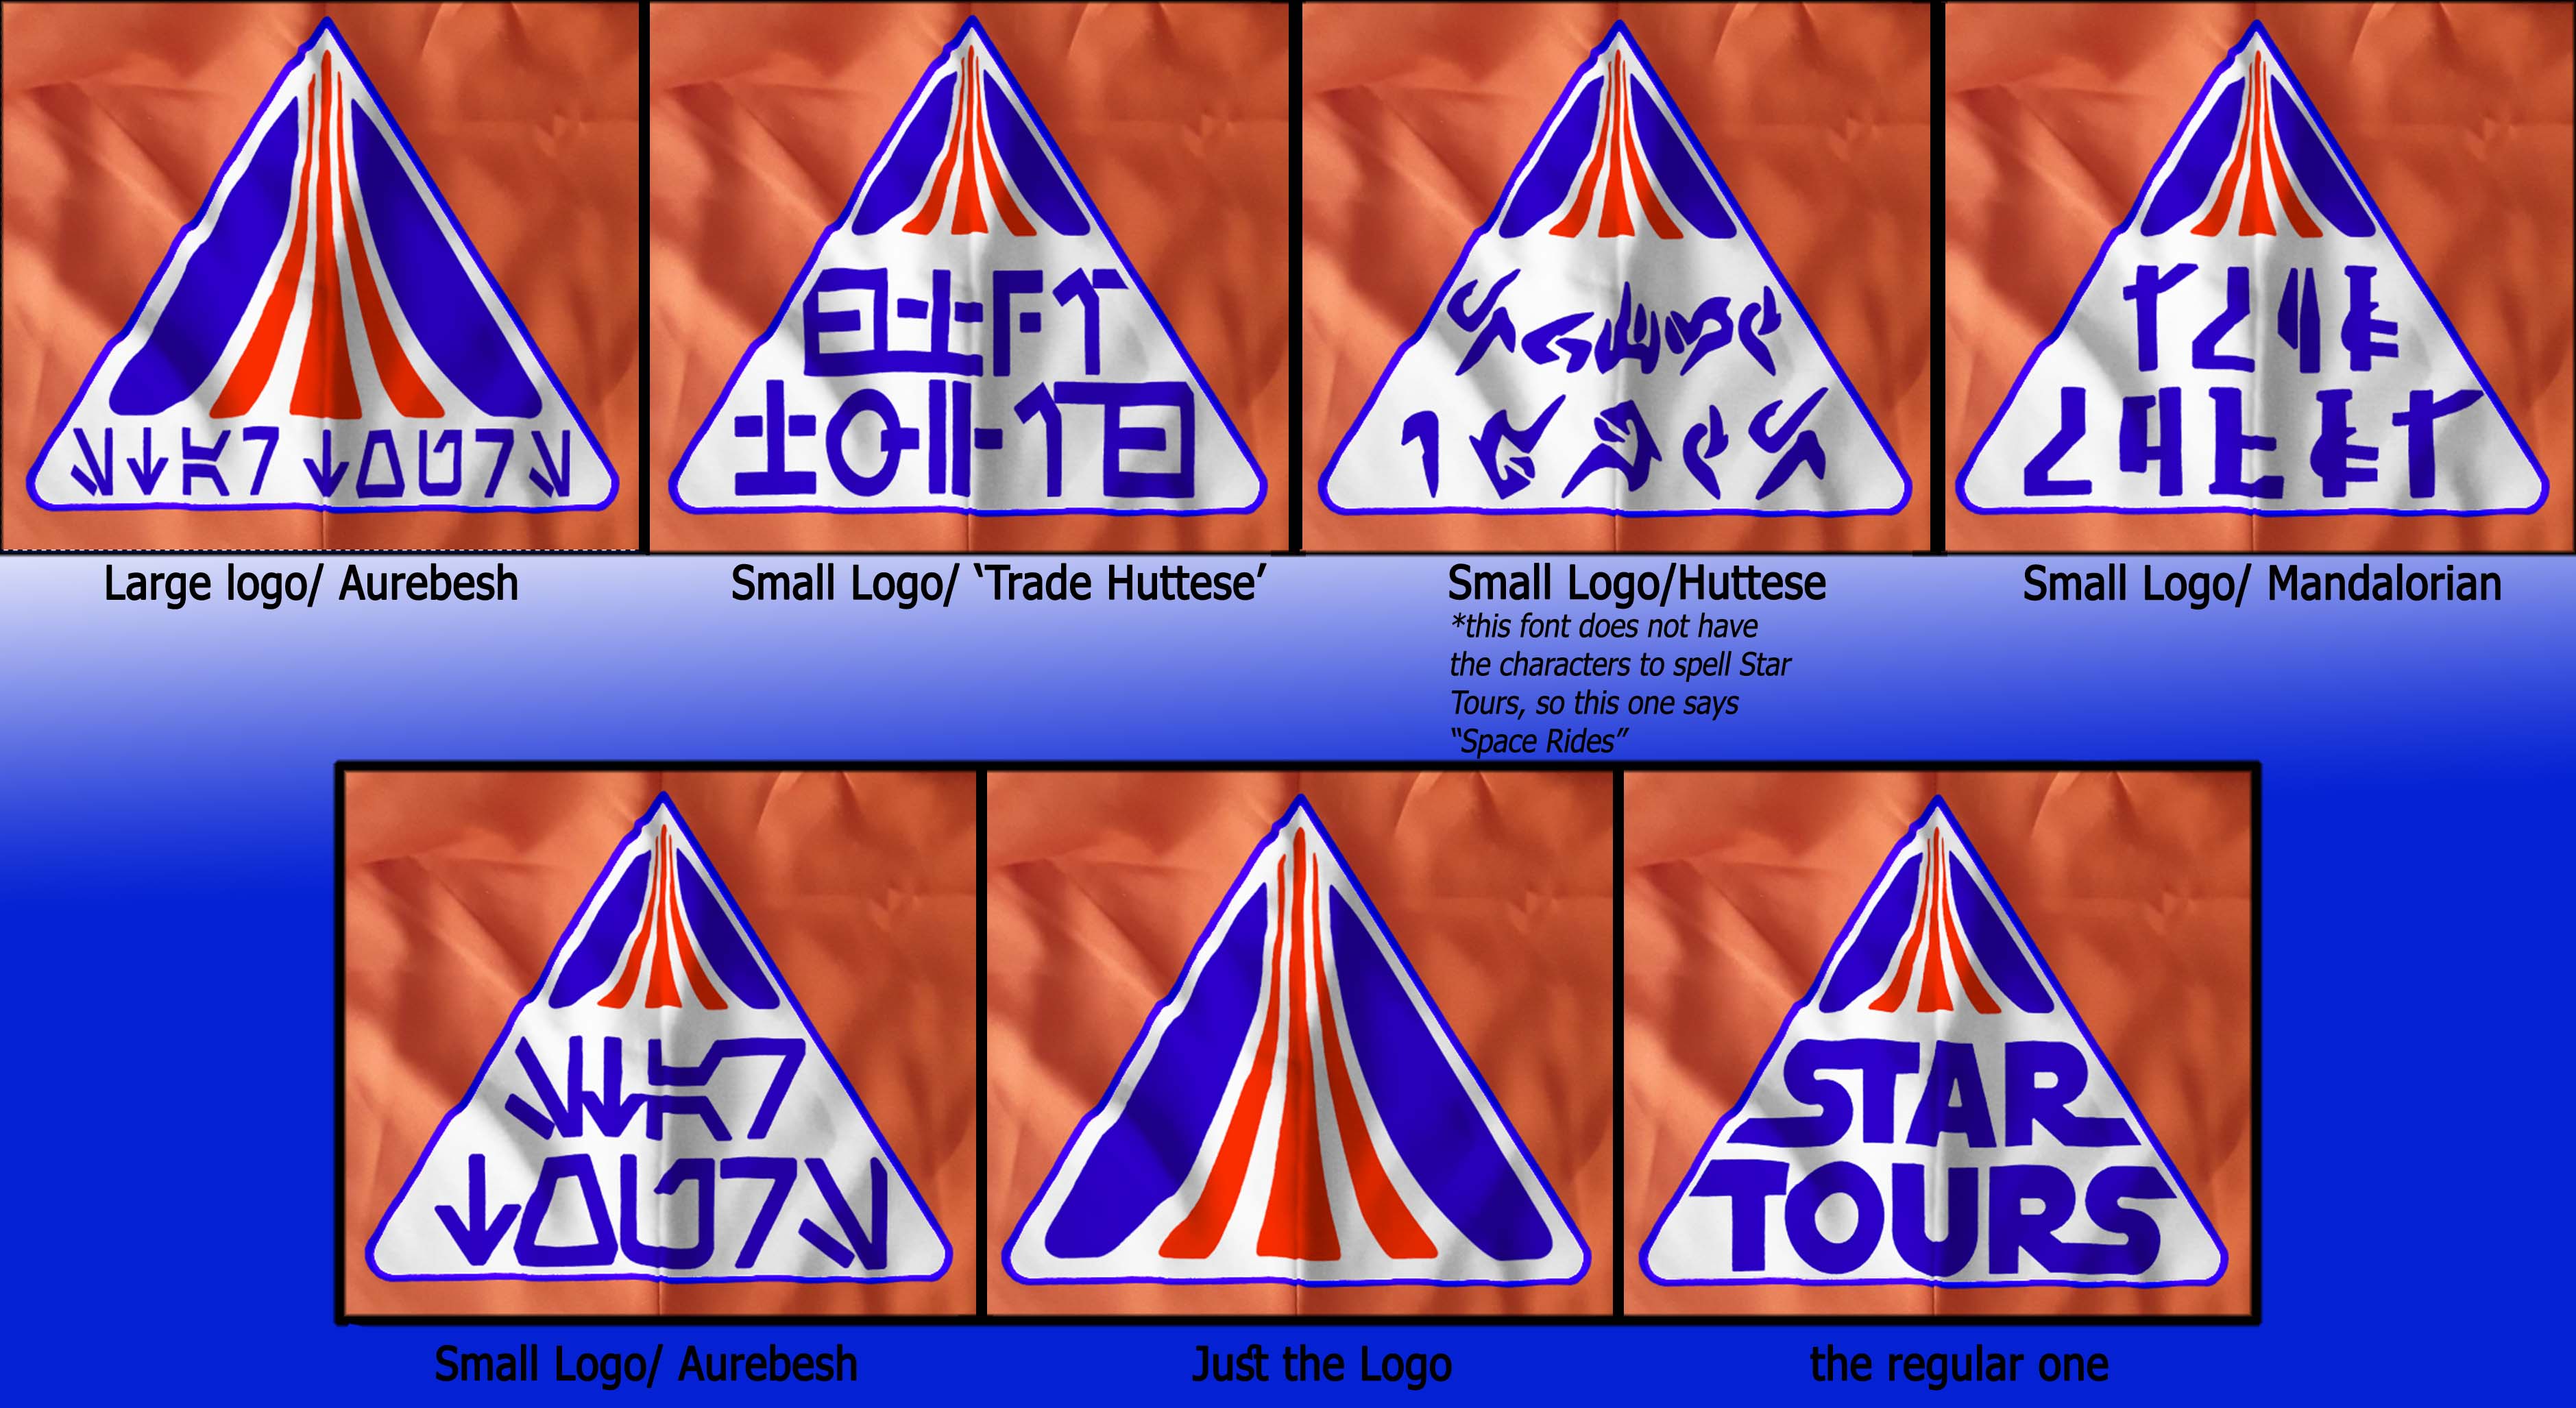
Lastly, to finish up this post. I needed to create a ‘Star Tours” image to slap on the back of the flight suit. I knew I wanted to incorporate the Star Tours logo, but maybe mix it up. I downloaded a number of Star Wars fonts and made the following concept images.
The image will be printed on canvas and sewed on like a patch. It will measure about 13″ wide and 11″ tall (if I remember the dimensions right).
Printing a custom image means one thing:
![]()
A trip to TrooperBay, a webstore (the physical store is a couple miles from where I live) Star Wars merch/costuming shop. He also runs a custom print shop (shirts, stickers, business signs, etc) and he is my go to for getting stuff professionally printed. Also because iron on transfers don’t look as good as a print on fabric machine!
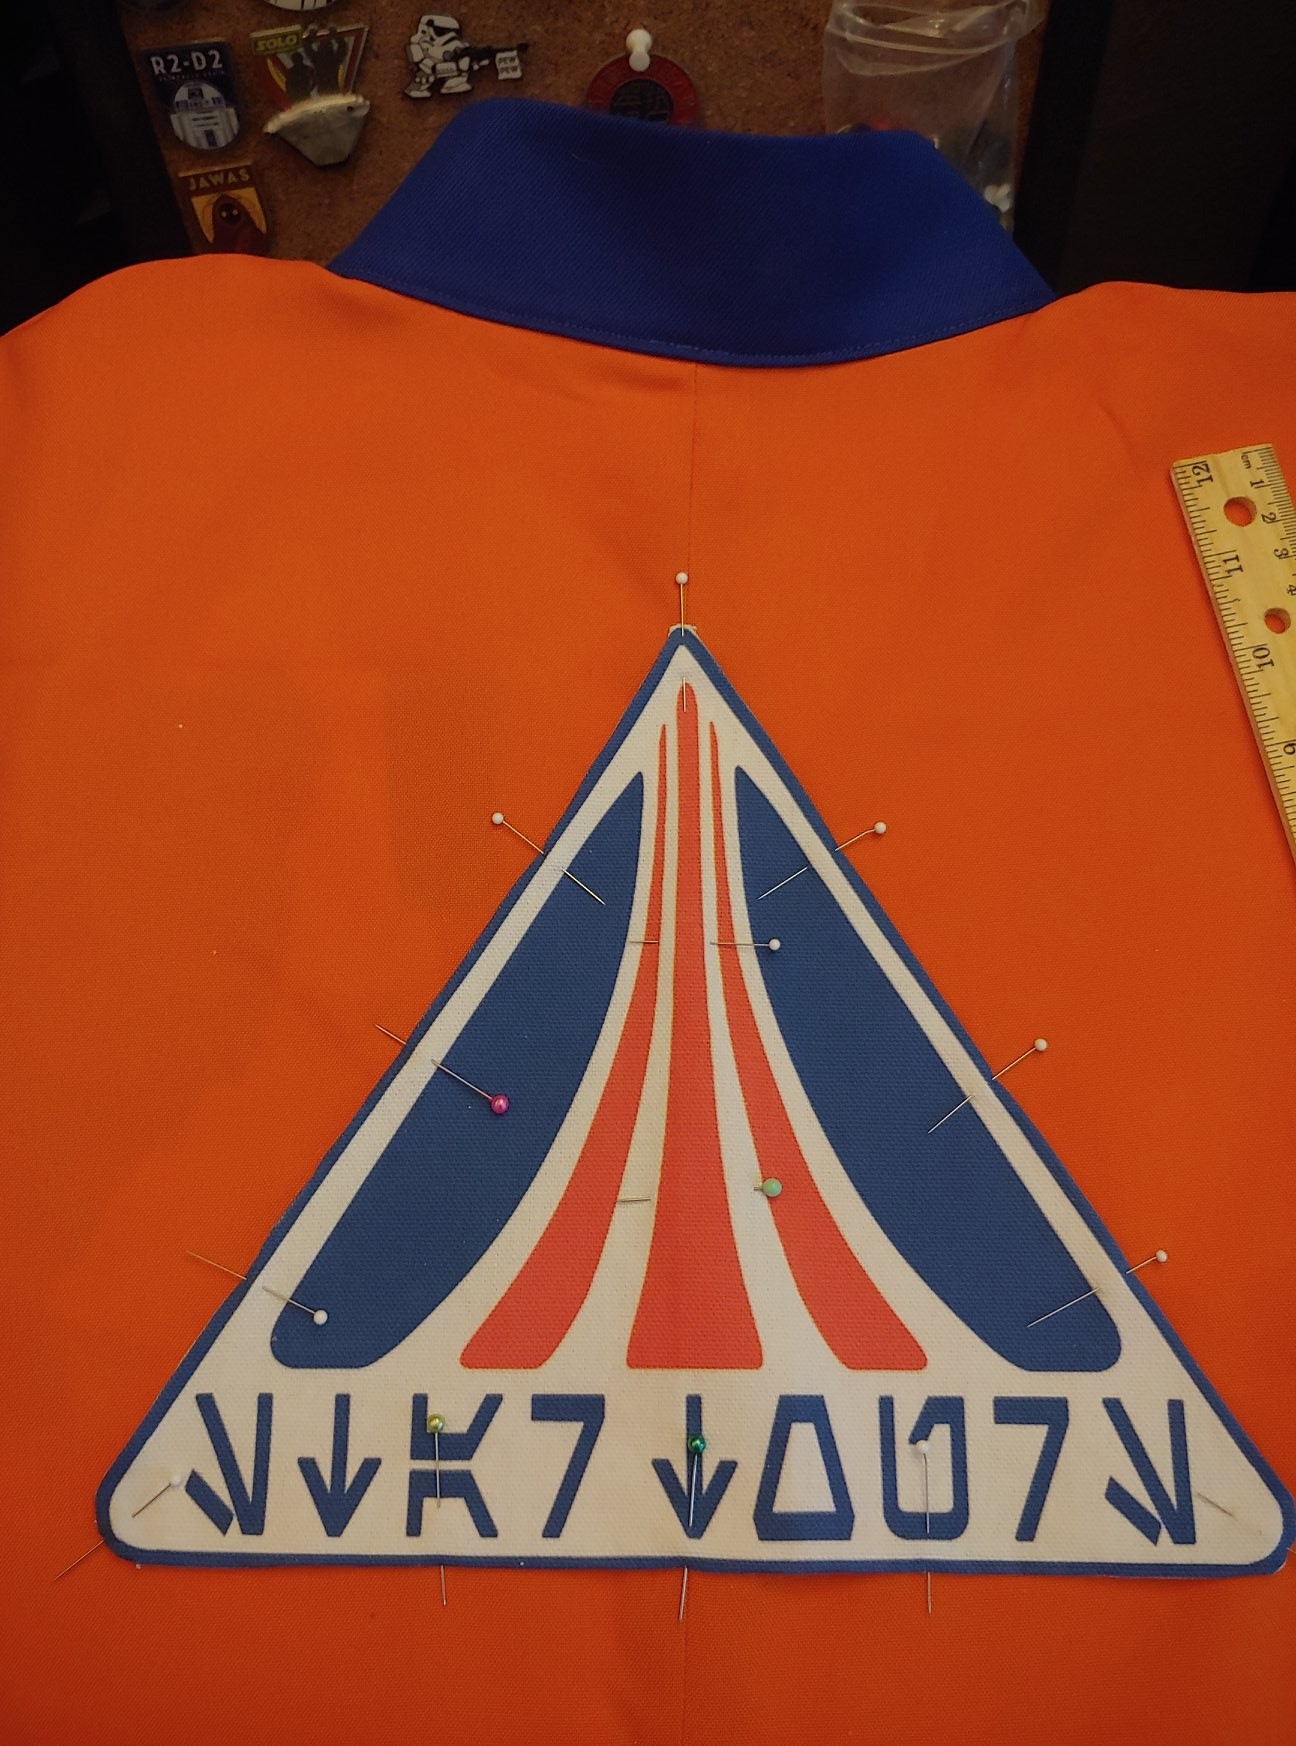
I went with Option 1. At least for this first one (I’ve made enough costumes to know that this is probably going to be the Version 1 of several versions until I start panic sewing the week before Comic Con).
I’m gonna leave it at this for now. Soon though, more posts, more costumes, more tears to be shed, and most importantly, and as always, more Star Tours.
-J(o)n
Next Time (hopefully):
- Finishing the torso part
- Adding ONE sleeve (I promise to explain)
- And starting the search for the misc. Navy surplus gear I’m going to need to modify for this project.
Have a question or suggestion for this build? Send me (Jon) an email at [email protected] or reach out on Twitter at @HothPod!