

*this is a multipart tutorial on how to convert the Rubies E-11 blaster into something well, more. Each post will continue off of the previous one until we have a ‘Screen Accurate’ blaster. Also, use safety items when you need to, a mask and goggles mostly. I forgot to mention that in the post.*
The Repaint
Don’t want to to a crazy amount of work? Don’t really care about 100% screen accuracy? This is the Tutorial for you.
For this part of the build we will be doing 3 major things (and three optional):
- Remove un-sightly seams
- Primer paint the blaster
- Paint the blaster black
Optional bits:
- Paint the T-Tracks
- Dry brush the scope (weathering)
- Dry brush the gun (weathering)
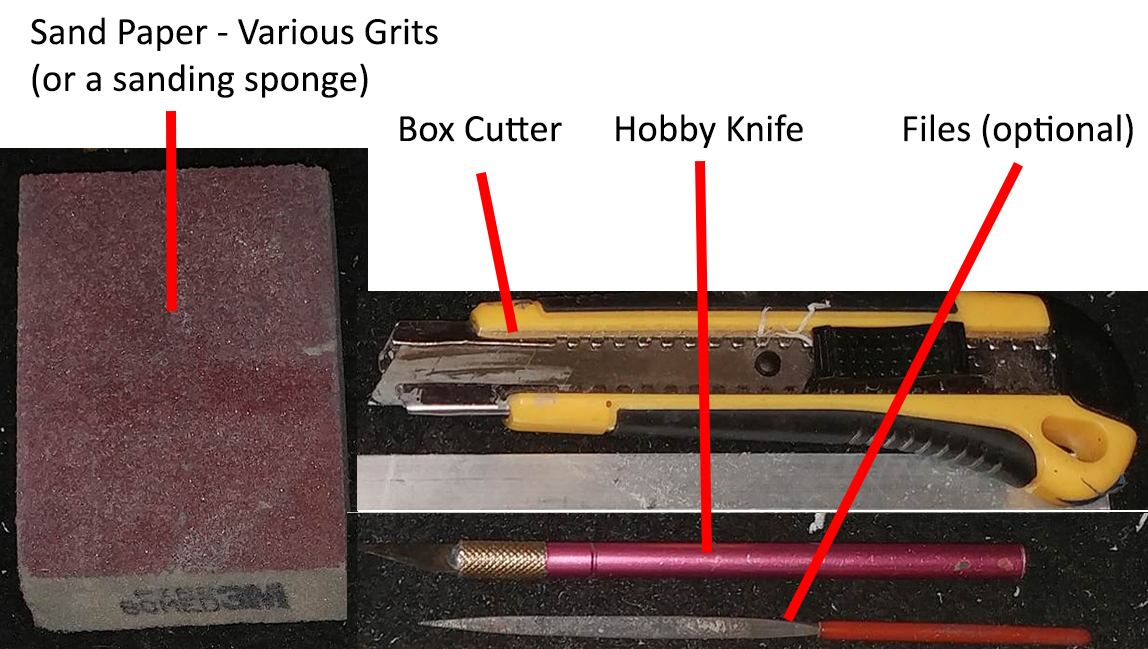
What you’ll need:
- Hobby Knife/Sharp blade
- Sand Paper/Sanding Sponge (various grits)
Paint:
Any craft store (Michael’s/Joann’s/Hobby Lobby/Wal-Mart…Ben Franklin, are those still around?) should have the acrylic paints for around $1-2USD. The enamels are usually around $2-3, I don’t buy the enamels often).
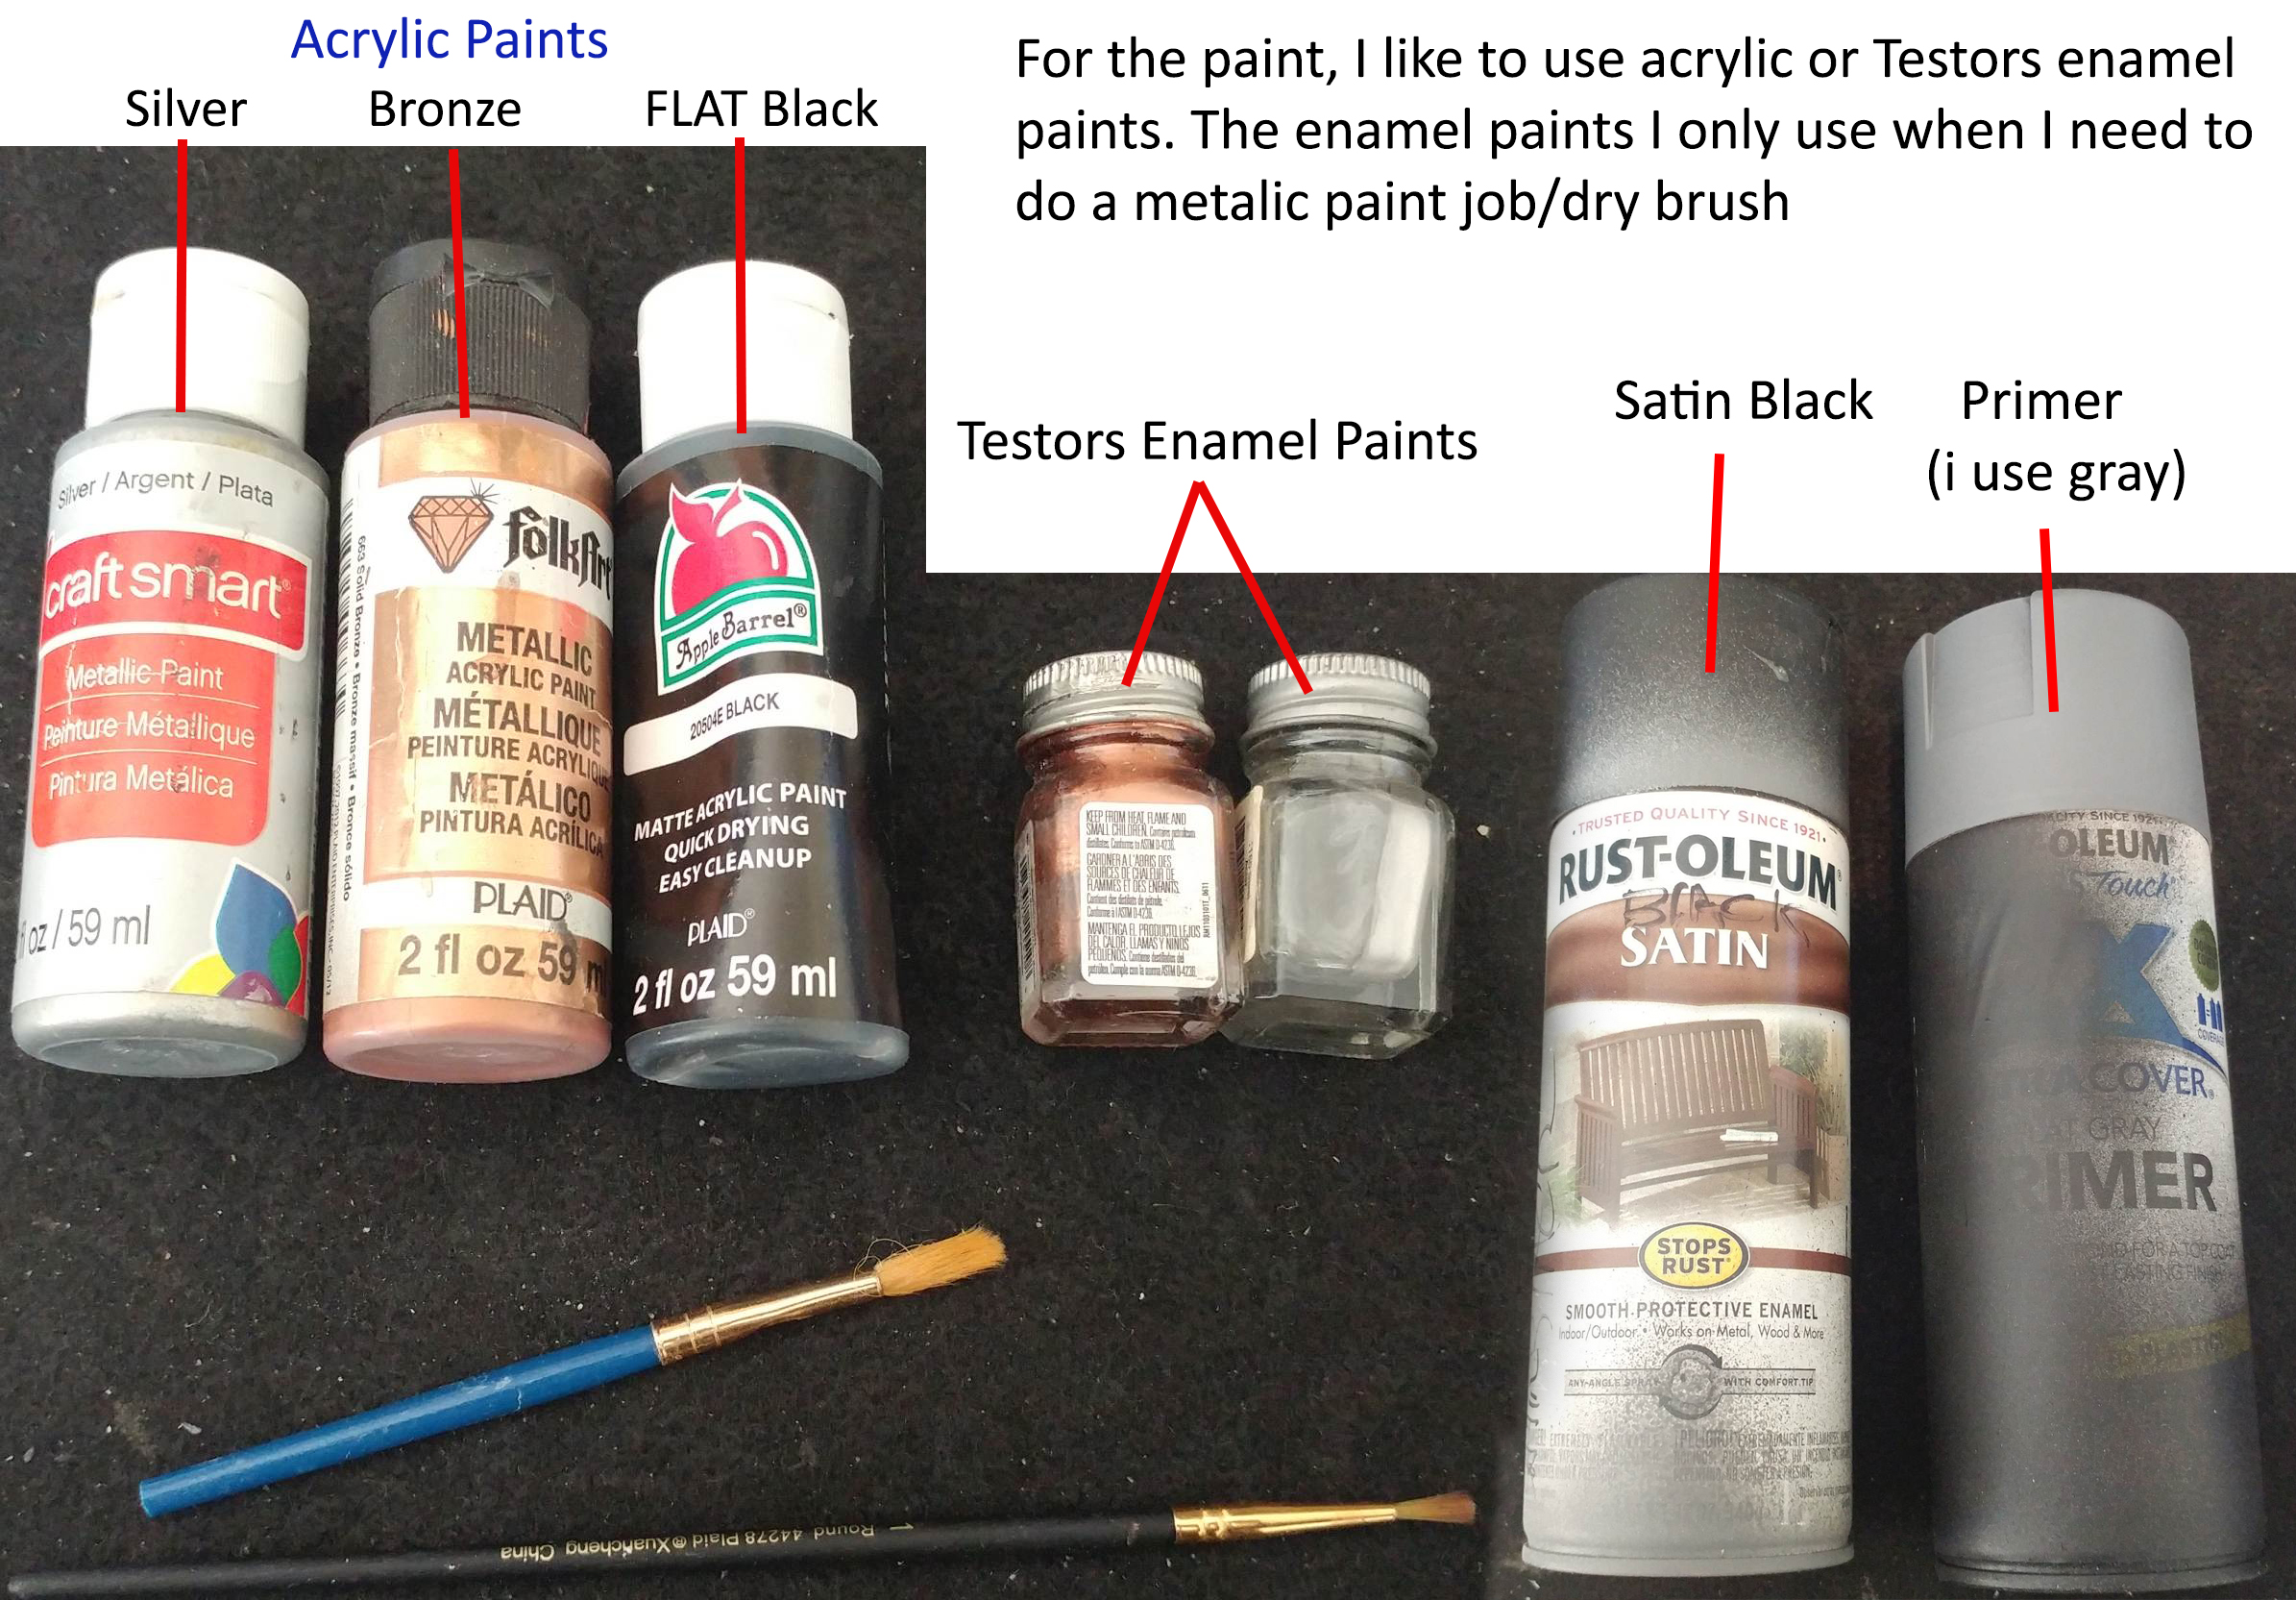
- Primer
- Black (Satin Finish)
optional:
- Silver Metalic
- Bronze
- Black (flat)
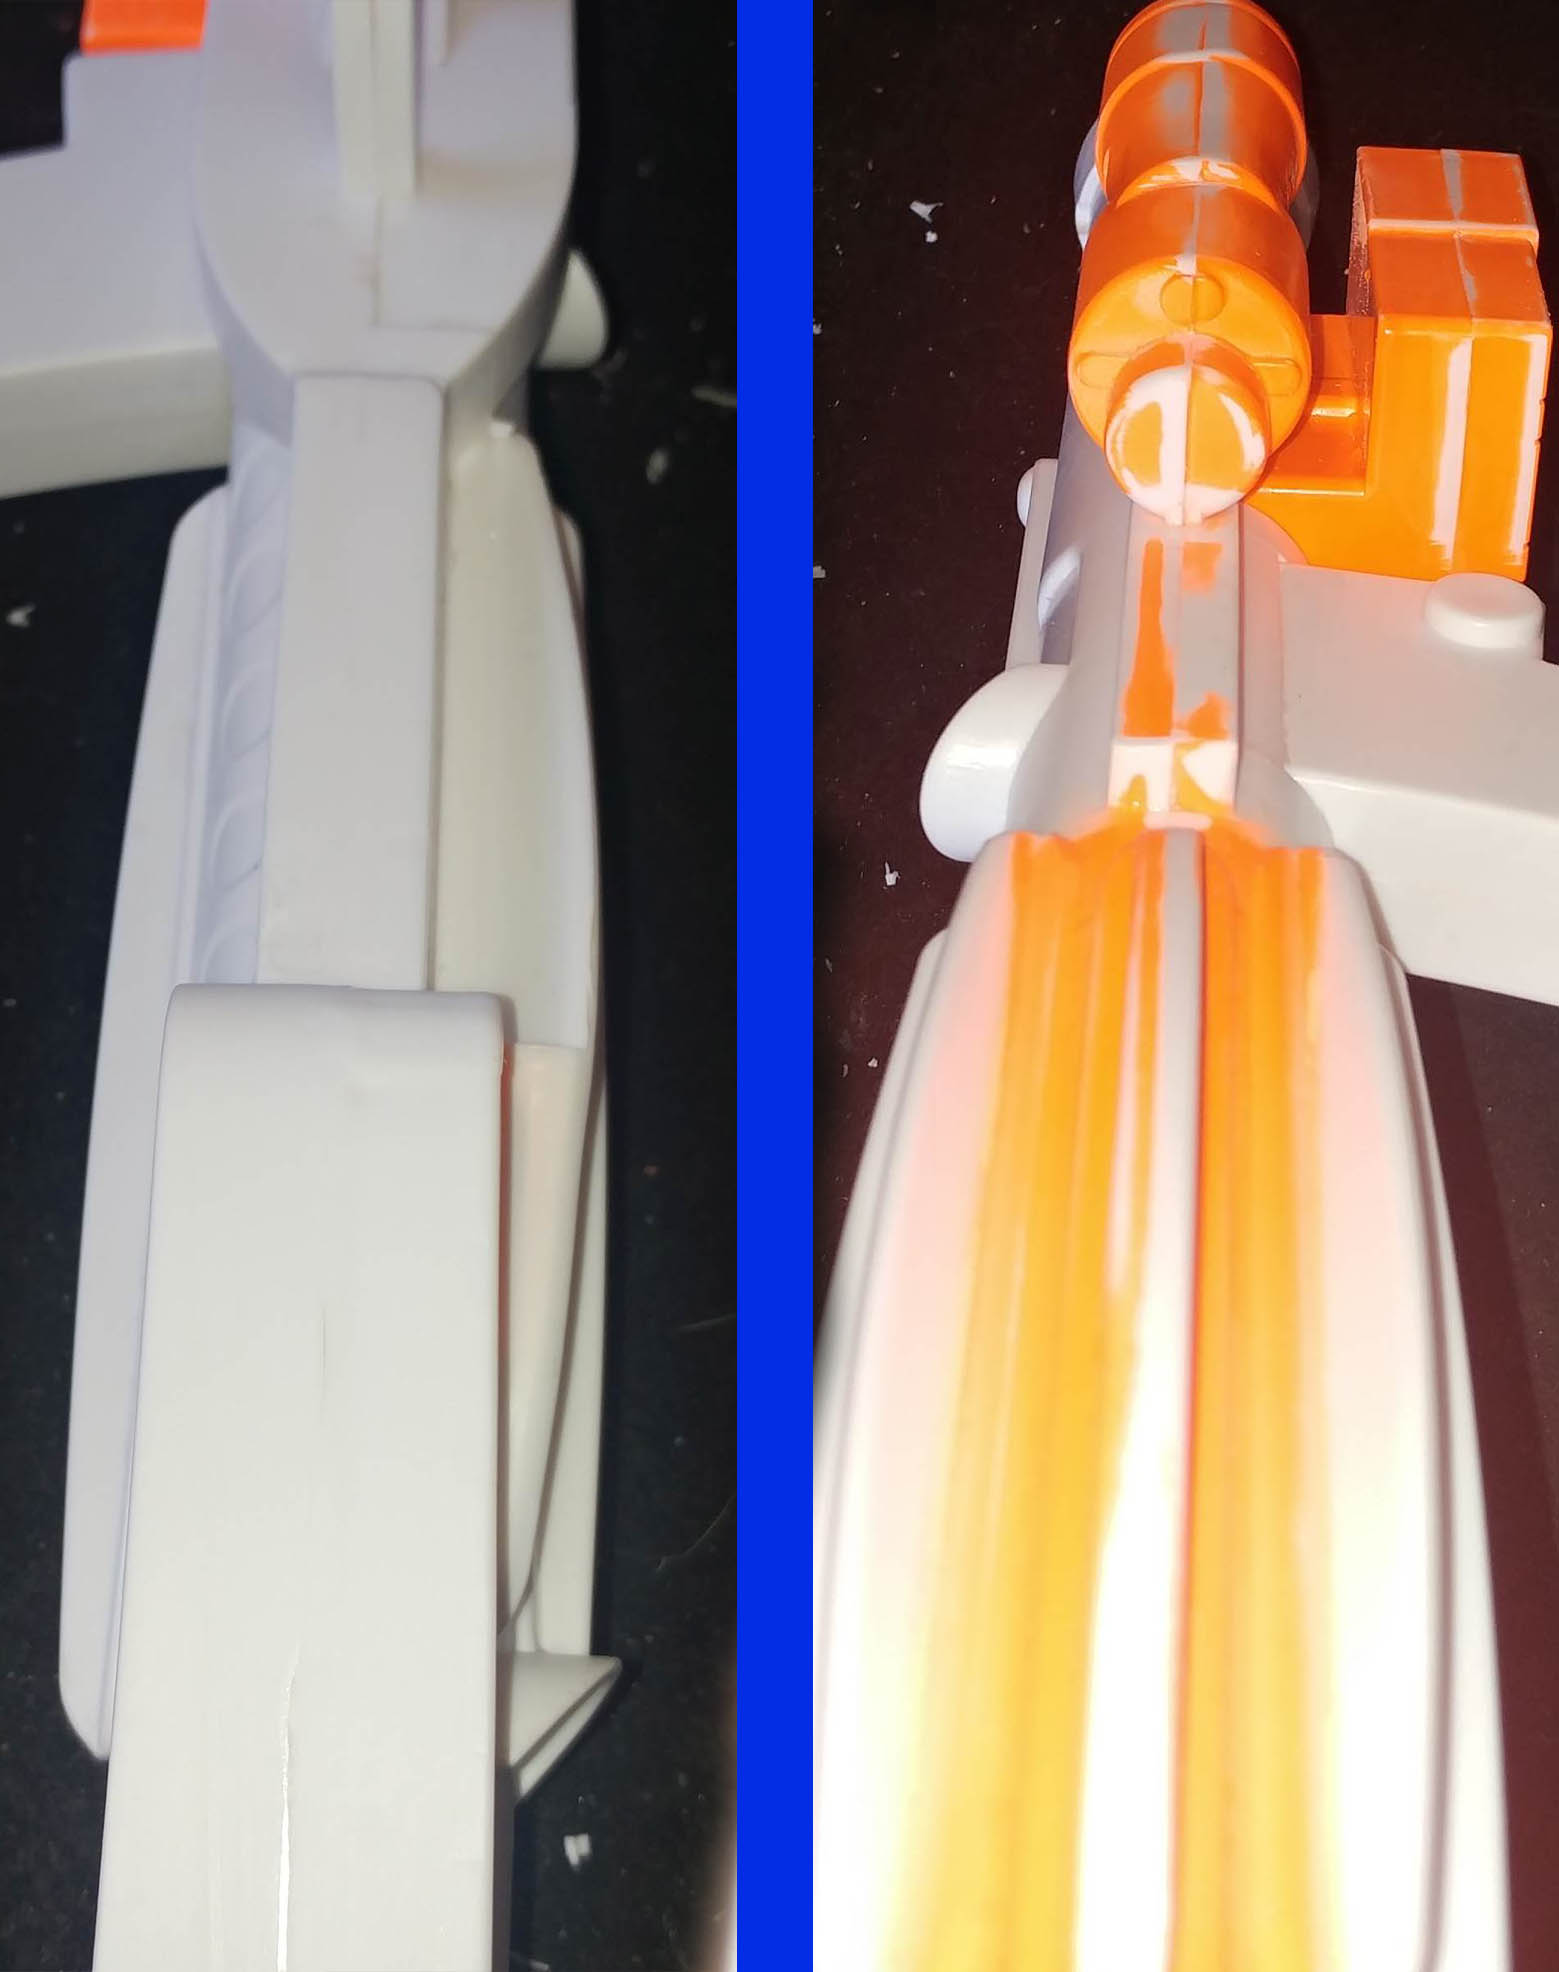
Dealing with those horrible seams
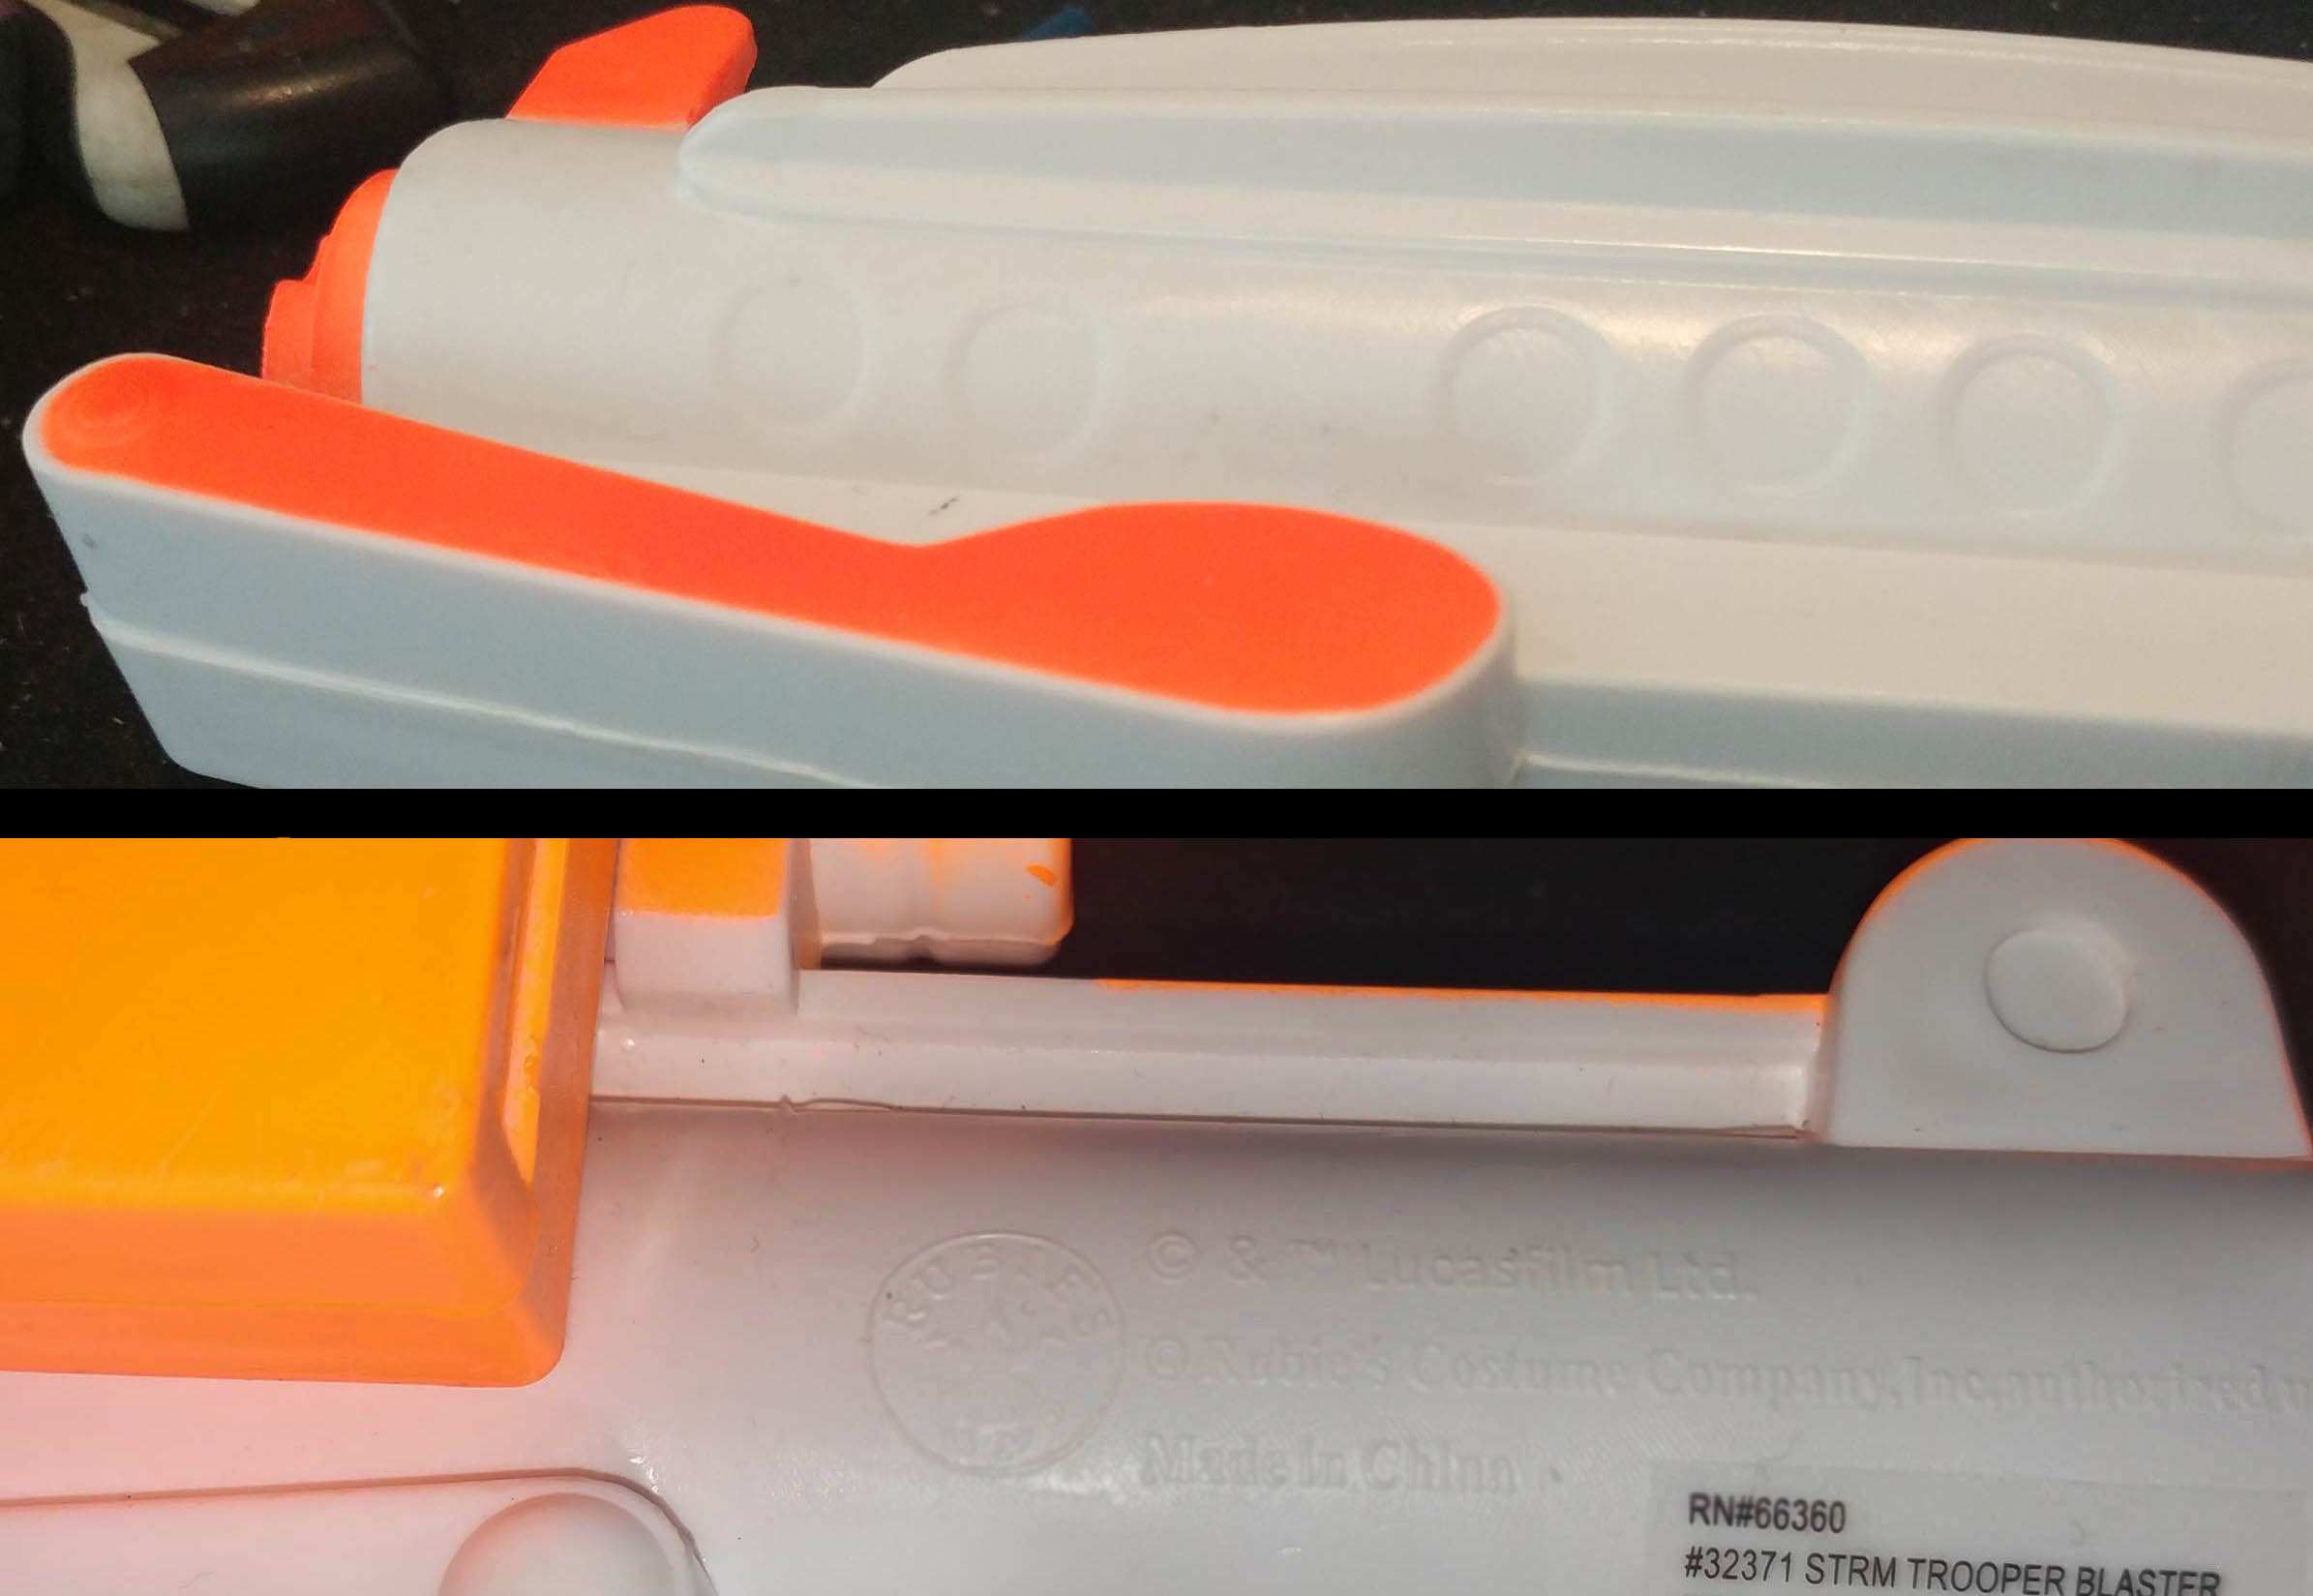
These blasters are made from two shells glued and screwed together. Sometimes those two halves don’t line up so good.
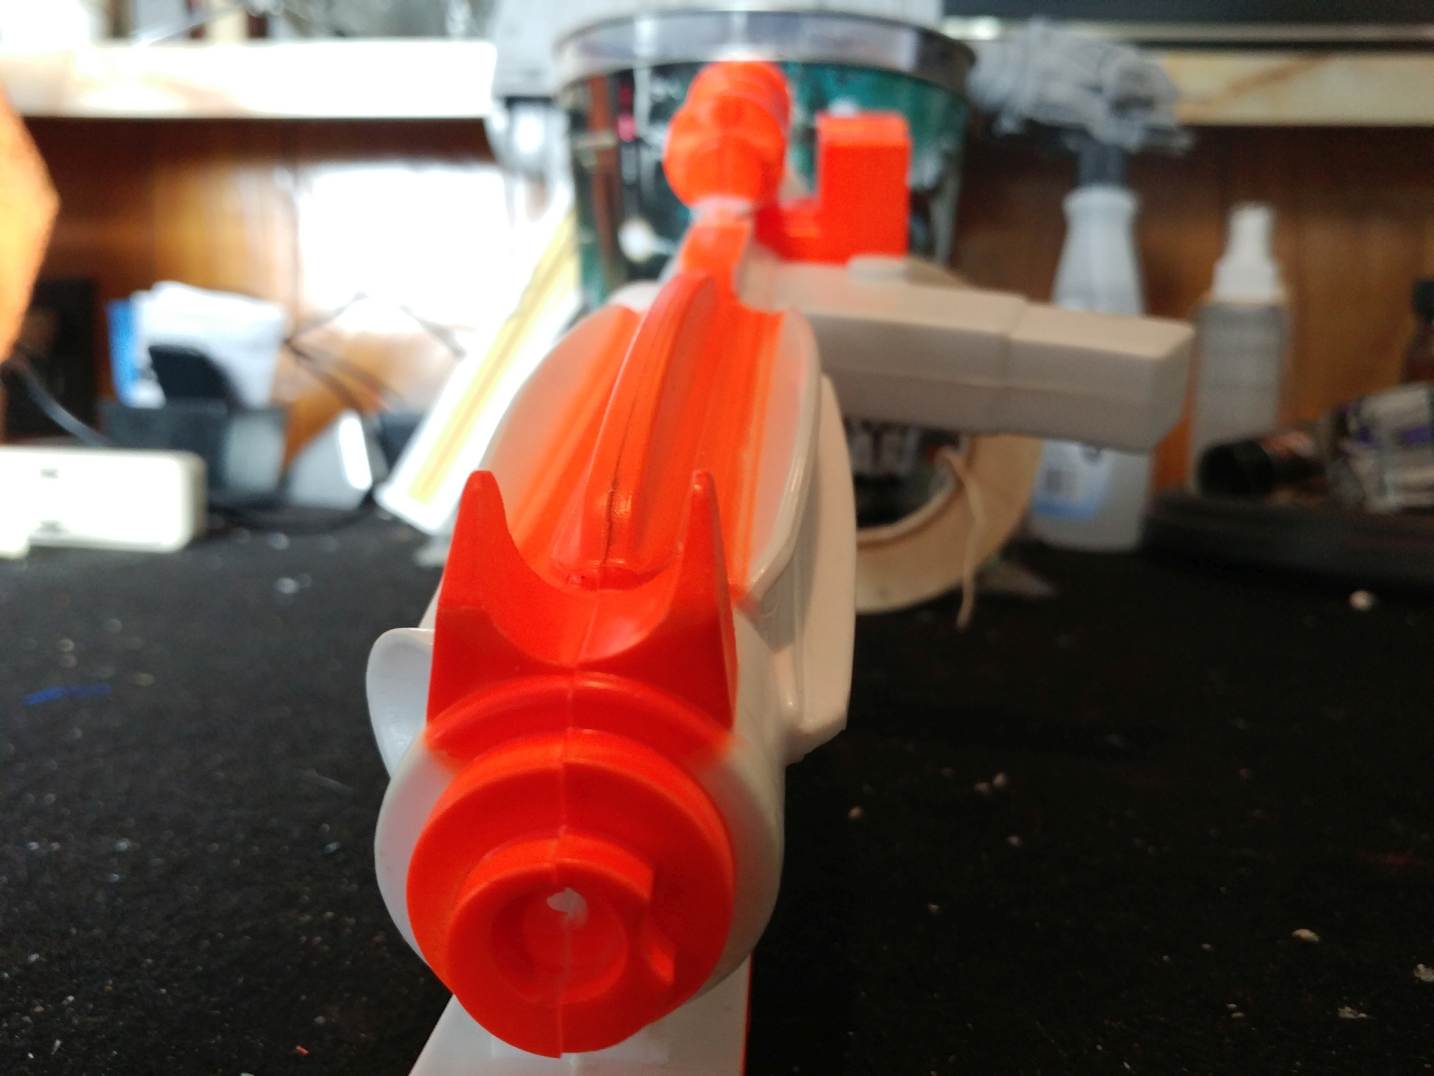
Now, with out a ton of work, involving breaking the thing in half to manually realign the parts, it’s pretty difficult to get rid of all the issues. However we can clean up enough of them. Each blaster is usually different, you might’ve gotten a pretty clean one. The one I’m using has some pretty nasty ones that I couldn’t correct. Due to the nature of this series, I’m using the same blaster for every post, so I cant cut and carve up this one without adding a ton of work in the next post!
Step 1: Give em the Blade
With your Hobby Knife/Box Cuter, CAREFULLY start cutting the excess plastic around the length of the blaster and the Hengstler/Ammo counter box. If one side is obnoxiously off level than the other side, skip it. Trust me, it’s not worth the hassle if you don’t plan on doing major ‘plastic surgery’.
The easiest way to remove the ‘flash’ (the excess plastic) is to place the blade perpendicular to the seam, press the blade firmly and moving the knife away from you with the sharp end trailing (pointed towards you). You may need to do multiple passes this way, but it will reduce the likely hood the blade will grab the plastic and you take out a chunk of material you didn’t want to remove.
Step 2: Smooth it out
Once you have the excess removed, take your sand paper and start smoothing it out the seams. Use a low grit sand paper at first to get the remaining plastic off then a high grit to smoooooooth it out real nice, or at least as smooth as you want it. I use a small file to clean up stubborn areas, this is an optional tool. It just makes things a little easier.
With that out of the way sand down the rest of the body (white and orange bits) this doesn’t need to be anything more that a light sanding, we just want to rough up the surface a bit to give the Paint something to grab on to and give it a strong adhesion.
Painting
Step 3: Laying a Foundation
Before you jump right into painting it black. It’s highly recommended that you cover the blaster in a Primer coat first. This helps later with color uniformity (since this blaster two colors) and, for me at least, helps with identifying areas that can be sanded down a little better.
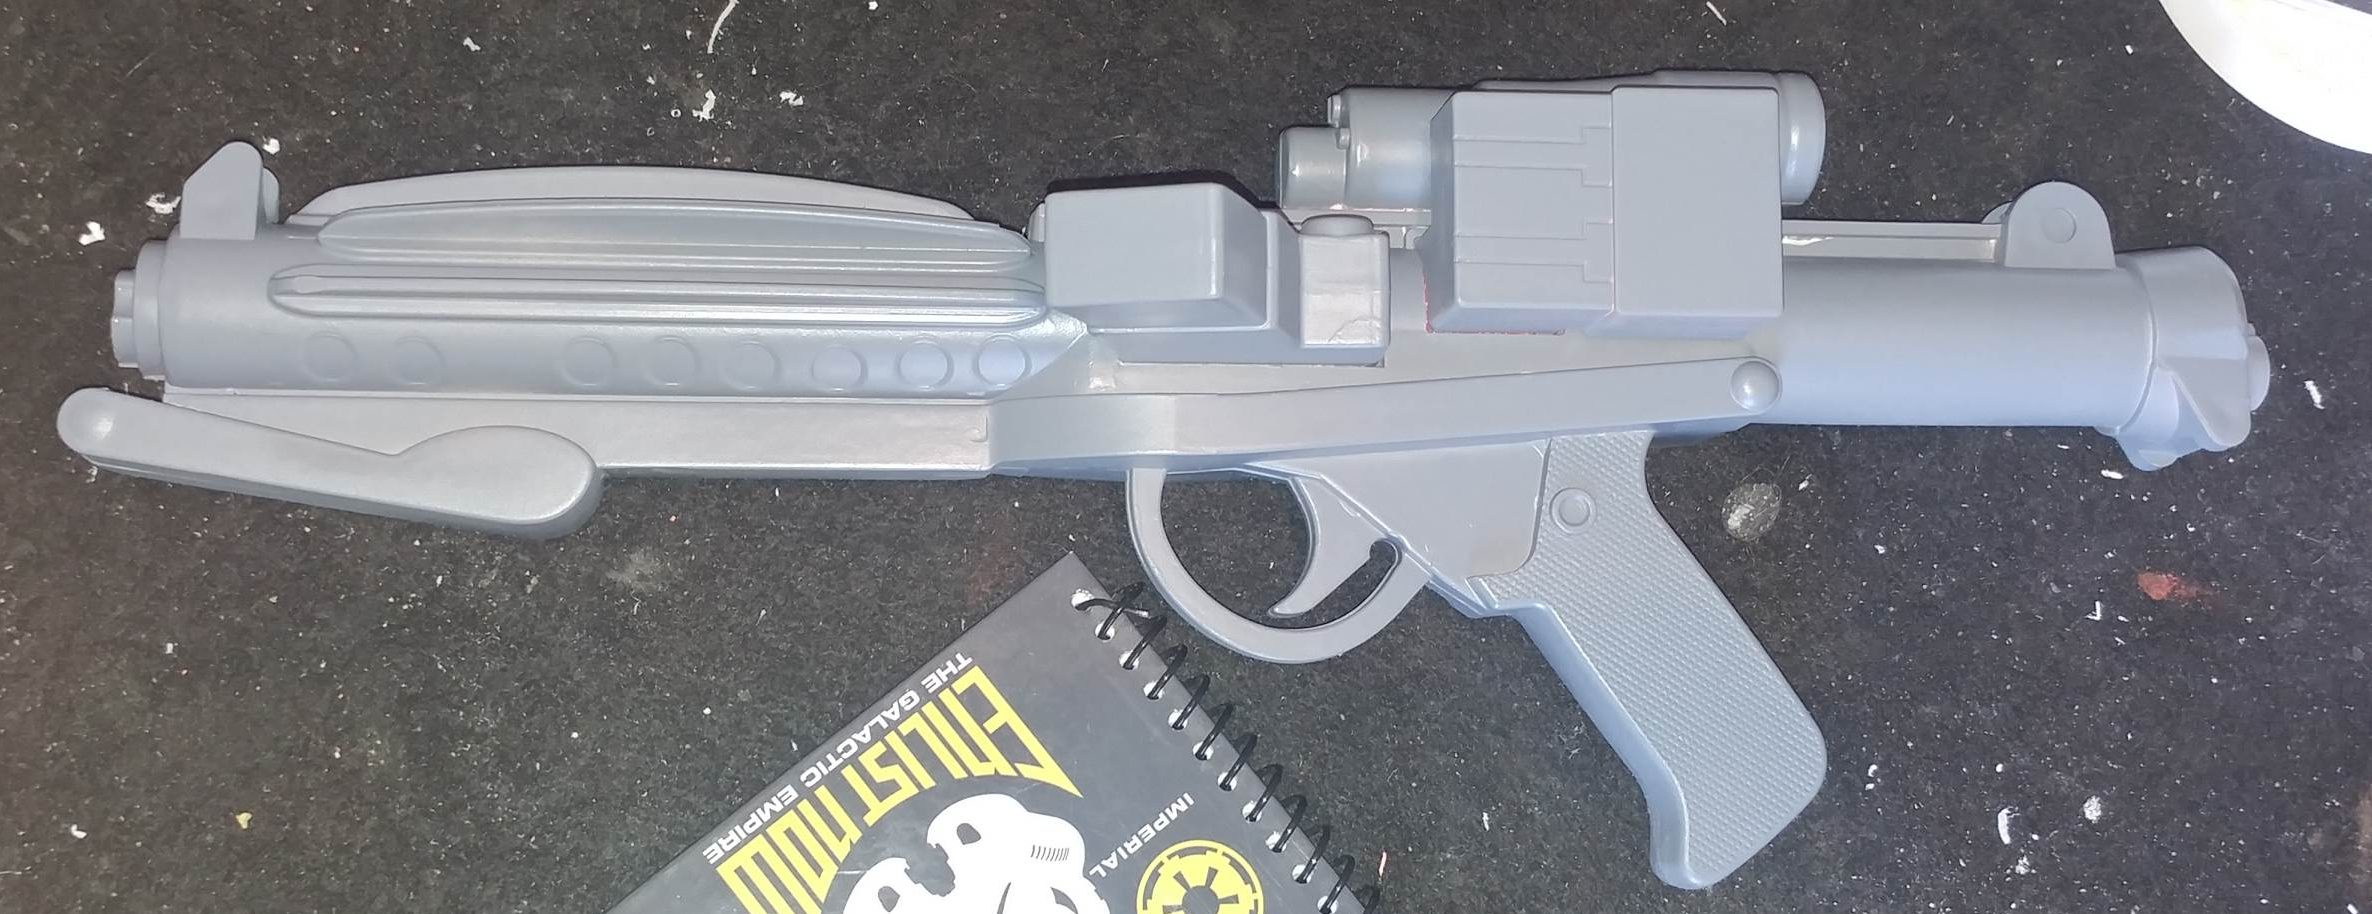
Let this dry for a a couple hours, go over any areas that need a little more sanding and repaint if necessary.
Step 4: Paint it Black
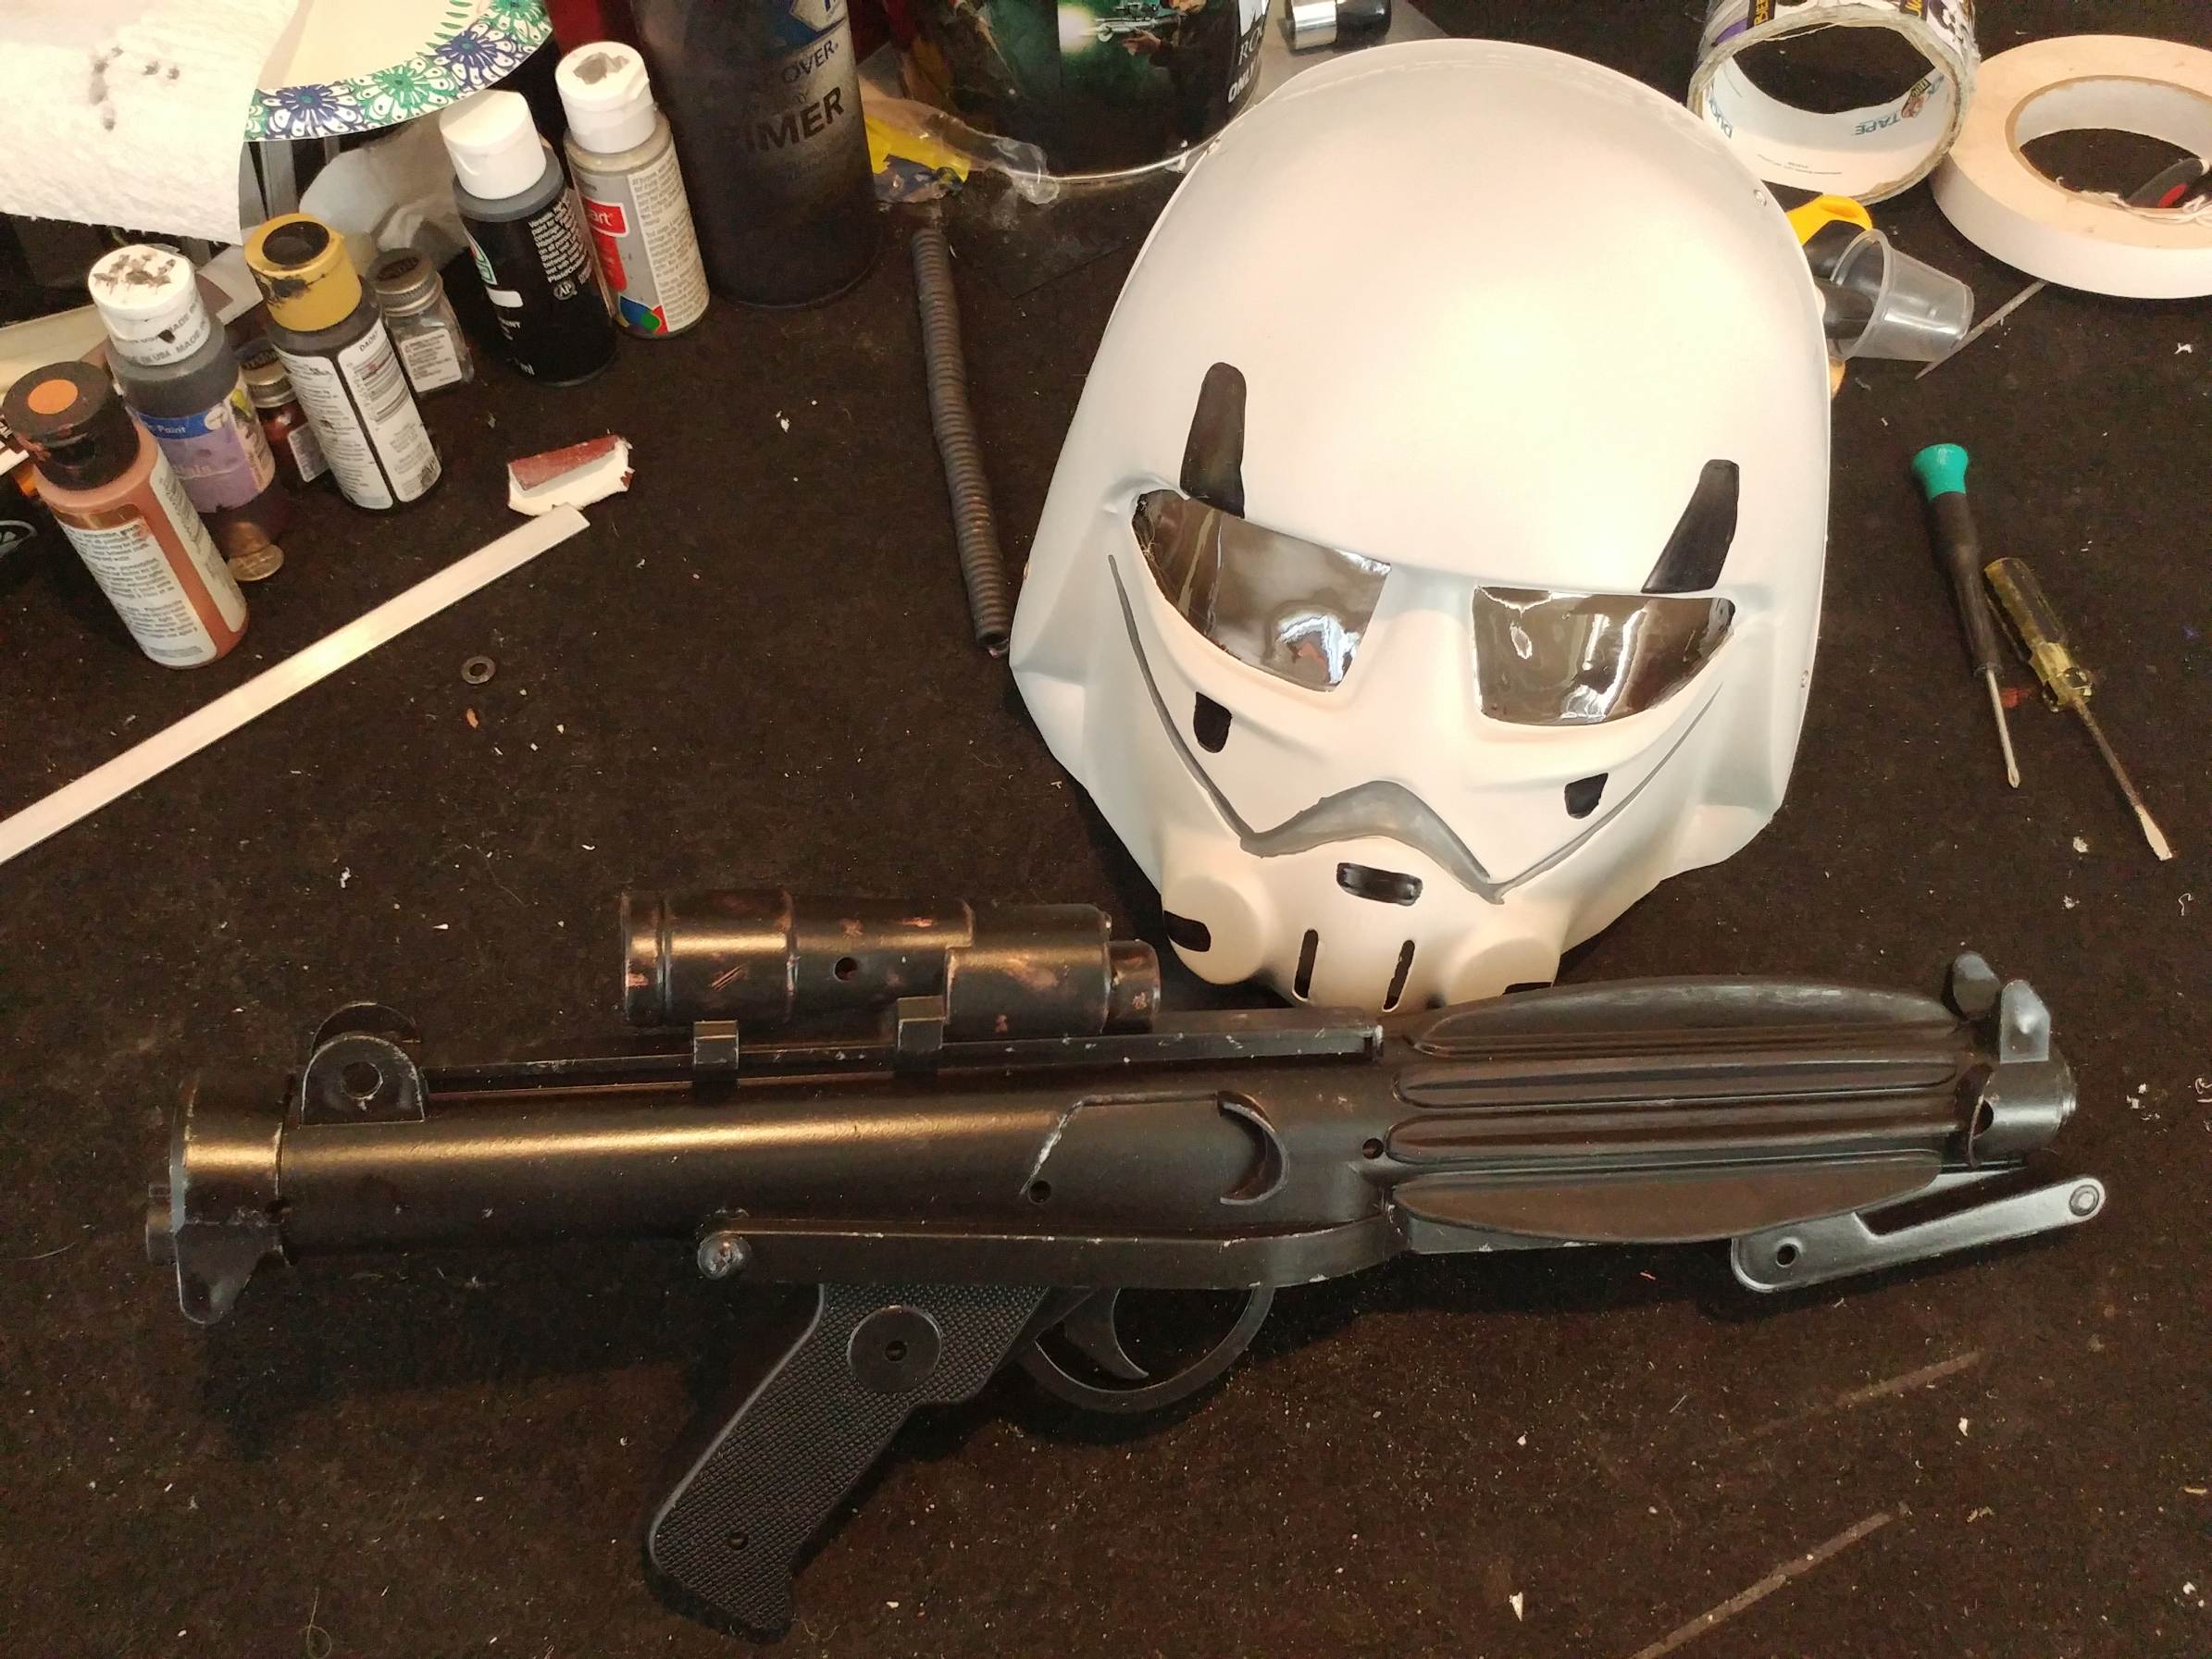
Ready for your blaster to look like a blaster? Me too. Hit the blaster with the Satin Black paint. We use Satin black because it isn’t as shiny as a gloss black and gives the blaster an almost metallic look.
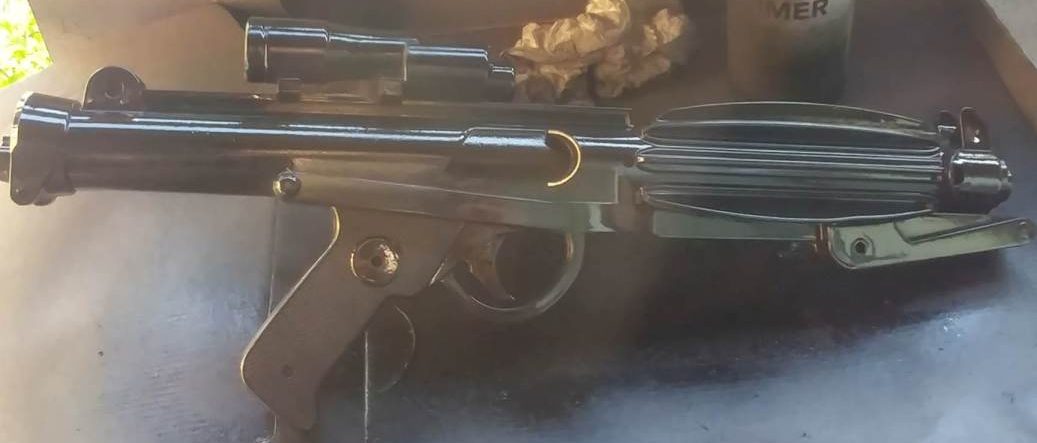
This paint, in my experience comes out of the can pretty thick and as such tends to puddle up pretty quickly if you aren’t paying attention. I usually do a couple of light coats spaced out over an hour or so. The brand of paint I use tends to take quite a while to dry. I suggest painting one side and then allowing it to dry for half a day. Then paint the other side waiting about the same amount of time before handling it.
And that’s it. Pretty simple right? If you want just a little bit more out of your new blaster the below steps are an optional detail that can help sell the ‘prop-ness’ of the prop.
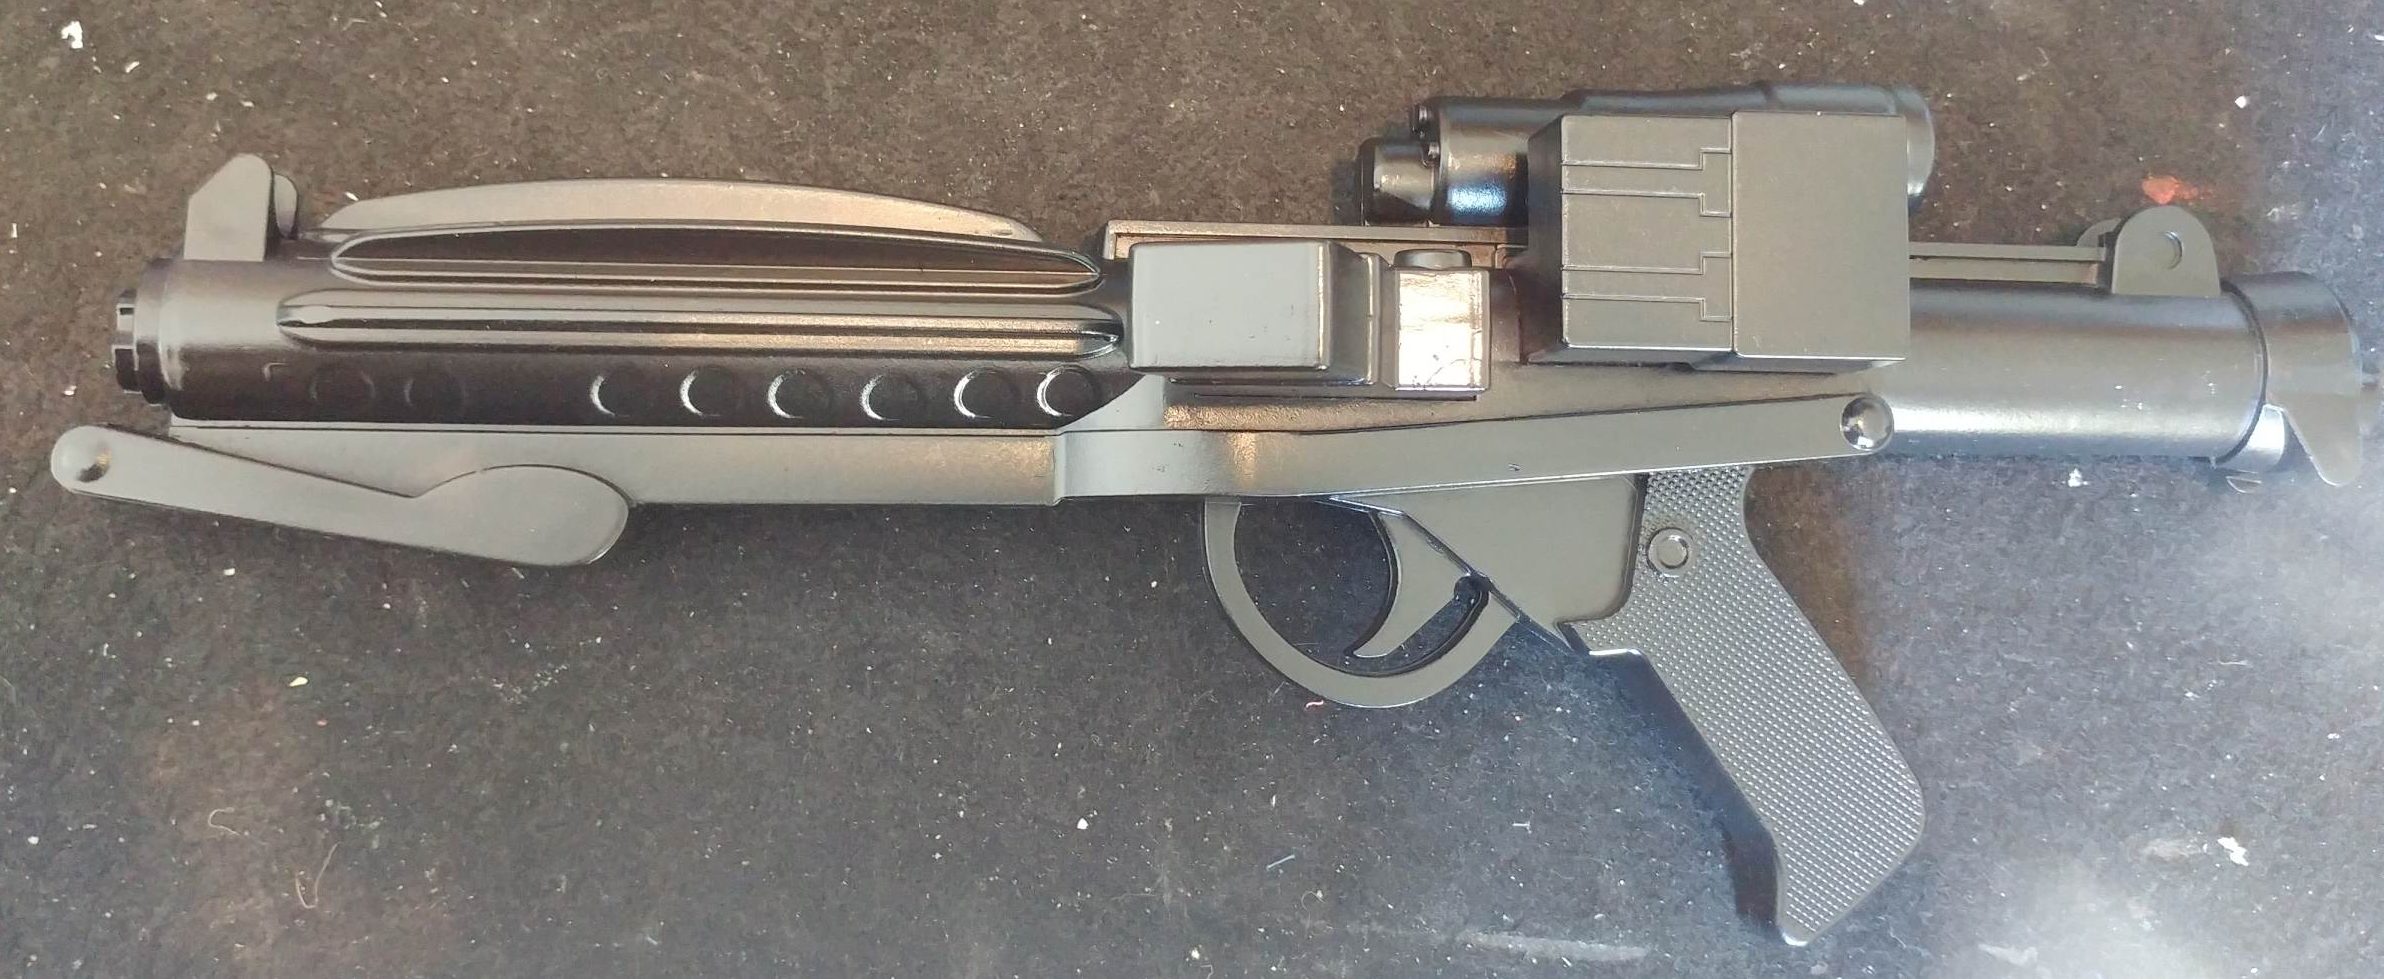
Optional Bits
The optional bits here are just adding a little bit of paint.
Why does this help? On the actual prop there are bits that are attached that are made of different materials and and are slightly different colors.
The Scope is bronze under the paint and the ‘T-Tracks’ are plastic pieces attached to the Sterling SMG to cover the vent holes on the barrel.
- Take a flat black paint and paint the the ‘T-Tracks’ on the barrel.
- Take the Bronze and dry brush the scope. Do this by dipping the brush in the paint, then wiping off most of the paint on to a paper towel or something. Take the brush and lightly brush the edges of the scope. Don’t go overboard on this. I do. All the time. Unless you want your blaster to looks like its been in every battle from Jedha to Jakku.
- Take the silver/metallic paint and do the same as above to the blaster. Ignoring the ‘T-Tracks’ and the grip (these are plastic on the real Sterling SMG the E-11 is based on).

And just like that, a blaster good enough for blasting some space terrorists is ready for you or an Imperial Cadet in your life!
 if you want, you could paint the ejection port silver too. i probably shouldve done this…i remove this part in a later post, so i didnt do it here.
On the Next Episode
We take the blaster apart, drill some holes, and add some plastic.
Should be great time. A great, covered in plastic particles, time.
Got any questions on this build? Leave a comment below or send me an email at [email protected] or hit me up on twitter @HothPod