
Part 1: Why a Veers kit & Helmet Build

Ever since I learned of the 501st Legion costume group I’ve wanted to be a part of it. Why haven’t I? Well, like Luke Skywalker, I’m a little short to be a Stormtrooper, also a little too round. Now, I know there are a ton of non-armored costumes I could do to get approved, but I wanted to make something that I liked and meant something to me. I didn’t want to just grab a gray jumpsuit and be a Scanning Crew Tech, or just another black uniformed officer (not that there is anything wrong with that, it just wasn’t my style). I also wanted to have an Imperial costume done before San Diego Comic Con 2017
I’ve made an officer uniform before (for my co-host Ian). It was easy enough, even though I made it with two different black fabrics and I can tell the difference when I look at it. Through that process I realized that I wanted one too, just not a black one, but a green one. Tarkin, Piet, hell, even Cassian Andor had a green one. The only problem with this is that there is a lot of debate on what the actual color is. Olive, Olive Gray, FieldGrau…etc. When researching it, I found out that there is a 501st approvable costume from over seas. It’s not the most accurate green, but it is cheaper than the licensed costumes. It also only cost a little more than what I paid for the materials for Ian’s uniform (granted, I messed up a few time and had to re-buy fabric. Grainlines are important. Know your grainlines…)
Around this time I also came across a raw General Veers armor kit on Ebay for obnoxiously cheap and it was located about 60 miles east of me so I knew it would get here quickly. The research I had done showed that the handful of people that make this kit have a 1-2+ year wait time. A kit that was available to ship immediately sounded perfect. I later found out I was purchasing a fiberglass re-cast of a known makers work. If I had known, I would have stayed away and probably would still be looking for a costume a year on.
The following is a documentation of over a year sanding, cutting, crying, and small victories. All of which may result in finally being an official member of the 501st.
*Disclaimer. Jon has NO IDEA what he is doing. Things like ‘Safety’ and ‘Well Ventilated Area’ are only reflected upon when his head starts hurting and the dizziness sets in or when he isn’t sure where all this blood is coming from. Don’t be like Jon and read all safety warnings and use eye-protection and similar safety gear when the situation calls for it.*
(For anyone wanting to attempt this build. The best resource I found was the 501st Armored Cavalry site. Especially the build guide made by user Ruthar, you’ll need to set-up an account to view it.)
Let’s start off with the items of the costume that I didn’t need to make/modify myself:
- Captain/Commander Rank Bars (Interstait/Etsy)
- Code Cylinder/Chalk Holder (Amazon)
- Funtasma Boots (Amazon)
- Green Officer Tunic/Pants (CosplaySky)
The Armor kit as it arrived:
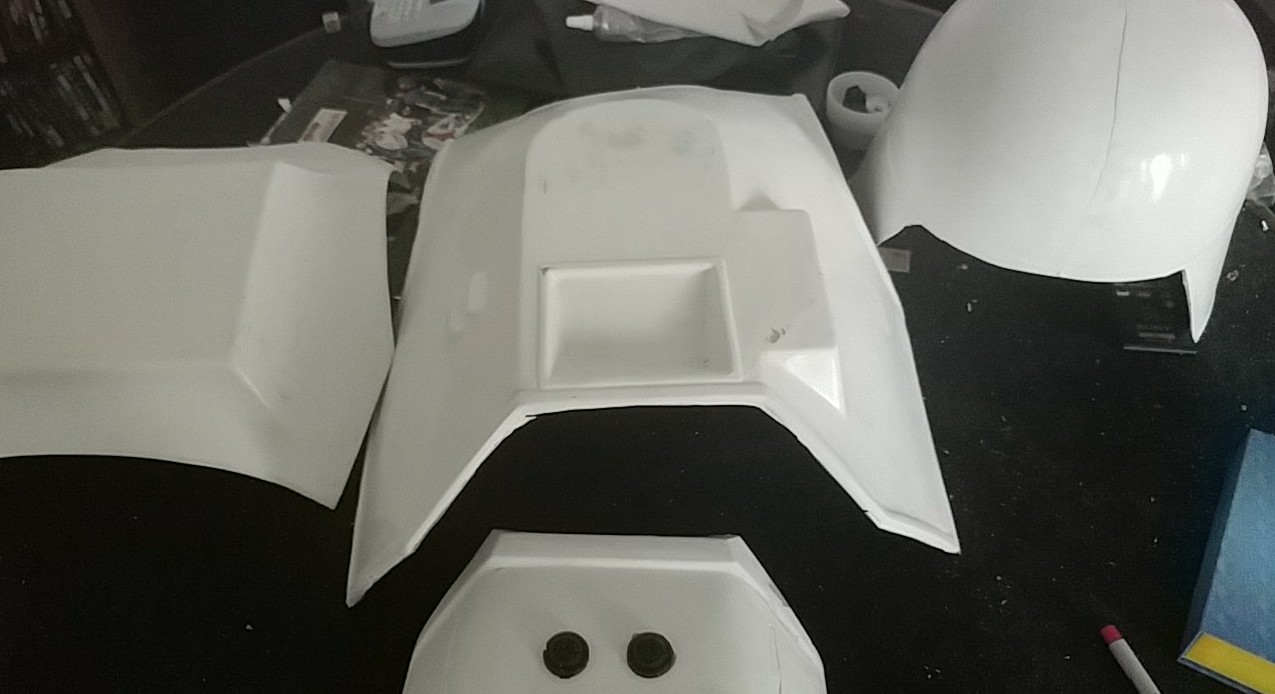
The kit itself was cast/taken from a Snowtrooper Commander kit (Veers and the Snowy Commander share armor bits). On whatever kit this guy copied, the helmet was two pieces, a skirt and a dome. His kit, however, was two halves vertically connected (just look at the seam). The kit included:
- Front Chest Armor
- Back Armor
- Ab/Belt Plate
- Helmet
- 2 resin Code Disks
Too complete the armor, I would need to get a hold of a pair of Stormtrooper Shoulder bridges to modify. Luckily Trooperbay had a set in stock. Also his shop is about a mile and half from my house! Trooperbay has become an invaluable resources in my prop builds now, I definitely had to go back for this build a number of times to get some specialty items.
For this part, we are gonna focus on the helmet construction. As mentioned, the helmet had a weird seam running down the center vertically. The two halves weren’t perfectly lined up and so I got to learn-by-doing how to use Bondo and the Joy of Sanding (please wear a respirator when sanding Bondo).
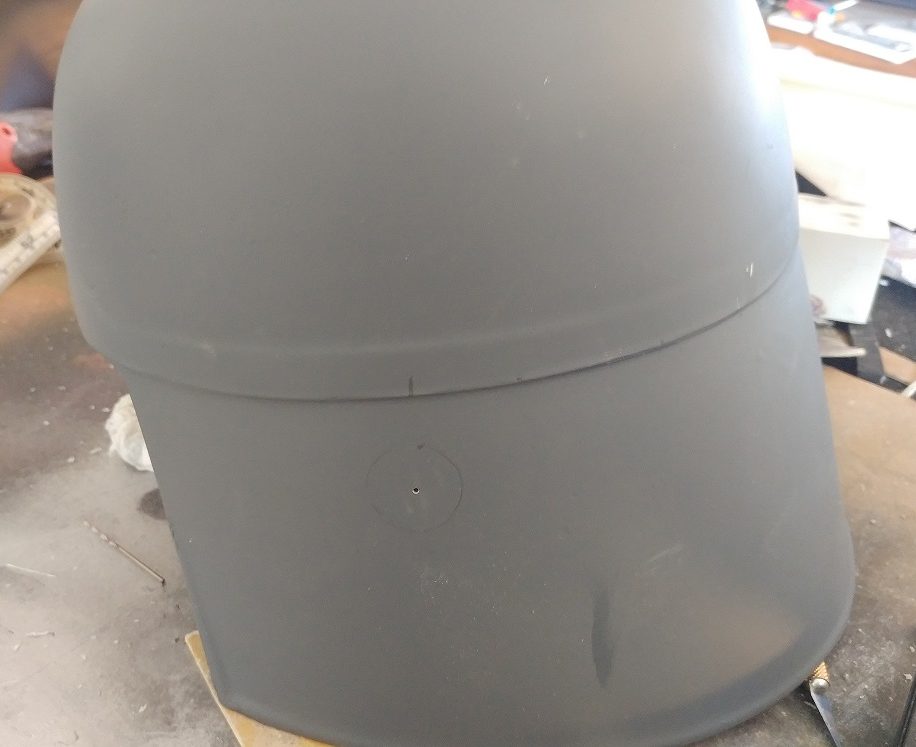
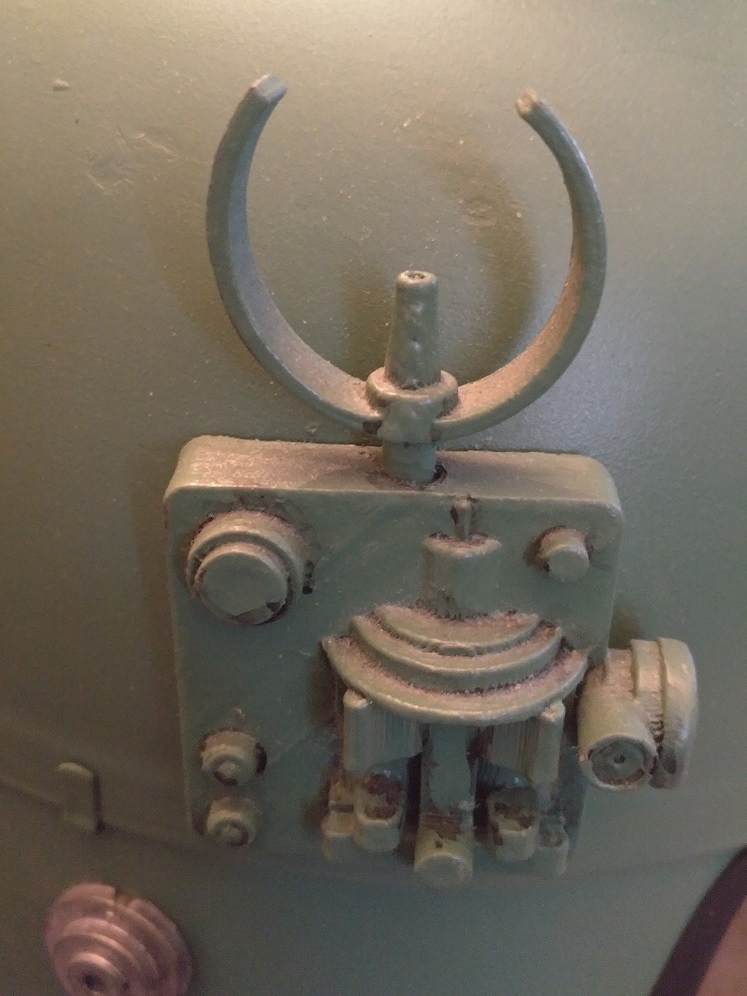
With the seam now ‘fixed’, I began to mark out where the Code Disks will be attached, and also where the hooks for the goggle strap will be attached. On the other side, I marked where the 3D printed Comm Unit/Antennae will be attached.The hooks needed to be cut down and holes cut where the helmet was marked so I could insert the modified hooks.
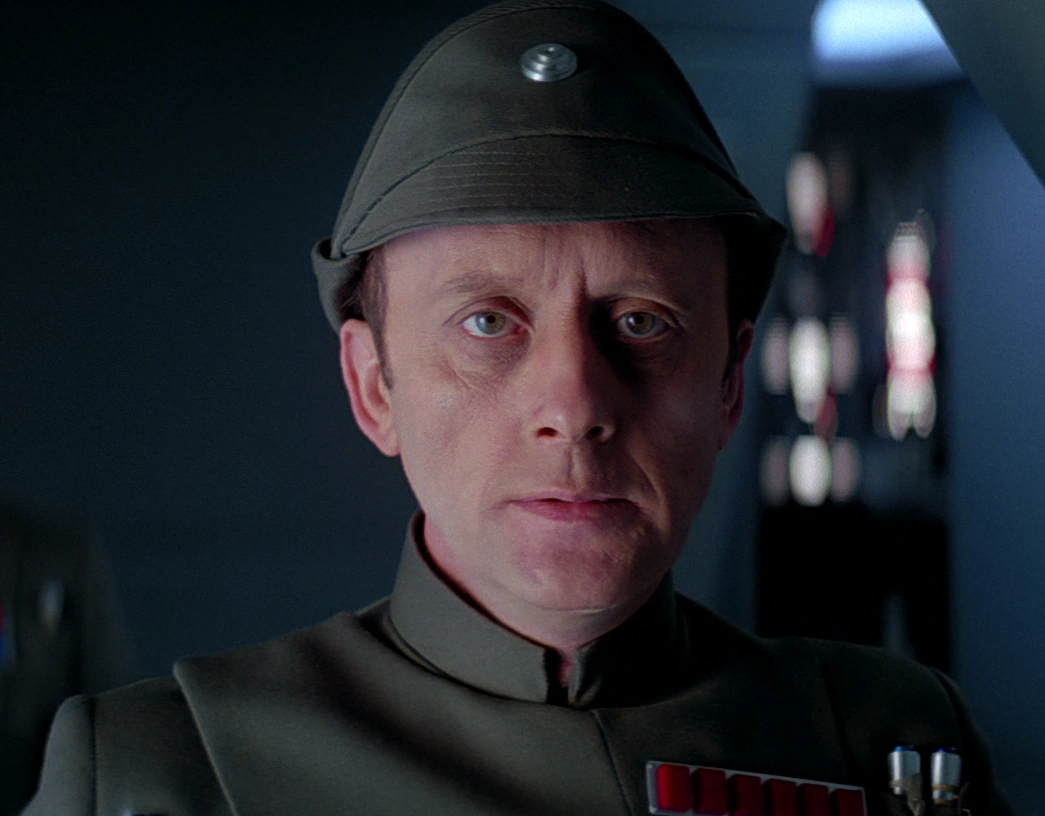
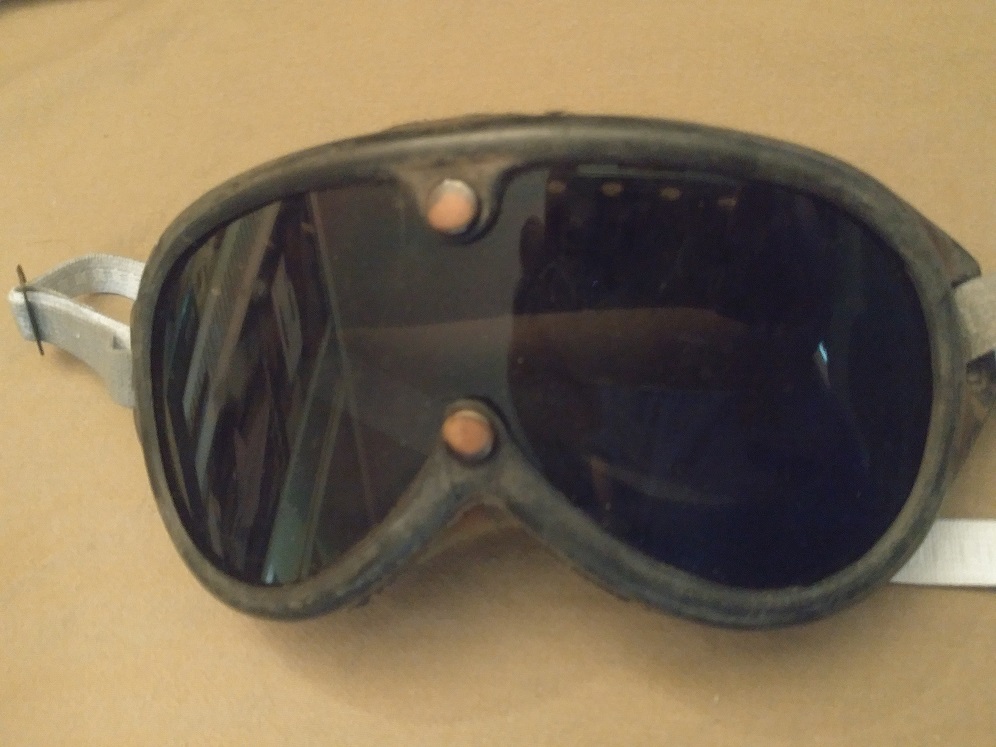
The Helmet was painted Hunters Green and the code disks were painted Silver and attached. Evenly spaced around the bottom of the skirt were several ‘Screw Caps’ and the bottom edges of the helmet were covered by 1/4″ rubber weather sidings. For the goggles, I used an old pair of military dust goggles I’ve had since i was a kid. I also painted the straps gray to match the screen used prop.
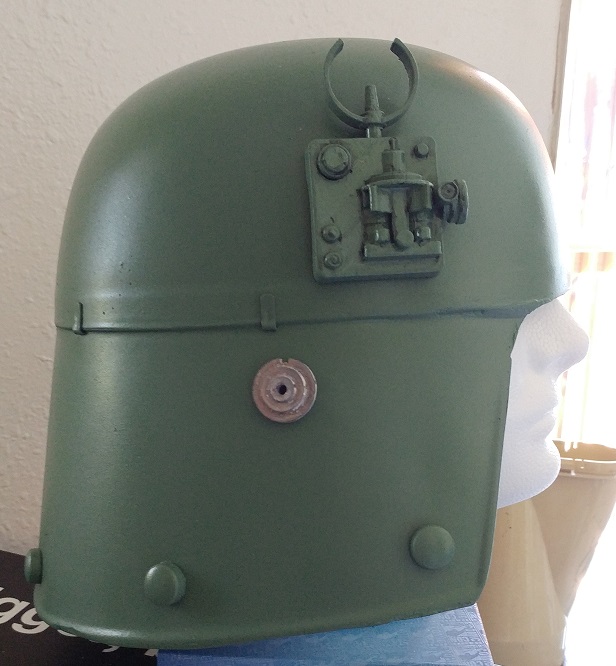
This is as Far as I got by the time SDCC 2017 came around. I hadn’t installed any padding in the helmet or a head harness. I ended up just wearing two thick beanies to try to get the skirt from resting on my neck. I also didn’t get the metal spine that goes up the back of the helmet made in time.
Tune in Next week where I go over the Armor Construction. As well as the updates I’ve done to bring it up to ‘code’ since last year.
-Jon, in the Edit Bay
Do you have a costume/or prop that you’ve been working on forever? Let me know what it was down below or send me an email at [email protected]!